Showing posts with label foundation. Show all posts

Sunday, September 22, 2013

Comparitively Speaking

 Comparison.  Countless ways that word can be interpreted or used to prove a point.  Undoubtedly, the way I choose to use the words ya'll gave me will not line up with what you had in mind, or maybe it will.  Either way, it's my turn now! 
I think whenever you are feeling bummed or discouraged it usually helps a great deal to compare your "now" to your "then".  Of course, this doesn't always work; sometimes "now" sucks.  However, in my case, to see how things used to be is quite helpful at times.  I've come a long way, baby.  But I also have a long way to go.  In the following photos I tried to arrange the before and afters right after each other.  The first pair may be hard to discern but I believe you can easily detect the following pairs. 
This first photo is truly the way this land once was.  Almost impossible to navigate without a machete.  I believe it was actually taken on what is now the left hand side of the drive and the second photo is taken on the right side, but other than that they are basically the same location.


 I'm sure, unless you've read the absolute beginning of my blog, you are not familiar with this photo.  The land could not even be accessed by truck or 4-wheeler due to creeks, beaver dams and undergrowth.  You could walk onto it though.  The first time we went completely across it we used a compass to make sure we didn't end up down the road somewhere.


 A fairly nice yard now.  Or the chickens seem to like it anyway.  Ya'll know I have always advocated and preached for people to do so many things themselves and building a house is one thing I don't believe is out of reach for many people.  However.... I fully understand why so many folks don't want to.  It is Freaking. Hard.  Fortunately I had a naive brain when I started this adventure and didn't realize just how hard it would be.


 Of course, it's a lot like that old analogy of eating an elephant.  It's just one bite at a time and then it doesn't seem so bad.  Certainly there are things about the house I would do differently now but I think absolutely everybody says that.  I really enjoying pouring the concrete here and hope to get to do some more of that before the year is out, maybe. 


I also can't help but long to build the rest of the house on this side.  I know everybody thinks the house looks so odd now, and it does in a lot of ways, but when it's all there it will be quite cool.
I do have definite plans to extend the roof on this end before too long so that it covers most of the deck.  Since the rest of the house is taking far longer than I hoped I need to do this to protect the front door and create easier access.  With the roof extension will come a small deck extension with stairs down to the front of the house.


 One thing that always amazes me about these old photos, which really aren't all that old, are how small the trees are.  And yes, I should have cut a number of them down when they were that small.


 So now there is a sweet little house that sits here and I am still plugging along towards it's completion.  Comparatively speaking, I'm doing quite well.  There are not many folks who can afford to take some time off their jobs for illness or injury as I have had to do.  Not many folks that can afford to work at home.  My life does not compare to most anyone I know, but I like it and it works for me.

Wednesday, June 22, 2011

Distant Early Warning

The photo here does not directly relate to what this post is about but is more of just an example to make my point about something. Now, I don't want this post to come off as pissy or elitist or some other such; it's just my thoughts on some stuff that has bothered me for a while. Of course, I know I'm preaching to the choir, so to speak, on this subject because all of my readers are smart and savvy enough to know what I'm fixin' to tell you but just in case....
Over the years of blogging I have come across a number of other blogs on building, as you would expect. Mostly it's regular people building their own home or barns or such. And that is great. Ya'll know that I try to encourage everyone to try their hand at building, especially women, for a variety on reasons. And in the course of reading some of these blogs I have noticed some of them have quite a few readers. Unfortunately, it seems that the blogs of people who are least qualified to be showing other people how to build something are sometimes the most heavily read. Let me just say, just because someone is being adventuresome in their construction; say, building in some exotic location, does NOT mean they know what they are doing. Now, some of these are fun to read regardless and I am not promoting myself as some all-time expert; I make mistakes too, which I will also show you. That said, I do have almost 20 years of construction and safety training and with that I say please, PLEASE, be very careful who you take construction advise from and what their qualifications are. I don't care how much experience they say they have in concrete, if they don't know what a snap-tie or a johnny clamp is, you run from them, quickly. They are an idiot and have never worked in the industry. In fact, we used to have a game we played when I worked construction. We often had fellows drop by our jobs looking for work and they often claimed to be form carpenters or whatever. This is common in commercial construction. Now, they wouldn't have a resume or anything but would just tell the super what their experience etc. Now, if they promoted themselves as super-carpenter, one who had done all and been all, and even if he uttered the famous words of one guy, "when it gets too rough for everybody else, it's just right for me", we, the crew, would immediately start taking bets on how fast this guy was going to drag up. Not, IF he was going to drag up but just how fast, because when people start talking like that they are full of shit. We never were wrong about a one. Keep that in mind when reading these blogs.
I have also noticed that many of the self-sufficiency types and all really like to get out of the city limits where there are fewer, if any, restrictions on building. Now, I don't have a problem with this. I'm only in the county and didn't have inspections on my house BUT, it is still built to code. Now, I agree that many times the building codes are stupid about some things and the city just wants the revenue. However, for the most part these building codes are for your protection. They are there so that JimBob doesn't put your rafters on 3 foot centers and have the ceiling or roof collapse on you. It's there so your neighbor isn't shitting in a 55-gallon drum and having it overflow onto your property. It's there so your well-meaning cousin doesn't burn your house down because he really didn't know how to wire that junction box anyway.
I have seen some of the stupidest things done, by way of building, on some of these blogs. I have seen people frame a two story house and not put the first header over a door or window. That's fine until about 2 years down the road when things have sagged so bad they can't open any of the doors or windows. I have seen a lot of unsupported spans on outer floor bands and rafters; no piers but in the corners. Code will tell you how far you can span according to the size lumber. I actually saw a couple install rafters with the wide side down. Now, I don't know how anyone can look at that, no matter their experience or lack thereof, and think,' yeah, that's the way those go'.
Granted it was just a chicken coop (a big one) but, holy hell! how do you do something like that.?? I have seen people install roofing in about every bad way imaginable. Granted now, roofing can be difficult and you really need to have help if you don't know what you are doing.
And Lord O' mercy, don't get me started about people pouring concrete. Concrete is a wonderful and versatile medium. It is astounding in it's strength and beauty. Under the right circumstances, it will kill you deader'n a hammer in seconds if you make one mistake. Concrete is not something to screw with and you especially need to watch who you get your advice from. Now, it's hard to make a deadly mistake pouring a slab for a patio or such but you can mess up and waste an enormous amount of money if nothing else. The photo above is of some formwork from one of my old jobs. We were pouring foundation piers and footings that were 2-3 feet deep. You can see some of the massive amount of rebar that went in those footings and the steel sticking up was just part of what was stubbed up for the walls that would pour on top. And, in all honesty, these were kinda wimpy footings for commercial work. I've seen one guy, on a blog, pour walls where he only put a stick of rebar every 4 or 5 feet and then claimed that was overdoing it. And NO, fiber in the mix does not help on walls. Fiber is to help keep slabs and walkways from cracking. It is NOT structural. Nothing over his doorways, windows etc. Please, please, please, consult with an actual concrete professional if you are going to pour walls, even some retaining walls. Walls must be tied into the footings correctly and with sufficient steel and the footings themselves must be sufficient to hold the wall up. Now, I know footings for a house are nowhere near what commercial construction calls for but, as I have actually seen, a 2-inch thick little spread footing is NOT going to hold up a two story house, especially when it was poured right on top of the topsoil! They didn't even dig down past the frost line or to substantial enough earth to meet resistance from a probe. You can get into a lot of trouble with concrete in a hurry if it is done incorrectly. The form itself can fail, which I have seen, and that can hurt or kill someone. Concrete (reinforced) weighs around 140 lbs. per cubic FOOT. That means one yard is way over 3,000 pounds. Concrete is expensive nowadays and hard to get back out once it has set! If you screw it up it can be costly to repair.
It just pains me to no end to watch people install such piss-poor foundations for their houses and such and you know, come a year or two or 5, everything is going to be so damn outta whack the walls are going to be cracking and all kinds of hell. The foundations, however they are done, must be done correctly or the rest of the house will suffer for it. And you too, I might add.
So, this is my rant. Just please, take most of what you see online with a grain of salt. Even me. For one thing, I have come to realize that something that is code down here might not be advisable in another climate and some stuff I've seen done up north (because it was code) I would never do here. MUCH depends on your climate, the geology of your region and the building materials you are using. Please, please be aware of these things, research your ideas for your region and know and go by the building codes, even if you don't have to.

Wednesday, January 13, 2010

Proving Ground

What is it with Blogger lately? Are they being a complete friggin' ass with everybody else, or is it just me? Nothing wants to work right. It took me forever to get these #@%#^%&^ photos to load right side up and it keeps wanting to underline everything I type!
So, this is how to install a proper French drain. And I don't give a flying shit what some residential contractor said, this is the way you do it and have it work.
When you get your footing and wall waterproofed (with an actual membrane, not just some paint on crap) lay your 4" perforated drain pipe down along the wall. Now, I put down a layer of landscape fabric between the pipe and the ground because the dirt was a little close and I couldn't get a full 1 foot of gravel all the way around the pipe.

I know many of you may have never seen this before and God knows, most residential builders won't go to the trouble to use it, but this is the perf pipe with a sock on it. Just a fine, fabric mesh tube that covers the whole length. If you don't use this type your pipe will fill up with dirt in about 6 months and then you just got a big, fat, solid worm of pipe laying there in the ground doing nothing. And again, I don't care what some contractor told you, if it doesn't have the sock on it, it ain't worth a crap. Do you want to dig this thing back up in a couple of years? No? I didn't think so. Now, you are going to have to go to a commercial construction supply to get this. Lowe's and shit don't have it. They don't even know it exists.

You can also get 90's and T's and such to make different connections and they just snap on, so it's really easy.

After you lay in your pipe with the sock on it, cover the pipe with at least a foot of gravel. You also need to use what we refer to as #57 stone. This is NOT 'crusher run' or similar. #57 stone is a stone of one consistent size and will allow water to freely pass through where 'crusher run' or #89-10 compacts solidly and doesn't allow water to go through as well.

Then, lay down another layer of filter fabric over the stone and start backfilling with dirt. This is a proper French drain and will actually allow water to filter down to an open pipe and be carried away from your foundation. Oh, I forgot to show how I ran the pipe around the corner and down the hill so that it does turn downward and allow water to run rather than just sit in the pipe. It ends down around the front of the house.
So, I'm in a little better mood now. Halfway through writing this post one of the guys called and I cried on his shoulder (so to speak) for a while. Everybody is all up in the air 'cause we have heard of a job starting in Birmingham.


*Widespread Panic

Tuesday, January 12, 2010

Thank U

Thanks for all of ya'lls input! I will be going with the 5" header trim and Mouse got to rub it in a little that he was right. That's okay though! I'm always open to suggestions. And I appreciate all the other suggestions and ideas that you all commented on.
So, I'll be changing that piece of trim out soon but first, a little diversion. Since I have this Bobcat at my disposal, I need to get on with the work that I got it up here for, in case they come to get the machine before too long. I had to go into town today and buy a little more waterproofing membrane to finish the foundation/ retaining wall, so that I can finish backfilling and grading. After that is done, I will have a much better surface to work off to finish the siding on the west and south sides of the house. I have already installed the drain and gravel and will be able to start filling with topsoil tomorrow. Yea! But don't worry; I have taken photos of the whole process so you will be able to see what I did. I just wanted to have the whole process done and photographed before I started to show you. Anyway, it was a rough ordeal as you can see from this one photo below...

That drain pipe is fiendish but I finally got the upper hand on it! I am so happy to have this part almost completed because I think it is going to make things look further along, like I've actually been doing something all this time.
Every time I get into one of these bigger projects, even if I make good progress, I always get a little overwhelmed. I'm not sure why. I guess it reminds me that I still have many more, just as big projects to finish. But things are going well. I just have to keep pressing on and not think about things too much.


*Alanis Morissette

Wednesday, August 26, 2009

Down Under

Today was spent trying to get the rubber membrane applied to the treated wall. This is fairly tricky when you are doing it by yourself but it can be done, albeit with shorter strips of rubber. This is a peel-and-stick kinda stuff and it works best to leave as much of the plastic film on the membrane as you can and then gradually work down the strip, peeling and sticking as you go. I peel the top edge first and apply it lightly at the grade I want, then peel the rest downward. Gravity lets the membrane lay down easily that way. Keep the membrane as cool as possible too, don't let it lay in the sun and try to not let it touch itself! Very important. This membrane has a white, fibrous coating on it, I think as a type of reinforcing against tears. This was some drop leftover from a job also, so this is only costing me the paint-on stuff, which is about $10/gallon. I let the membrane turn down onto the footing about 4 to 5 inches and lap joints about 6 inches. I have also applied a second run above this one.
I know a lot of people would think, well, if that stuff is so sticky, why paint on the goo too? Well, the membrane must be applied to a treated surface. No matter how well you clean concrete, it's always going to have some dust or film on it that would interfere with the membrane sticking.
After I applied all the membrane, I go back and use a butyl rubber caulking to seal all the edges. And you must use butyl rubber that is rated for 'below grade' applications. It comes in a regular caulking tube and you just lay down about a 1/4 to 3/8" line of the caulk and then tool over it with a putty knife, assuring that it has sealed the edge. I go over all joints and edges.
Now, waterproofing is the nastiest stuff you will deal with. Wear the worst clothes you have with the expectation that you will throw them away when you are done. I don't care how careful you are or try to be, how much you watch what you are doing, the waterproofing will get all over you. You remember in the first season or so of the Star Trek; New Generation series when Picard and the crew got stranded on that planet with the tar pit-looking monster? Okay, that tar pit monster was waterproofing. Yeah, you think I'm joking. This crap waits for you to turn your back and then it jumps on you. Everything will be fine and then suddenly...it's on your arm! or in your hair! Beware of it.
Of course, gasoline will take it off but so will WD-40 or similar and then you can just wash that off with soap and water. The roller and paint brushes you might use though are trash, so buy disposable.


*Men At Work

Tuesday, August 25, 2009

Move It

Wow! was it the title to that last post or what?! My hits were through the roof yesterday! Maybe it was my new profile photo? Haha! I don't think so. I think it was due to a new link to this blog. Anyway, I have gotten a fair amount done these past couple of days. They finally picked up the machine yesterday so I don't have that as a distraction anymore. I did use it all I could yesterday though to get a few last minute projects done. I kinda got these photos out of order but I'm not going to try to fix it. I had used the machine to rake the dirt back from the footing on the house and then had to clean it by hand, down to the concrete. This wonderful weather lately has allowed it to dry well and today I put the coat of waterproofing on. And I know some of you may be thinking; oooh, that looks like some kind of nasty petroleum based stuff and you would be right. I hate to use such but there really is not a better product for this situation. Now, once the stuff dries it will become inert and not be absorbed into the soil or anything, plus I am going to put a layer of peel and stick rubber membrane over this, further sealing it from the soil.
Now, a lot of people will tell you that you don't need to use this and that white paint on stuff works fine etc, and there are a lot of people out there with leaky basements too. In all of my experience with construction, and we bury a lot of concrete, this method is the only one that truly works over the long term. And I assure you, I don't want to be digging this footing out again when I'm seventy. It may seem like overkill to some but you do it right the first time, you know. 'Course, if I had really had a brain I would have put a keyway in the footing and inserted the bentonite coils where the wall joins the footing. But I didn't think of that back then.
Now, not much water will actually seep through solid concrete but you would be surprised how much can go through that crack between the wall and footing and through the snap tie holes. If you have concrete block that you are backfilling against you REALLY need good waterproofing. Water seeps right through that stuff. Here I have cleaned the footing and wall as best I could to assure a good seal. I've got to do a little layout and figuring tomorrow to know exactly how far up the wall it will be backfilled. I believe code requires that you stay at least 8 inches down from the bottom of your siding. Then you have to figure the ground sloping away from the house for good drainage.
After I get all of the membrane applied, I will install a French drain down at the footing level and backfill a couple of feet with stone and then cover that with dirt.
I also dug a deep trench for the permanent power line to come into the house. It is deep enough that I can go over it with the footing, without fear of hitting it, if I ever get around to building the other half of the house. And I know you are probably thinking, well, why wasn't this already done? Well, I thought the other half would have started by now and I wanted to place the meter on that side but things change so I'm going to go ahead run permanent as if this is all that there will be. If I do get to build more it won't be much trouble to move the meter if I want to but it won't be mandatory. I got pretty good with that excavator, huh? Pretty darn straight diggin! Dale would be proud of me! I hope to get the conduit in for the line soon and can go ahead and cover this up and pull the wire at my leisure.
This is the biggest of the trees that were cut. I used the excavator to carry the logs out to where I am storing firewood. I can cut it up later. I've still got to clean up some limbs and such.
I also painted some more on the north side of the house and am close to being ready to move the scaffolding down to the other half and be done with that side! Yea!!!! Hopefully, the rain will hold off for another couple of days.


*Cliff Richards

Monday, October 22, 2007

Hey, Crow Doesn't Taste Too Bad!

You know when you rant and rant about something it's going to come back and bite you in the butt. If it's a free bite in the butt though it's easier to take though! Most of ya'll know that I dislike Pella windows because they have a tendency to rot, in my opinion. I even inadvertently attracted the attention of Pella Corp. with my rants here on their product. Well, anyway, I was offered 10 free Pella windows by a dear friend who didn't need them so...... beggars can't be choosers, I guess. They look great and I really, really appreciate the gift. I don't want it to sound like I just took them and didn't really want them, I just need to take some extra steps to assure that they stay dry in their setting. So, this weekend, we set the windows which helps in closing in the underside of the house. This is very important now as winter is approaching and I have bare water pipes under there and an uninsulated floor. We used 3/4" plywood to create a backing for the windows (spaces where cut out in the plywood so that you can see through the windows) and this works to suspend the window in the space above the concrete block so that I can lay the stone around the windows without hindrance. And I can lay the stone at my leisure and the space is still closed in. That stone work is going to take some time and I would have never been able to get it all done before winter with all the other work on me.
Here is a little better view of what we have done. You can see the stone work approaching from the far side. The stone lays out flush with the front of the block work so the windows will be recessed into the stone about 3 inches. I will wrap the outside of the windows where you see the bare wood, with a rubber membrane to keep the moisture out. It's the same stuff we used in the window sills before we set the windows upstairs. This is some cool new plywood too. Well, I don't know how new a product it is but this is the first time Allen and I had seen it. It's called Dryply. It's apparently just CDX with one side embedded with a water repellent. Looks like good stuff. Could have really used that when we put the sub floor down. It's tongue and groove stuff too.
So, this is the "basement" now. My pottery studio will go down here and some storage. This area you see here is where the washer and dryer will go for now. We need to continue that wood frame wall on the right a little more and put up a door and it will be dried in then.
I was finally able to order the tile for the shower and it is on it's way! YEA!!! I have a feeling I will be down there installing that stuff at night to get a little further along. We are working so much that I now only have Sunday to work on the house. I'm making lots of money to buy stuff for the house but no time to put it up. I'm not complaining though. It is funny though that not too long ago when I was laid off, I had lots of time for the house but no money. Ain't that just the way things go?

Sunday, August 05, 2007

Why You Should Have Completed Drawings Before....

So you don't have to come back and dig the dirt out by hand when you decide that you want a concrete slab under the house after all. They make these great machines called back hoes that are just wonderful for digging so you don't wake up in the middle of the night with your shoulder and elbow screaming at you for doing this to them. Well, I was in such a rush to get started on the house I wasn't thinking. I knew I wanted a studio at home; I just didn't give good thought to where. For now, this is going to be partially my pottery studio. The washer and dryer will also be down here, until the rest of the house is built and some storage. It's not that bad to dig out if you just don't think about it. You know what they say, just do it! I'm going to try to pour this Friday, or Saturday if the plant is open, so I have got to get on the ball.
Now, this might look bad; Allen sitting on his butt while I'm digging, but he had done most of this by himself while I worked on stuff inside the air conditioned house. This end is to grade and ready for the next step. As soon as I get the rest of it to grade, I'll put a layer of poly down and a rebar mat. This end is where my work area for my pottery and stained glass will be. I found out this past week I can get some free windows to go down here! That will make the area much nicer; being able to work and look out over my garden and flowers. More about the windows later.
OK!, all of you that have not voted on my light fixtures, I want to hear from you. If they look like hammered cat doo, please tell me that too. The BFA actually liked them OK, although he says they should not have any lines on them at all. Just plain globes. What do ya'll think? I thought about that but liked a little detail on them.
As of now, I go back to work on the 13th so it's now a frantic rush to get as much done as possible. Have to go get drug tested tomorrow in preparation as a matter of fact. Whoopee.

Update: I go back to work tomorrow! The 8th. Now, it's a frantic rush to find a pair of size 7 steel-toed boots. Not easy.

Friday, March 31, 2006

Imagine

I haven't posted any pics where you could really see all the way around the whole house so I thought I'd show these. So, here we go! This is standing on the west side, which is the side you will drive up to.
I'm standing about where the parking area will be.
I am standing on the back retaining/foundation wall, looking down into the dogtrot area. The wall and the footings for the other side (you can see here) are poured through for the dogtrot. Right now our framing stops at the begining of the dogtrot.
Here, I'm on the east side (where the rest of the house will go).
I'm standing in the dogtrot space now, looking down the front of the house. At these columns, I can walk completely to the other side without bending over. The bottom of the joists on this end are about 4" about my head (I'm 5'6") and on the other end, I have to stretch to reach the joists. Lots of space. The rock wall I am going to build to close up the house will fit right up under that overhang of the joists.
This is at the NE corner. That one tree (that the scaffolding is leaned against) is fairly close to the house but I believe we still have room to put that deck even if we enlarge it a little over what was first drawn.
This is taken from what most people would think of as the back yard.

Wednesday, March 15, 2006

Something Coming Up

Hey! We actually started the framing! Here we have framed up the main beams that will support the floor joists. These beams are composed of 3 side by side 2x10's. We used 16 footers where we could and spliced in shorter sections to complete the overall length with the joints staggered. Does that make sense? Sometimes I don't know if I make sense. The 2x4's running across are just for bracing right now. This section of the house is 28' wide so the floor joists (which will run crosswise over the beams) will span 14' approx.
Here Allen is explaining or bragging about things to Fred and his twin daughters. Allen's daughters, not Fred's.

This is just a little detail of the beams from underneath. The beams are just nailed now but we will bolt all three 2x's together at the joints this weekend and they are also bolted to the steel columns with lag bolts.

Someone asked me about architect fees the other day and I don't think I answered that as well as I could. Maybe this is better. Most architects get 10-12% of the estimated value of the building. Allen says residential architects get a little more than commercial. I don't know.

I will post some more pottery photos as soon as I can as I have had some requests for that.

Saturday, March 11, 2006

Here, There and Everywhere

Posts about rocks are popular right now so I thought I'd show off some of my rocks! This rock is how we determined where the house was going to go. Sort of. I really liked it and it was in the general area that we knew we wanted the house so I said let's just position the house so that this rock will be near the entrance and we can see it when we are sitting out on the patio sipping mint juleps. Or whatever. It's nicer in the summer when the ferns are up and really green. The house will run length-wise by this rock and I thought a little water feature would be nice near it too.
Here you can kind of see where the rock sits in relation to the house.
Keep in mind that the rest of the house will continue on past where we stopped the wall at for now and also what most people would consider the back of the house is kinda the front. The house really won't have a definate front or back. The rock is near the top center of the photo. The ground level elevation at the base of that biggest tree over on the right is what I want the finish floor elevation in the house to be. So, all of that tore up dirt in between the tree and the wall will be filled in and flat. I have found a tremendous amount of flagstone on our land and will use that to build the patio here, upon which we will sip libations in the heat of the summer.

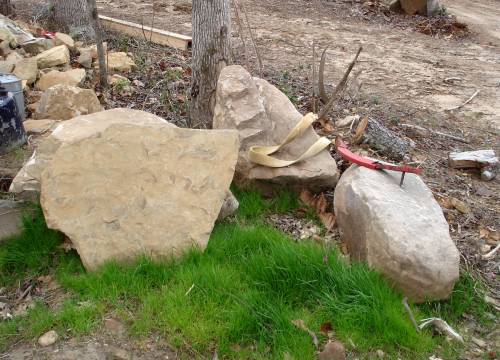
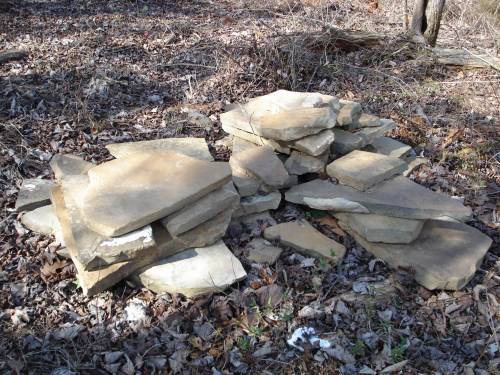
We have dup up tons of rocks everywhere! Big ones, little ones, flat ones, you name it. I am currently piling them up wherever there seems to be a concentration of them. Later I will use them to build the wall that will close off the underside of the house etc.
This is a small pile of the flagstone. Most of these came from the old dam and were placed around the spill way. I believe these were probably hauled in but maybe not. I need to gather alot more of these to have enough though.

Thursday, March 02, 2006

Nice Work If You Can Get It

Well, things are still a little slow with the house right now so I thought I would just show another view of what we have so far. We have still not completed our drawings. I know some of you are saying" you don't have drawings and you are building?" Well, we do things a little different sometimes! We have the footprint of the house and how we want it (or must be laid out to work with the sun) so its enough to put in the foundation by. I would not recommend this approach for people who do not have experience in building though.
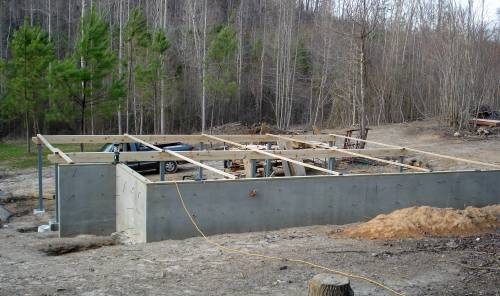
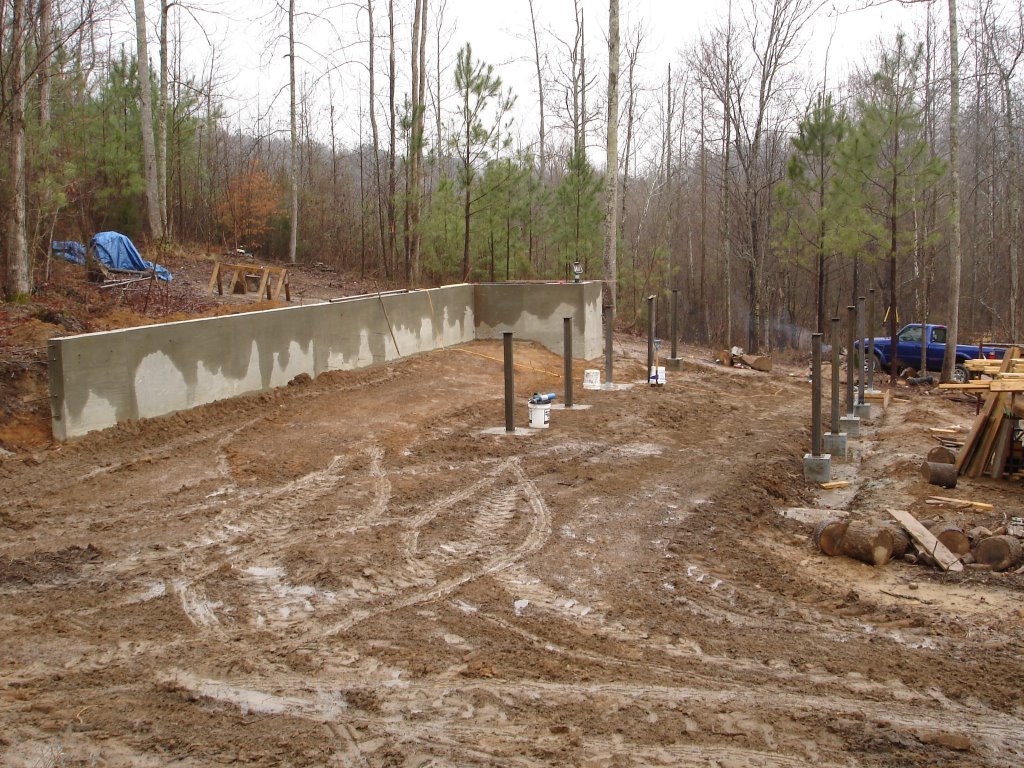
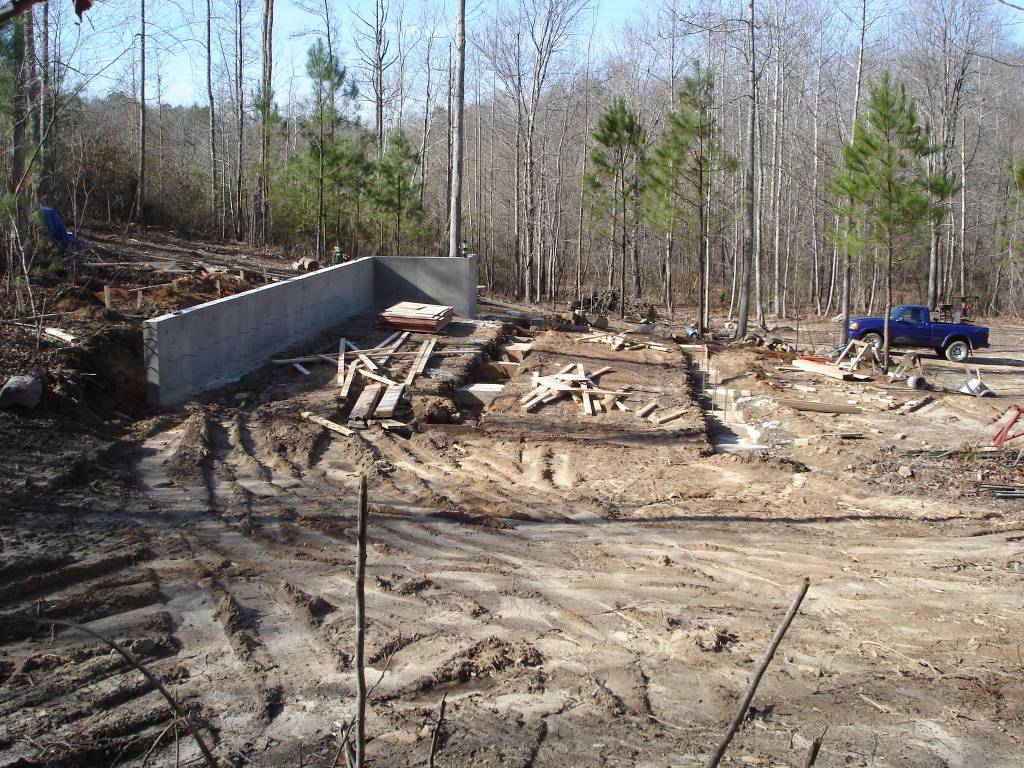
This is the back retaining/foundation wall. It is a standard 8" thick and 4' tall here and then gets taller down where it turns. Poured concrete is much better than block and sometimes just as affordable. But even if it costs more, concrete is worth it. We will put a french drain down at the footing and then backfill so that we will have a flat area for a patio at the entrance. We set anchor bolts in the top of the wall (approx. every 4') when we poured which will be used to bolt the rat sill down. The rat sill will be a P.T. 2x6 and will carry the floor joists on this side. There will be a termite shield in between the concrete and 2x6. I don't think termites are going to chew through the concrete (although I have heard urban legends to the contrary) but they are a real issue down here. Having two 90 degree corners in this wall also stabilizes it greatly and relieves us of having to worry about putting bracing in between the foundation posts on the front of the house.

Monday, February 20, 2006

New Steel

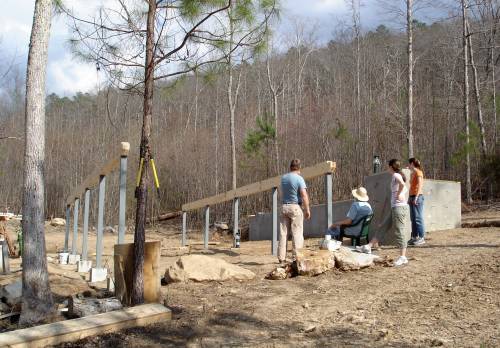
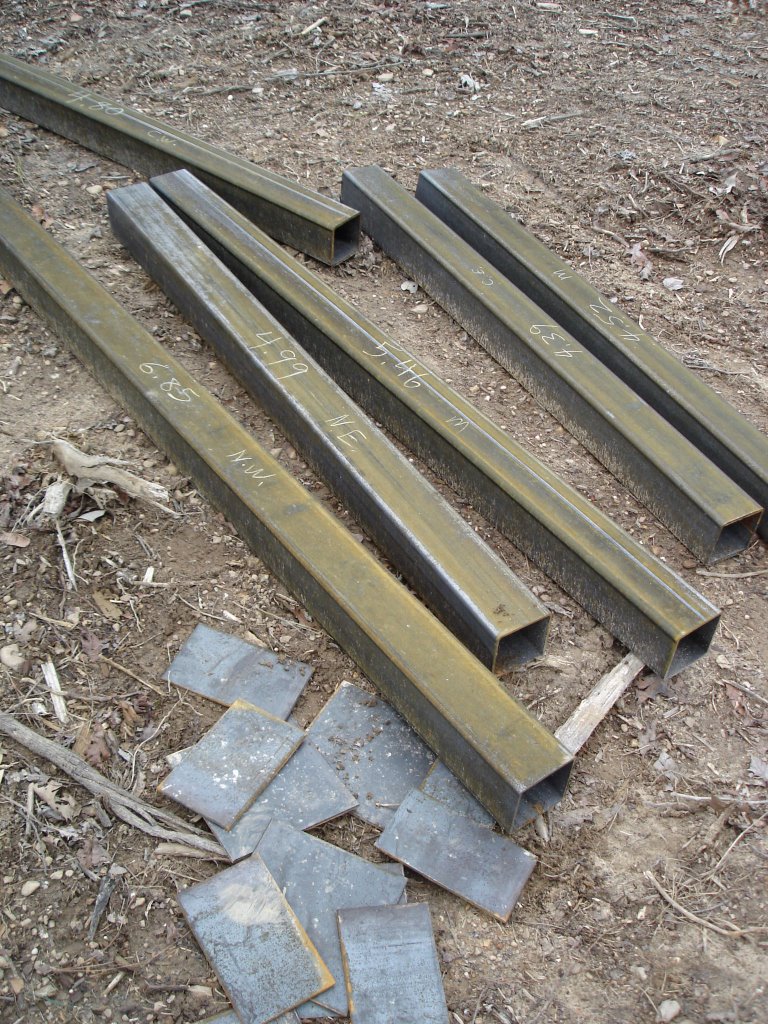
Okay! We have fabricated all the steel posts that the house will sit on and have set most of them but not all. Some of them are just sitting where they go but are not fastened down yet. As you can probably tell, the house will sit kind of high off the ground. The tallest post is about 7'-6" and some of the shorter ones are 3'-6" to 4'. There are several reasons why we did this. Our original idea for the house was that it would be a pole frame, and it still is technically, but the poles are steel instead of timbers. Usually pole foundations are cheaper than tradtional (which was one of the reasons initially that we wanted it)but I don't think this one is going to be. Anyway, we did the foundation this way because: 1. It does not disturb the landscape as much as leveling an area to dig continous footings. 2. It elevates the house more which helps to catch breezes. With the passive cooling design (dogtrot) this is very important. 3. Aesthetics; you get a nice view of your property from inside the house.

This is just some of the steel before we put it together. It doesn't cost too much just to buy it like this. If you have to have someone else fabricate the designs though that's what cost you.
This is me welding the columns up! All women should learn to weld. Seriously. It gives you alot of confidence in yourself.
Because of the mud, you can't really see the footing that this pier is sitting on but it is there. I am going to have a rock wall underpinning the house on the front and one side so we poured a continous footing across there. We primed the bottom of the posts before setting them and I will prime the rest of them as they are standing. Much less messy that way.
For those not familiar with construction methods, this is an example of the wedge anchors we used to bolt the columns down with. Now, so far we have been using more commercial construction methods of building rather than residential methods. Anyway, you drill an appropriate size hole (width and depth, depends on the size anchor) and then drive the anchor down in the hole with a hammer. It had better be where you want it too because it ain't coming back out! When you tighten the nut down on the plate of the column, it pulls up slightly on the anchor and those little prong-like things and collar you see on the end wedge the anchor in tight.
There are also chemical anchors but they are expensive.

Thursday, February 16, 2006

The house site!

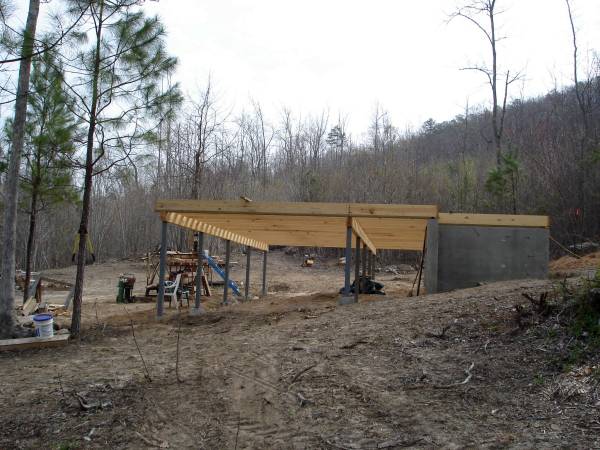
The first thing you have to know is we are only building half of the house right now. Is will be (hopefully) a passive solar house with a dogtrot in the middle for cooling. This side of the house contains the living and dining rooms, kitchen and 1 bedroom and bath. We will build the dogtrot but for now it will just be a porch. So thats why this looks kind of small for a house. What you see here is the back foundation/retaining wall, spot piers in the middle and a continous footing with piers in the front. I'm calling the downhill side the front but actually the house will not have a front or back really and you will enter through the dogtrot. On this end you can just barely see a giant hole with some walk boards laid over it; thats where the concrete truck almost got stuck! It was a little softer than we thought. But we poured him out fine.

Okay, Here I am standing at the house site looking out across the front yard or what will be the front yard one day. Its not so messy now; we cleaned up the other day.