Showing posts with label stonework. Show all posts

Saturday, April 01, 2017

Warm Enough

 It appears that Winter just sorta gave up shortly after the first of the year and Spring came rushing on in.  Not that I'm complaining about no cold weather, mind you.  But it has been pretty weird.  We did not get the flooding rains we always do around the end of December/ mid-January.  We got some heavy rains but none even close to what I have recorded every year since living here.  Despite all that, we have made up a good deal of the terrible drought this area was in.  I think we are listed as still in a 'slight' drought, but not anything near what it was.
Most things have bloomed out already but a few things, like my forsythia bushes, did not bloom at all.  They just went straight to leaf. Very odd.  The dogwoods started blooming in March. I think that is a first.  It's so nice now that I'm tempted to go ahead and set out some warm weather crops but I'll control myself.  We may be in for a frost next week.  I have got all the spring crops in though!  Very excited about that and even have a good crop of broccoli that I managed to start from seed!! That's also a first. lol!

I have felt well enough since being on the new meds to do some hardscaping too!  I have put this off way, waaaaaayyy too long but have it finished now.  Just need more fill dirt.  It's the main entrance to the garden in case you can't figure it out.  I always assume people know what these photos are of and you can't do that! Anyway, I poured a concrete curb to finish the boundary of the brick paver pad, dug out a bunch of dirt and replaced with gravel and crushed limestone fill.  Packed that and then laid the remainder of the pavers.  The block coming off at right angles is the beginning of gravel paths that will go around the entire garden perimeter to form a flower/ herb bed on the outside edge.  Make sense?


Nothing is flat around here so I have to step or terrace everything.  The pavers are sand-set by the way.

 Little bit different angle.  I was very pleased with how it came out. When the garden soil and gravel paths are filled in there will not be quite that big off a drop from the paver elevation. Maybe only an inch or two.

 A real nice, older gentleman down the road has let us have use of his backhoe.  I did some welding for him on a couple of occasions and I guess he was pleased so he told me if I wanted any of his old equipment that he didn't use anymore to just ask.  I wasn't really sure he was serious but I said, Sure, I'll take that old backhoe if you ever want to get rid of it!  He said, Okay! Haha! I was kinda flabbergasted.  At first he said he's sell it and then he just said, if you can get it running (it's pretty old) that we could just use it however much we wanted.  Just keep it running and not tear it up.  Good deal! Allen got it going and drove it over to my place, where it promptly died.  But Allen can get most any machine going again and he got it running enough to get up to his place next and then fixed it up a lot.  It runs pretty good now and we are taking turns doing a good bit of landscaping.  Will sure save me a chunk of money when I go to dig the footings for the next half of the house.  No, I don't have the means for building that yet but it must happen at some point.

 I repaired a larger bucket that came with it and we put that on.  This was a complete break and separation here but me and Allen worked with it and got it closed up enough I could get a good weld going.  For the most part, if I can step across it I can weld it.  lol!  And you believe that, right?  That's a very, very old brag for a welder.  And no, I will not give up welding.  I do weld now with a respirator and/ or a stiff wind blowing across me and will do so as long as I can hold my hands still enough to run a bead.

The violets are especially pretty this year and very, very prolific.  My herbalist friend came to visit the other day and told me how to make a syrup from them to sooth my lungs and throat.  I have a lot of issue now with coughing and hoarseness.  This is common with PD and it's very frustrating.  Hopefully this syrup will help a little.
Well, like I said, I am feeling better but still not quite up to my old days.  I hurt a lot and have a lot of stiffness all along my right side.  I joked that my left side is too loose and shakes and my right side is too tight and hurts! I'm slower than I used to be due to this but I'm still chugging along.  Mainly I want to do stuff and am excited about things again.  I can take some pain in exchange for that.  I'll try to get back soon with maybe some progress in the garden and maybe even the kitchen!!

Thursday, April 10, 2014

Going With the Flow Again


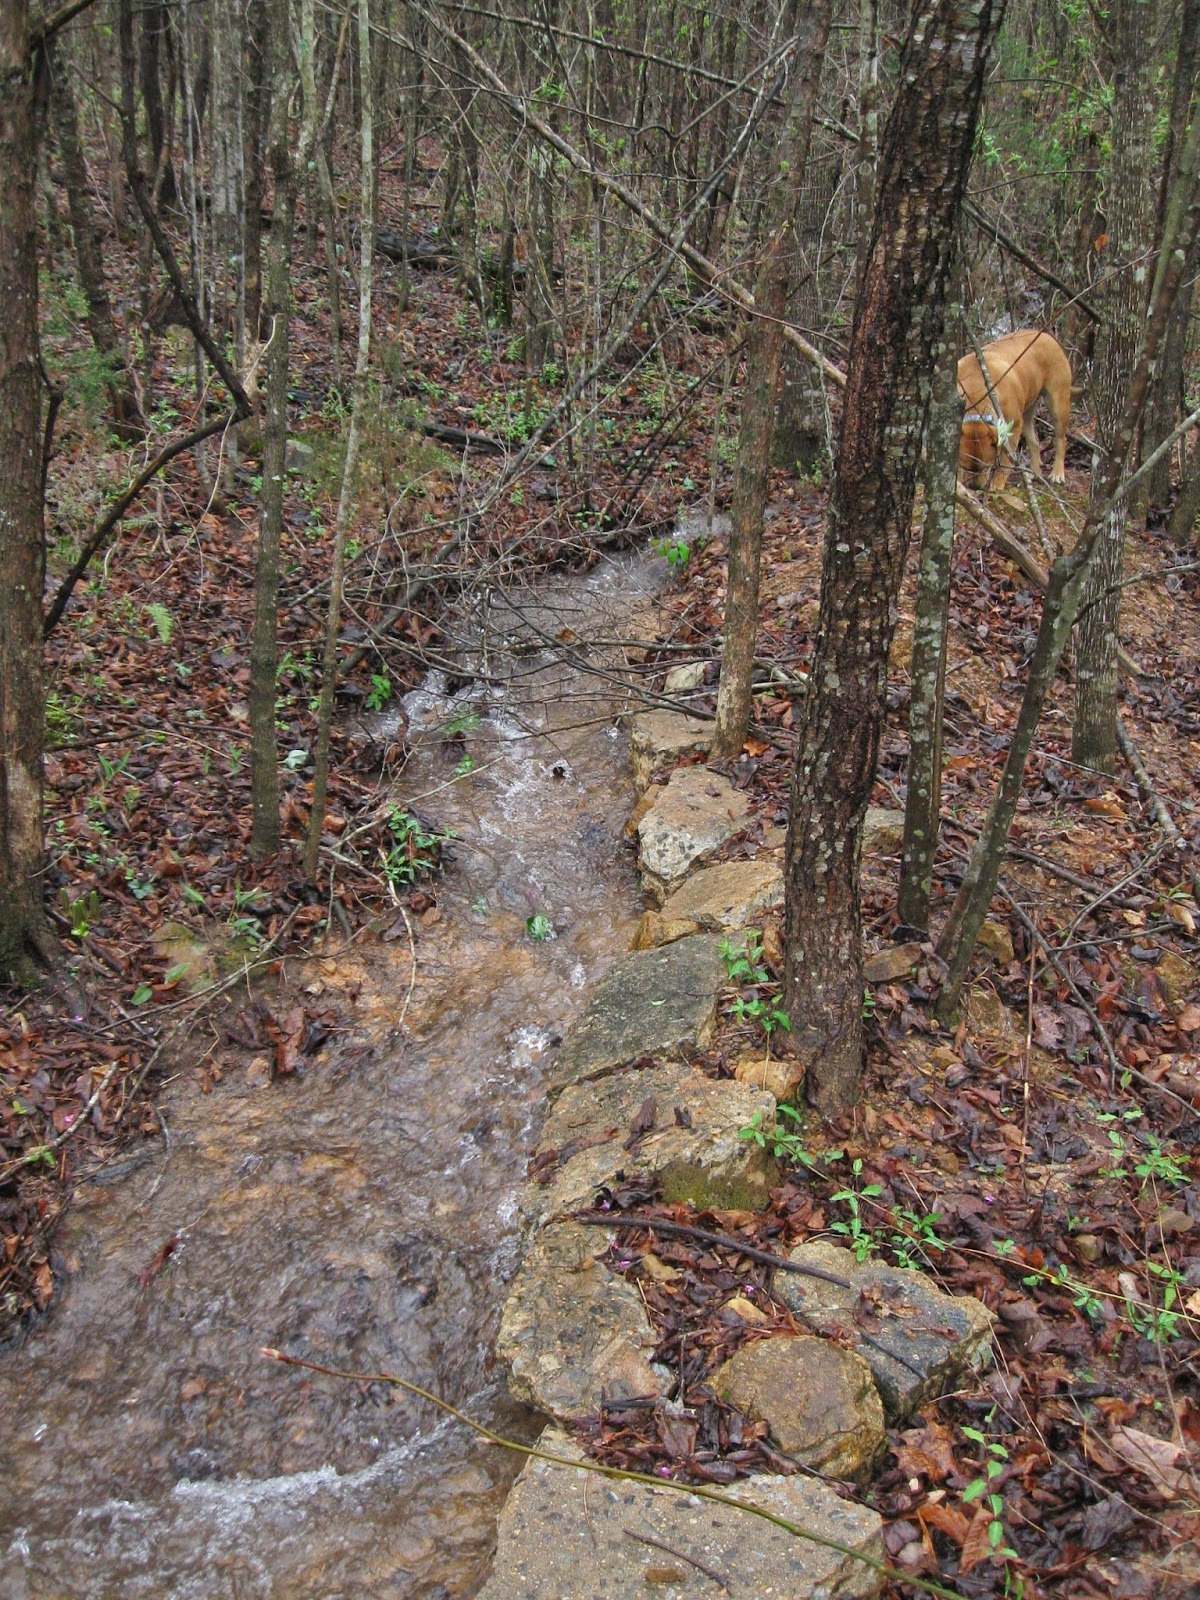
Right after my recent "water" post we had some very heavy storms come through our area that dumped a tremendous amount of rain on us.   This isn't all that unusual actually, we normally get heavy rains once a year, but if I remember correctly, they usually come in January or February.  But, it's probably not that far out of the normal realm for them to come in  March or April either.  I've shown ya'll the photos in previous years of the large amounts of resulting water that flow through my valley, so this isn't really anything new.  What I did want to mention though, is what I've been working on over the years to accommodate these yearly occurrences.  I think if you are going to buy land, even if it's not really rural or undeveloped, it's always a good idea to observe the place in times of heavy rains, if possible, before you make your purchase.  Not that it may deter you from buying the place, though it might; but it will just give you a good idea of what to expect in the future.  Now, I had been around this land before I actually started building the house and I did take into consideration the proximity to the creek, the water dynamics of a valley etc. but I really didn't get a good idea of things until I started clearing land.  Trees, forest undergrowth and all that greatly reduce the speed and volume of flowing water and when you clear that...well, it can become ferocious in some cases.


So, basically, I kinda let the water do what it wanted to at first, just to get an idea of where it naturally wanted to flow.  Sort of like letting footpaths form before you pour your sidewalks.  You want the under structure to actually be in the right spot when it becomes permanent.  We tried to locate all the culverts in naturally low lying swales and I further enhanced these swales by digging the stream beds out even more.
In the photo above, this culvert has become just a little clogged but it didn't take much to undo it and that sped the drainage up immensely. 


This is the other side of that same culvert.  Some strategically placed boulders help prevent erosion and protect the tops of the culverts from machinery and I also planted very hardy iris and such that don't mind having their feet wet or even standing in water at times.  These are very tough plants too that can stand up to the flow of water and also help with erosion control.  I plan on transferring a good many more to both sides of this area, so it's still a work in progress.  I would also like to eventually line these stream beds with some nice heavy gravel because for most of the year they are dry and that would like nice.


 The same stream as it dumps off down the hill and flows to the creek.


 The creek got quite high, out of it's banks and even crossed the driveway in a couple of spots but had receded by the time we were really out and about.  There's always lots of clean up to do after flooding like this.  Various things wash down the creek and get stuck the trees and all.  Sometimes we find some cool stuff and other times...well, not so cool, just trash.  It also washed every single bit of my mulch away that I had placed around my creekside plantings, so I get to redo all of that.


 Ya'll know I like to build most anything and I especially enjoy building with stone, like all these walls.  They serve a lot more than just for beauty's sake though.  All these stone walls act as terraces and help to break up that flow of water.  One reason I added this stone wall and got rid of the logs was that I could build the stone higher, and it just looked better.  With the logs the water was still washing too much soil in this area but by bringing this wall up about 6 inches or so it has helped the washing tremendously.


You can vaguely see how the water flows towards this area.  My garden is just across the drive from this bed also and, as it is on sloping land (like everything else around here), this planting bed helps break that flow before it hits my garden.  I used to have a bit of trouble with ruts washing in the garden but no more!  With this and the addition of small retaining walls at the lower end of the garden, we have an almost level gardening area now.  And it looks nice!


The most unexpected and worse trouble I had was from the flow down one of the valleys right towards the house.  If the rest of the house was built that would block this flow, but it's not and I had to do something else.  Some of ya'll may remember that I used to get free equipment usage from my old construction company and that was absolutely a Godsend.  At one point when I had a Bobcat I used it to build this dam that you see Chigger sitting on.  You can tell it's new because the redness of the dirt still shows.  I don't know that I would have ever been able to do this by hand with a wheelbarrow.  As it was with the Bobcat, it took me most of a day but it helped tremendously.  90% of the water is now diverted out across the yard.


We lined the dam with stone and broken concrete to avoid erosion here. 

I also get many people asking me about whether or not I collect rainwater; you know, every good tree-hugger collects water!  Well, no I don't.  Not yet anyway.  See, the way I look at it, my whole plumbing system is essentially a rain water collection system.  I just let mine collect in the ground rather than big barrels.  Yes, I do have to pump it to the house but that doesn't actually take much and after we finish using it, it is returned to the ground.  Honestly, when I was trying to get this house blacked in and livable, collecting rainwater just wasn't that high a priority because I knew I would need a more reliable way to water the house.  However, now that things are further along, I have thought about and will probably at some point put in a collection system for the chicken coop and garden area.  I am in no way opposed to such a thing and it would be nice to have water there without having to use a little power.

All of this is just a system that you tweak as you go along, seeing what works better in some cases or not at all in others.  It's a very organic way of building to me, where you let the land point out what to do next and then use your imagination to make your own.

Monday, July 01, 2013

Stuck


 Well, I finally have a house post for ya'll!!  I finally got up the gumption to start the fireplace tile and have been steadily working on it for the past week or so, in between pottery, gardening and such.  I am actually a little further along than what you see in this photo.  About 2 more runs of tile and I have started the mosaic that will be in that blank space over to the left.  Yes, all that smashed pottery will be put to good use.  There were a number of reasons that I chose to break this up with a mosaic.  First, I think they are pretty and I wanted to do something different and creative.  Secondly, in placing these tiles out so that they wrapped the corners the way I wanted them to, it was going to make the spacing between them just a fuzz larger than I really wanted.  3/8" was really the max that I could justify with looking right.  By laying the ends the way I wanted and working inward, I could leave a strip in which dimensions didn't matter.  Oh, and I didn't want to cut tiles if I could get away with it.  There is nothing wrong with cutting them but with the area etc. I would have come out with pretty small cuts and just wanted to avoid that.  I wanted to stick with whole pieces for the looks.


 As it is, the spacing didn't quite come out as I imagined, although it's close.  See, natural tiles are...well..natural.  Even cut they may not be exactly the same size or totally square.  I have found differences of up to 1/8" and I really didn't expect that.  Maybe a better quality tile would have been more accurate, I don't know.  I will use a dark grey grout on this so that will also minimize how much you notice the irregular spaces.  For the most part I have been able to use these cool little spacers to keep it all in line but I have had to fudge some here or there.  I made sure to establish at least 2 control lines (1 vertical, 1 horizontal) before I ever started to help keep the tiles laid level and plumb.  Actually, I have 4 lines at this point but it never hurts to keep a check on that.  These spacers, by the way, just pull out when the adhesive is set up and you reuse them indefinitely.  They are also 2-sided; one side is a space just for a slot and the other is a spacer for intersections of 4 corners.  The adhesive also sets fairly quick so I only spread enough to set 4 or 5 tiles (6x6) at a time.  You have about 10 minutes working time, maybe.  That may seem like a lot but when you are adjusting and tweaking it goes pretty fast.  Or it does for me anyway!
You can also see from this photo what I meant about the corners.  I did not want the edge of the tile that turns back to show.  The edge of the face tile shows from the side but that is more attractive, to me, than the other.  Basically, when you are standing in front of the fireplace wall, you will not see any of the edges of the tiles.  There are many ways to do corners though.  You can run some type of edge cap of another material such as wood or steel corner molding, another type of tile etc. etc.


 In this photo you can see a bit more of the unevenness of the spacing but it will be covered up by the fireplace unit.  See, I don't have any problem showing my stuff that doesn't come out exactly right.  Everybody makes mistakes or has things that don't do exactly what they thought they would.  I honestly thought the tiles would be more accurate in size so that was a learning lesson for me.  At any rate, I have been able to control the spacing better in areas that will show more, now that I understand the material more.  Plus, it's a natural stone.  It is just going to have variations.  Don't want variations??  Use a manufactured tile.  I had to cut a few tiles to fit around the gas lines and anchors that hold the unit in place.  This was very simple just using a 4" side grinder with a diamond wheel.  You can use it dry too for such small cuts.  I just had to nip out a notch here and there.  For whole cuts I will use a wet saw for tile.
So, there is the beginnings of that.  I'll have some more on it soon.  Hopefully.  If you would like to see a more in depth or closer look at how I did something please let me know.  I'm not sure how well I explain things so please ask questions if needed or tell me to clarify.

Tuesday, April 09, 2013

Rites Of Spring


Well, I keep telling ya'll I'm gonna change up this blog or add some stuff or blah, blah, blah and I haven't done crap!  I will one day.  There's just so much to distract me right now with this wonderfully warm weather and sunny days.  I'm soaking it up like an old, dried up sponge that got kicked under the sink and laid there for a year or so before somebody found it.  And then you throw it in some water and it poofs up!!! like a petrified blowfish!  That's me alright!  Poofed up and prickly. LOL!


And I took a good bit of this past Sunday to work on the flower bed (it's getting close) placing more stone, filling in with topsoil and moving a few plants around.  Anytime the shovel comes out ZuZu is right there beside me.  She knows what that means!  Lots of bugs and worms and she doesn't have to do the digging!  She inspects everything before I can fill any hole or place any root ball and talking up a storm the whole time.  I wonder what she says; whether she's complaining or expressing her pleasure as she must think I do this just for her.  She gets so enthusiastic I'm often afraid I'm going to chop off a toe or two (hers) when she jumps in a hole unexpectedly.  But we've been safe so far!


This is just more gratuitous blooming photos.  See how I layered the 2 blooming plants to get like, bloom overload.  The reddish blooms in the foreground are a decorative crabapple I think.  The past 2 springs have turned ugly with late frosts and got this tree before it could bloom properly but this year it made up for all that.  Just loaded with big, full blooms.  Maybe it will eventually get over 7 feet and actually be a noticeable part of the landscape.


And lookeeee!!!   the asparagus are just starting to poke their little heads up!!  I don't think I've ever been so enthused over a plant.  Hhmm, maybe I need some more excitement in my life.  Oh well.  For some reason I thought the asparagus would sprout sometimes in early March or so but after reading a little I determined that April and actually May is normal.  I also read that you should pull the heavy winter mulch off the asparagus at the first sign of warm weather.  Does anybody else do this?  I pulled about half the layer of mulch off and as I did this I discovered the few shoots coming up.
I also read that most fruit should be mulched with pine straw, so I've been working on that.  I knew it was good for strawberries and blueberries, so they got a new top coating, and also went around the border of the garden mulching the grapes, raspberries and figs with it too.  Do any of you use pine straw on your fruit or something else?

Sooo, lots of stuff going on around here and I'll have more to show before too long.  I promise I am working on some stuff in the house too, so maybe a post about that soon.

Tuesday, April 02, 2013

Spring!!!


Ahhhaaaahaaaaahaaaa!!  Feast your eyes, all of you still snow-bound and frozen, upon the glorious, golden warmth of the blessed South!!!!  This is one reason why we say, "American by birth, Southern by the grace of God!"  Yes!! We have Spring!!!
Well, okay, we are still having to run a fire at night but the daytime has been quite wonderful this week with highs in the 60's.  If I were not so freakin' far behind on my pottery I would spend every moment out in the garden.  As it is I am going to have to take some time, probably this weekend, to plant some more stuff in the garden, but more about that later.


I'm just bursting at the seams for all kinds of projects around here and the other day I thought, well, I'll just move this one rock down to where I want to build that new retaining wall.  (To replace those old rotten logs holding up the driveway flower bed) Aaannd, then 3 hours later I had built about 1/3 of it.  So, I've been taking a half an hour here and there to work on it when the weather is nice.  Stacking rocks is a form of meditation for me I believe.  I can't seem to get a very good photo of what I've built so far but if you enlarge it maybe it will look better.  Now I need to move a number of plants around and fill in some holes but I think it will look really good when I'm done.


I've also been working on the fruit border beds in the garden; remulching, training vines on trellises, and all that.   Moving a few things around or dividing things.  I added a pot of thyme to the bottom corner of this bed.  I have a few herbs planted amongst the fruit bushes.  I think they grow and work together well.  You can see my blueberries are loaded with blossoms again this year.


Lots of grass has been springing up also so the chooks have plenty to graze on and scratch through for bugs and all.  We leave this run open all day and one or two might go in it during the day but generally speaking,  they all wait until late afternoon to go in as a group and graze.  I have no idea why, but they have a very set routine apparently.  Chickens are so funny.

Well, I have a number of things going on around here so I'll be back soon (hopefully) with some more projects to show, maybe even some stuff going on within the house!

Friday, February 04, 2011

Left-Handed Path

This past weekend, during the wonderful spell of warm weather, I continued my work on the garden path. I didn't get a tremendous amount done but did get about 10 feet on each end of what I already had. Better than nothing I guess. I also put up some long overdue metal trim on the clerestory section of the roof, so that is completely finished. Anyway, the landscape timbers here are pinned in place with 2' rebar driven down through the timbers. Once those are secured I simply fill the walking space with gravel.
Here, the ground outside the path is where my fruiting plants are; raspberries, blueberries etc. and on the inside of the path is the vegetable area. You can see the garlic poking itself up through the mulch there. Lot of people say you can't grow that garlic you buy from the grocery stores but that is what I planted. Heck, I don't know if it will work or not but every clove I planted sprouted and looks healthy so far. It's been so cold this winter I didn't think it would sprout so soon but it has. The store was having a special on a 3 lb. bag of garlic so I said, what the heck. Won't hurt to try. I did not plant the whole 3 lbs. though! I only planted about half of it.

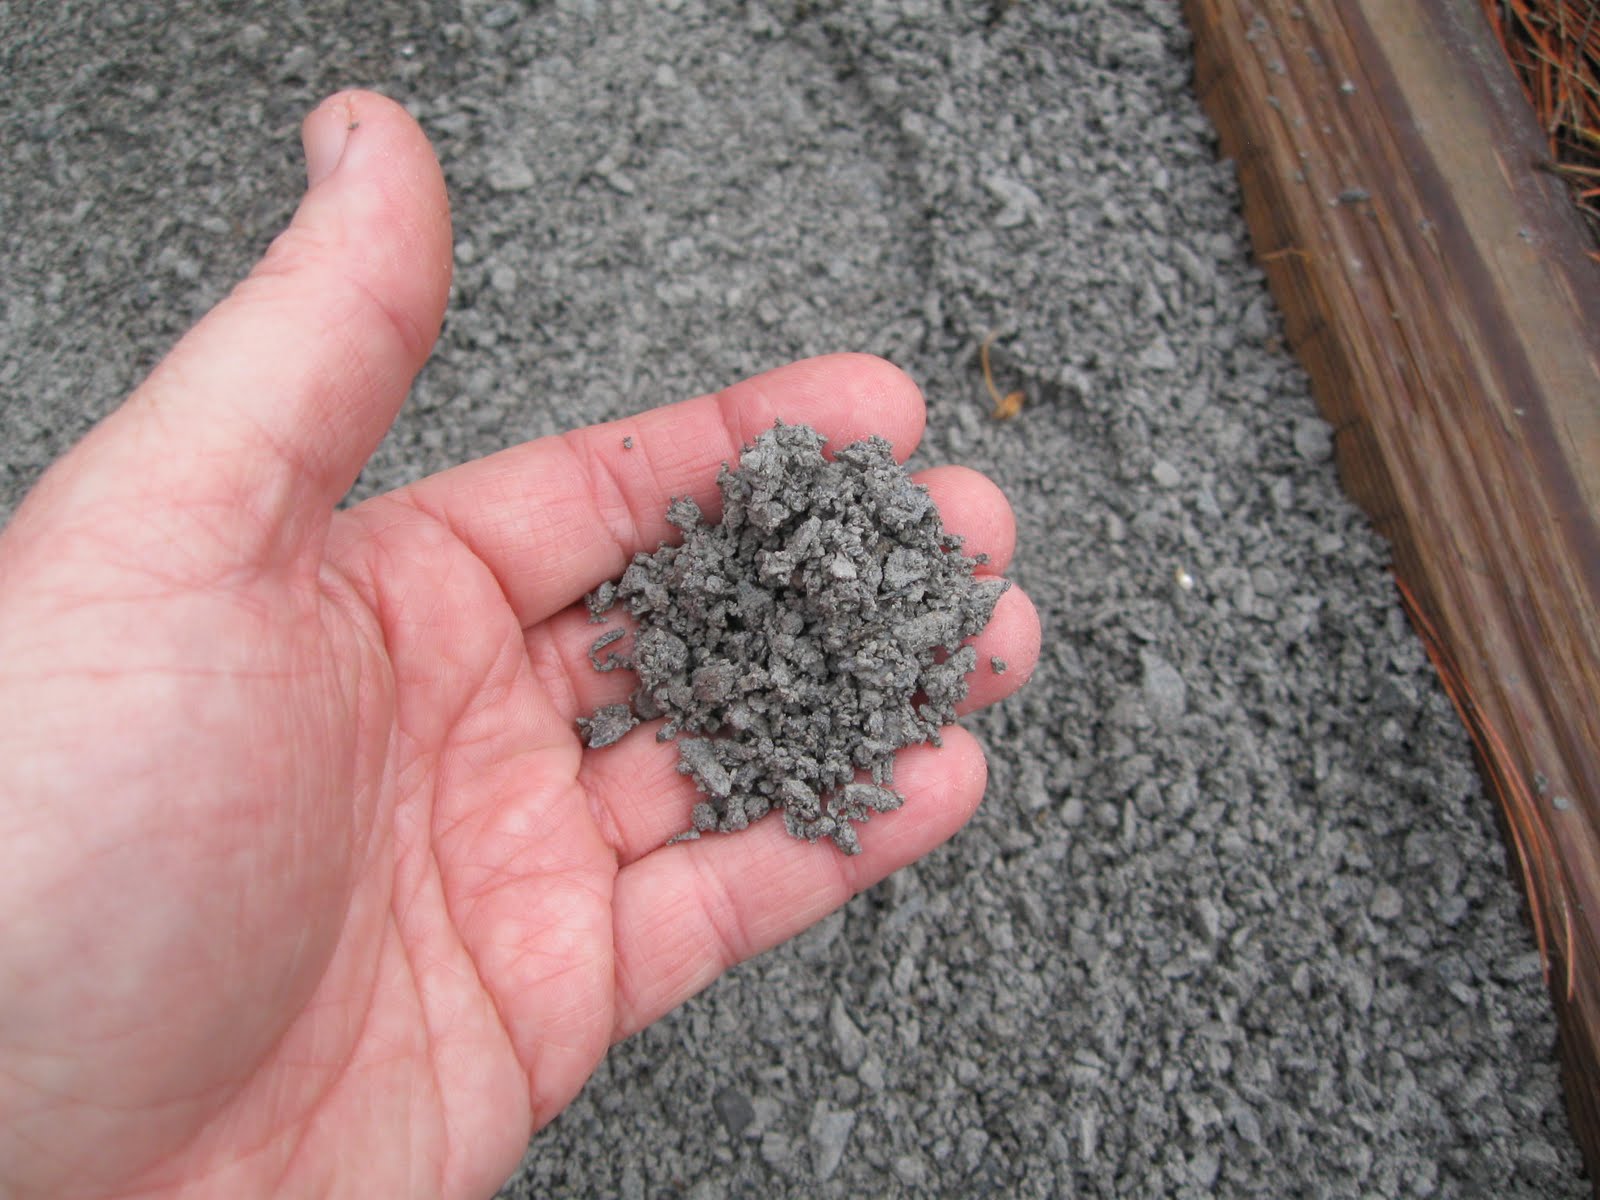
This gravel is what we call '89-10'. It is a fine crushed limestone and you can even get it in a light brown color. It is great for paths because it packs very hard and it's tough for weeds to grow through it because it's so dense. You just soak it with a hose after you place it, or just let it rain on it, and then you can pack it by hand or just walk on it. It is relatively cheap. On this recent load I got around 13 tons for $150. Now, for paths and general landscaping, 13 tons goes a long way. The price does fluctuate some, as with anything that must be hauled, depending on the current price of gas.

Speaking of gardens, HERE is an article on the USDA's recent deregulation of genetically modified alfalfa; I'm sure a lot of you have read it by now. Sounds like Monsanto lined the right pockets this time. I know there are a lot of panic-mongering, woo-woo organic sites out there that get a little overly dramatic about some of these issues but this is one that could really cause some serious harm. And yet another case of our government being bought by corporations. Now, more than ever, people need to be taking more control of the food we eat. Please consider growing as much food as you can and growing only open pollinated varieties. I know a lot of people are really busy and don't have the time like I do but this is really important. The government will have us all down to eating nothing but corporate food from factory farms if they can.
And yes, I also know that the USDA in Maryland reads my blog every morning. I have two separate site meters that confirm this. Maybe they are just interested in house building! Maybe. Even at that they are wasting taxpayer money reading blogs when they should be working. Just like our government.

Sunday, December 19, 2010

How Sweet It Is

Wow!!!!! thanks so much for all the comments and wonderful feedback that ya'll left on the last post. I really do appreciate the time you took to comment. I would have normally answered each one but I didn't check until later and there were so many, I thought it might be easier just to answer you here. I think that lack of time these days is what has contributed most to a lot of bloggers stopping. Lots of people are now having to work longer hours or even work more than one job. And, as some of you mentioned, some people feel they have just said all they have to say. I guess if I had limited my blog to just my house it would have petered out too, because there have been times when progress has gone so slowly, the blog would have virtually stopped. Fortunately, I like to run my pie-hole about most anything, so you all still get to read about my train wreck of a life!
I have dutifully taken note of the things ya'll said you would like to read about and will do my best to post on those things. Thanks again, truly, and welcome to the new readers.

In fact, these photos are what one of my sweetest readers, Floridacracker, asked me about a little while back. He wanted to see the stone retaining wall I had been building around the parking area. I thought I had shown a full scale shot but I must not have. Anyway, here it is. It is not completely finished at the areas next to the steps but it's getting closer.

I don't lack a whole lot finishing but sometimes so many other things distract me. There is just so much to do here. Cleaning up the yard helped so much though, to give me some incentive to finish things like this.

Some of you may remember my plan to weave various little curious objects into the wall. How many can you see? I have not put everything in that I intend to, as this is just one small section of the wall. This stone is just dry stacked for now but I do intend to go back and mortar in a few pieces of the loose stone, concealing the mortar as best I can.

Here is the broccoli. Yesterday was warm enough that I pulled back the plastic over the tunnel to let the crops get some good sunshine, which I do if the temps are going to get above 50 degrees. These plants are about a foot tall. I will be so excited if I actually get some broccoli off these plants. At least you don't have to worry about too many pests at this time of year, although I know there is still the possibility of some.

The cabbages, which are about 14-16 inches across, are trying to form heads. Everything seems healthy and robust so far. In the worst cold they are a little wilty looking but then as it warms up they spring back up. I have read that cabbages can easily take 20 (F.) degrees, so these seem to be doing okay. However, I put the light, with a 100-watt bulb, under the tunnel on nights that are going to be in the low 20's or lower. I am trying to come up with some other form of heat that could safely be put under there and would not require much or any electricity. Any ideas? I do not believe it is weather proof enough for a small ceramic heater and those things use a good bit of power anyway.


*James Taylor

Thursday, July 08, 2010

Lately

Oooh, lots of wonderful things have been going on around here lately. Well, maybe not all of them wonderful but at least productive. I believe I have recovered from the burn-out I suffered last year and have really been enthused about finished many things. I didn't get much garden planted this year but aren't these maters pretty! They are doing really well. I may even try canning some in the following weeks.

Is this not a thing of beauty? One thing though, that is kinda odd, is that this is supposed to be a Rutgers and the Beefsteak tomatoes, which are kinda supposed to look like this, are generally small and smooth. Oh well, they taste fantastic. Makes you want to go into a grocery store and just start slinging all those tomato-like things they sell against the walls and run around screaming "Anarchy!"
What? Ya'll don't have thoughts about doing stuff like that? I bet you do.

I also had a very nice man come out and grind three stumps for me. This was a big one very close to the house that I needed out of the way so I can start installing the flagstone patios and walks. Yay!!! But I'm not sure what to do with the 'leftovers' from these stumps. It is pretty evenly mixed dirt and wood fibers. I thought it might make good garden soil after the wood decomposes? Anybody ever used this stuff before? What did you do with it? I want to remove it, since it will partly decompose, and fill the hole with just dirt so it will compact good. Oh! I also had another nice man come out and give me an estimate on what he would charge to build my kitchen cabinets. I'm just going to have him build the pantry cabinet now, as that is what I can afford right now. It will be about 3 weeks before he is able to start though, so you'll have to wait some for pics.

I got quite a bit done on the clerestory siding over the holiday weekend but I ran out of material once more. I'm very excited; I think it's going to be great! I will be so glad to get off that roof! But at least my butt is getting a good workout going up and down that ladder so much.

I also started on mortaring and stacking this stone wall for my kitchen/ herb garden. I've still got to come up another 18 inches or so to be high enough though. Allen had a good idea to make it tiered. I think that will look good and then the front won't have to be so high.

Wow, that seems like a lot after writing all that down. Well, got to burn this energy off somehow and since I haven't met a nice guy lately and thereafter proceeded to get into his pants, I guess manual labor will have to do. LOL! Heck, if that's any indication on things, I may finish this house by the end of summer!
I'm so glad tomorrow is Friday; hope ya'll have a good day.

*Stevie Wonder

Wednesday, August 12, 2009

Steppin' Out

Well, I set the last step this morning and then tried to straighten and clean up a bit. I think the steps came out pretty well. They're very sturdy if nothing else. I can be a little OCD about some stuff, insisting on perfectly straight lines and right angles etc. but with this type of material you have to be accepting of a certain, shall we say, organic quality to the work. There are some cracks and the run of the steps vary some, but it is okay. It is what it is. I like the challenge of taking found materials and creating with them as they are. Just making what you were given work, you know. Too bad I have trouble with this philosophy in other parts of my life.
I sit back and look at this, and other stuff I build, and I wonder sometimes why the hell go to so much trouble? Why didn't I just put the house where I wouldn't have needed a retaining wall for parking? Why not just build a regular house and be done with it? Just go to Lowe's and buy their stock cabinets or whatever, stick it in and go on with my life? It occurred to me today that perhaps it is vanity. Pure vanity just to prove to somebody that I can do this. I don't know who and I've built enough over the years that I don't think I really have more to prove.
I was so sore last night when I went to bed, I figured I would go right to sleep but I couldn't. I hurt all over. It would have been nice to have had a warm, male body to lie against. Maybe that would have helped me sleep, like a heating pad, you know. But the guys at work, and others, tell me that my doing stuff like this is intimidating to men and that I scare them off. This is not my opinion, mind you. This is what men have told me. It's emasculating for men to see that I can do this and don't need a man to help me. Maybe so, I don't know. I know I can see that look though, when I tell some guy I've met that I built my own house. And that is not something I am quick to say, believe me. But the look that says, "this woman's delusional and if she's telling the truth, she's psychotic."
Oh, sorry I'm in a kinda crappy mood. Well, not really crappy, just weird. Maybe I am insane and don't know it. They say that if you really are nuts, that you think you're fine. Hhhmm. Well, maybe one day I can find a way to have this land turned into a park and all the little kids can sit around and tell stories about this crazy lady that built all this! lol! And every once in a while she would lure some unsuspecting man back into the woods and ...... okay, okay enough of that! ha! Time to go visit Cat Daddy this weekend.


*Joe Jackson

Tuesday, August 11, 2009

Stepping Stone

First thing this morning I was off to the quarry to find some stone for my steps. I hated to spend much but any alternative, such as concrete, would have cost much more, so sometimes you just gotta bite the bullet. So, I ended up buying around 3 tons of stone and, with delivery charges, it was about $300. Not horrible and the guy was real nice to let me run around and pick out each stone. Of course, I was picking through the drop, so it was stuff they didn't care much about anyway. Normal cut stone would have been much more.
Drop is what is left from breaks and cuts etc. The scrap, basically. Aren't the colors in this one beautiful. You know, these things didn't look that big out in their yard but when they slid off the truck into my drive I had to think, "what the heck have I gotten myself into this time". These things are huge. I know a lot of you say, 'wow, you do so much' and 'I can't believe you do that' and stuff but it's not that I'm all that, it's more like, "holy crap, I just bought $300 worth of stone. I've got to do something with it!"
So, you just start setting the things. I eyeballed where I wanted them to go and leveled a place in the dirt. The boards under there are just so I can pull those straps out and then I wedge up the stone with a Burke bar and pull the dunnage out. Kind of a pain but it's just what you got to do. At times, I had a 20 lb. pry bar in each hand, prying the pry bars out! I made sure this first step was set as best I could and, amazingly enough, it set perfectly level with very little adjustment.
This is actually the third step. The first one is pretty much buried at this point from digging out the successively higher steps and the dirt rolling down. I set these about the same as the rocks for the wall in that I filled in behind the stones as I went up.
This photo is kinda crappy but basically you can see what I've got so far. The stones are all almost exactly 7" thick, which is perfect stair riser height. Due to the fact the front edges are not cut and kinda wavy, the run of the steps is between 12" (standard) and 14". Actually, I think 11" may be code but anyway, I thought this dimension felt right. They climb very comfortably. I set one more step after this photo so I have 5 up and one more to go. It started to rain slightly on me but it actually felt good. Cooled things off some.
I'll try to get some better photos tomorrow. I almost forgot to take any today, I got so caught up in what I was doing.
Now, it's bed time. I'm really tired for some reason.

*Duffy

Sunday, August 09, 2009

Rock On

I know ya'll are probably getting sick of seeing this wall but I'm trying to focus on getting this thing done. They are coming to get the machine this Thursday, so I must get the biggest rocks set. So far, I've just shown general photos but I thought I'd show ya'll more of how I'm building this wall. The level there shows that the wall is not plumb. I'm letting it lean back about 2-3 inches into the bank, just as a general precaution against the bank settling and pushing outward. I don't think these rocks are going anywhere but it never hurts to be a little cautious. I can afford for it to come out a little but it's a major pain in the wahzoo to get it back in.
After I set the first layer of stone and get it situated where I want it, I backfill up level with the rock to give the next rock plenty of support. It's also easier to get a more solid backfilling this way. On a side note, I did not pour a footing under this wall, like I normally might, because it's not that tall and the ground underneath was not disturbed. The stones sit on hard, packed dirt that was never cut into, so I think the chances for settling are minimal.
Since most of the stones are so large, I've had to put a strap on them and lift them into place with the machine. This takes a lot of time when you are working by yourself but that's okay. Here, I have picked this one but couldn't get the strap to tighten correctly, so I had to stick a small stone in there as a spacer, so the larger rock would sit up straight and not fall out of the strap.
Here, I have the rock about where I want it and am lowering it into place. Once it's sitting on the other stones I can move it some with the long spike. I also use the spike to leverage the stone up and pull the strap out. Allen says this is a mighty ambitious project for such a little girl as me. It's not so bad though. It did take me about an hour on each of these two large stones but it is actually fairly easy to swing them into place. Somehow I always pick the right stone too. I've never had to take one down because I couldn't get it to fit right.
Of course, there is always a little filling in to do if you don't cut the stones any and I like to work with their natural shape. Besides, cutting these stones would be a major job! The vertical stone on the left is where this section ends and there will be steps leading up to the house on the other side where the bank is not cut back.
I'm fairly proud of the way this project is turning out. I am going to one of the many stone quarries in town tomorrow to see about buying some precut stones for the steps. If they are not too expensive it would be much easier than pouring concrete steps or something like that.

Ah, yes, and it is now official; I am laid off! Got to call the office tomorrow and see about my vacation time etc. I have over a week's worth of paid vacation and our pay is a week behind, so I'll receive my regular pay for the next two weeks and then go on unemployment. I'm very excited and hope to get so much done. Yea!!! I hear rumors about one or two jobs starting in September and October so I might get on one of those. Or, hell, I might retire and never go back!

Thursday, August 06, 2009

Too Much To Ask

I had grand designs to move this rock over to my wall from the far side of the house. I put my boot in there to show scale but it doesn't do the stone justice. It seems much bigger standing next to it. I was able to dig the rock up (you can see how much was buried) and move it out into the open but couldn't get it picked up with the bucket. So, I thought I would put a strap on it and carry it that way. I had successfully moved one other rock that way and I was able to strap the rock and get it about a foot off the ground but that was about it. These excavators have a small dozer blade on the front which you can also use as an outrigger to stabilize yourself when picking an object or digging. When I let off on the blade, in order to travel, the front of the machine started tipping forward and forward....and so I let the rock back down and took the strap off. This is how you decide which rocks will just be lawn ornaments.
Little Tachie (the excavator) just didn't have enough ass to carry that much rock so we tucked our tails between our legs and had to settle for this little thing. Not even a bucket full. Pfft. Well, it all helps!
I have made a little more progress on the wall and added one found object just to see how that is going to work. Can you spot it?
Here is a full view of all I have up so far. Actually, I think I continued to work after I took this and I have the wall up to it's full height all the way. It's almost addictive to me to start working on this because it becomes like a game to find just the right rock to fit and so on. I worked until it was almost dark. Hopefully, I will have lots of time for it next week.
I think my design work is fair but then you find something like this. Such subtle beauty in this tiny design. Makes my handiwork look clumsy and awkward.

*Avril Lavigne