Thursday, March 17, 2011

Forming

Ed was correct in his assumption that I would be pouring concrete soon. This is the formwork for the future chicken coop. Or the Taj MaCoop, as Woody put it. Now, I know some of you are looking at this and thinking, that's a helluva thick slab for a chicken coop. Well, it's not so much. See, none of my land is flat. None. Not 10 square feet anywhere. It's all gently rolling hills or steep inclines. I picked the flattest part I could find around the garden but it still meant a 12 inch elevation change in 12 feet. But, that is easily remedied with a concrete slab.
I wanted it connected to the garden for a variety of reasons. At certain times, when there are no tomatoes, the chickens can be let right into the garden to patrol for bugs etc. Scraps from the garden are easily thrown to the chickens and chicken poop is easily gathered and taken over to the garden. Plus, I already have electricity and water at the garden and it won't take much to trench the power down to the coop, although I would like to maybe install some solar lights. And, last but not least, I already have shock wire run around the garden and it won't take much to incorporate the coop with this. The coop will also be known as ChickenTraz.

So, forming the slab here wasn't much problem but I did have to fill the interior in order to have only a 3 inch thick slab to pour. This involved wheelbarrowing a lot of dirt and gravel but that's good exercise. However, if you do this, you MUST tamp the fill so that it won't collapse on you later and have your slab crack. And that dirt will settle, I assure you. So, that is what this contraption is above; a motorized tamp. One of those little handle doolollies ain't going to do it. These big tamps are way cool. Due to Allen and I being in the business, we just happen to have one residing here all the time. It doesn't get a lot of use but is very handy to have. The things are extremely heavy, as you might guess, and when running that thick plate on the bottom vibrates, causing the tamp to well, tamp, and actually move forward. You can barely pull one of these things but when running it moves along on it's on.

It's kinda hard to see in this photo but I left a small turndown around the perimeter of the slab for a footing. You must have this so that the edge of the concrete turns down to contact undisturbed earth. This is kind of a mini version of what we call a monolithic slab. Meaning the slab and footing are poured at the same time. My little footing turndown is only about 5-6 inches wide at the bottom.

I dug the right hand side down just as low as I could, and still have the slab be above grade but that still gave me about 11 inches on the other end. The slab is 12'x8' and it slopes 1/4" per foot in the short direction. This is to allow drainage when I hose the slab off for cleaning. I know most people would not go to the trouble of pouring concrete just for a chicken coop but I have my reasons. 1. I am just partial to concrete; it lasts. You will never have to redo it. 2. No predators will be allowed access to my chickens. They are for my meals, not theirs and I prefer not to kill predators. I think it is better to just not allow them the opportunity. 3. Concrete is easily cleaned and a clean coop is essential. 4. With the rising cost of lumber, concrete is a good deal. The local batch plant used to charge an outrageous minimum on concrete; 5 yards. I suspected with the recent falling economy that maybe they haven't been doing as much business and might have changed their policy. I called them and what do you know? they said they would work me a deal for just 2 yards. How about that? If I have decided to floor the coop in plywood I would have to use pressure treated, probably 3/4 inch, and it would have cost about what 1 yard of concrete is going to run me. With 2 yards, I can also pour a small footing for the tool shed I want to build connected to the coop.
So, I'll be back later to show how I finished my preps for pouring this slab. Oh, and I meant to say I did not buy any lumber to do the formwork. It was all constructed of scrap material I had laying around. Basically just old 2x4's and stuff. Unless it is going to be pretty architectural concrete that is really going to show, I almost never buy form material.

Monday, March 14, 2011

On Building

Whatever good things we build end up building us. So, maybe by the time I finish this place I'm building I will be a halfway decent person. I think building is good for one's being. For one thing, it's amazing how much a wooden post can humble a person. Think you're pretty smart, eh? Try to get them all plumb and in line... Or, build that box but make sure it's square. Seems pretty simple right? Well, it is fairly, after years of doing it. After explaining my procedure for running a line of posts, it dawned on me that I have, in essence, spent the last 17 years learning how to plumb a post and build a square box. It basically boils down to that. Ah, but once you learn those two items, oh the things you can build.

I think many of the ills of people today are the result of not getting their hands dirty anymore. To build builds you up. Few people have any desire or confidence to get out and try to make something. Is it just coincidence that depression, insecurity, ill health, obesity, and apathy are rampant in our country? As an occasional teacher of the crafts I have often been amazed at how happy it has made some people just to build a little flower box or learn to cut a board correctly (and to the exact measurement you were intending). To build gives so much confidence. You say, I can do this! Look! If I did that, I might could build something bigger.

I have often written here about how timid and insecure I was before I began working construction. I also held many arrogant and narrow-minded opinions regarding those who chose to work blue collar rather than get a college education. When I look back now to my much younger days I am somewhat amused at that girl and those attitudes. What rough but exciting roads she went down and found herself learning so much more standing in mud and scorching sun, rather than in a classroom. It is only fitting I did not receive this land at an earlier time. I was not ready back then. I could not have built these things I build now, even halfway through my construction career. Not that I didn't know how to put pieces of wood together but because I didn't know how to put a life together. Building taught me what was important in life. When you have to do it yourself you begin to get very picky about what really matters. I have to pour this concrete myself, so do I really need 100 more square feet of house? Do I really need a dining room that will only be used on holidays? Isn't someone who will help me dig holes all day long more of a treasure than someone who would just pay someone else to do it? And to be safe and warm and dry in my little house with that person is worth more than all the McMansions and Hollywood 'pads' in the world.

I will explain what I am building in these photos in the next post. The big box in the last 2 photos will be finished and then all torn down again!

Saturday, March 12, 2011

Unstill Life

Our annual spring rains/ floods have come and gone this past week. Since I've been living here this has been a normal occurrence. Over the years I have been building and modifying the landscaping around the house to reduce the effects of the rains on the house and yard but I still have more work to do. The construction of the other half of the house would help greatly. Maybe one day. This wet season stream that flows under the drive is much reduced from the day before the picture was taken. Basically, I have a small creek that developes in my lower yard when it rains like this. Doesn't hurt anything though.

Chigger was helping me clean up debris from the rains. Well, really she was just running around with sticks in her mouth. She loves sticks. She will bring the sticks to me sometimes to put on the burn pile but if I could just teach her to put them there on her own that would be a great accomplishment!

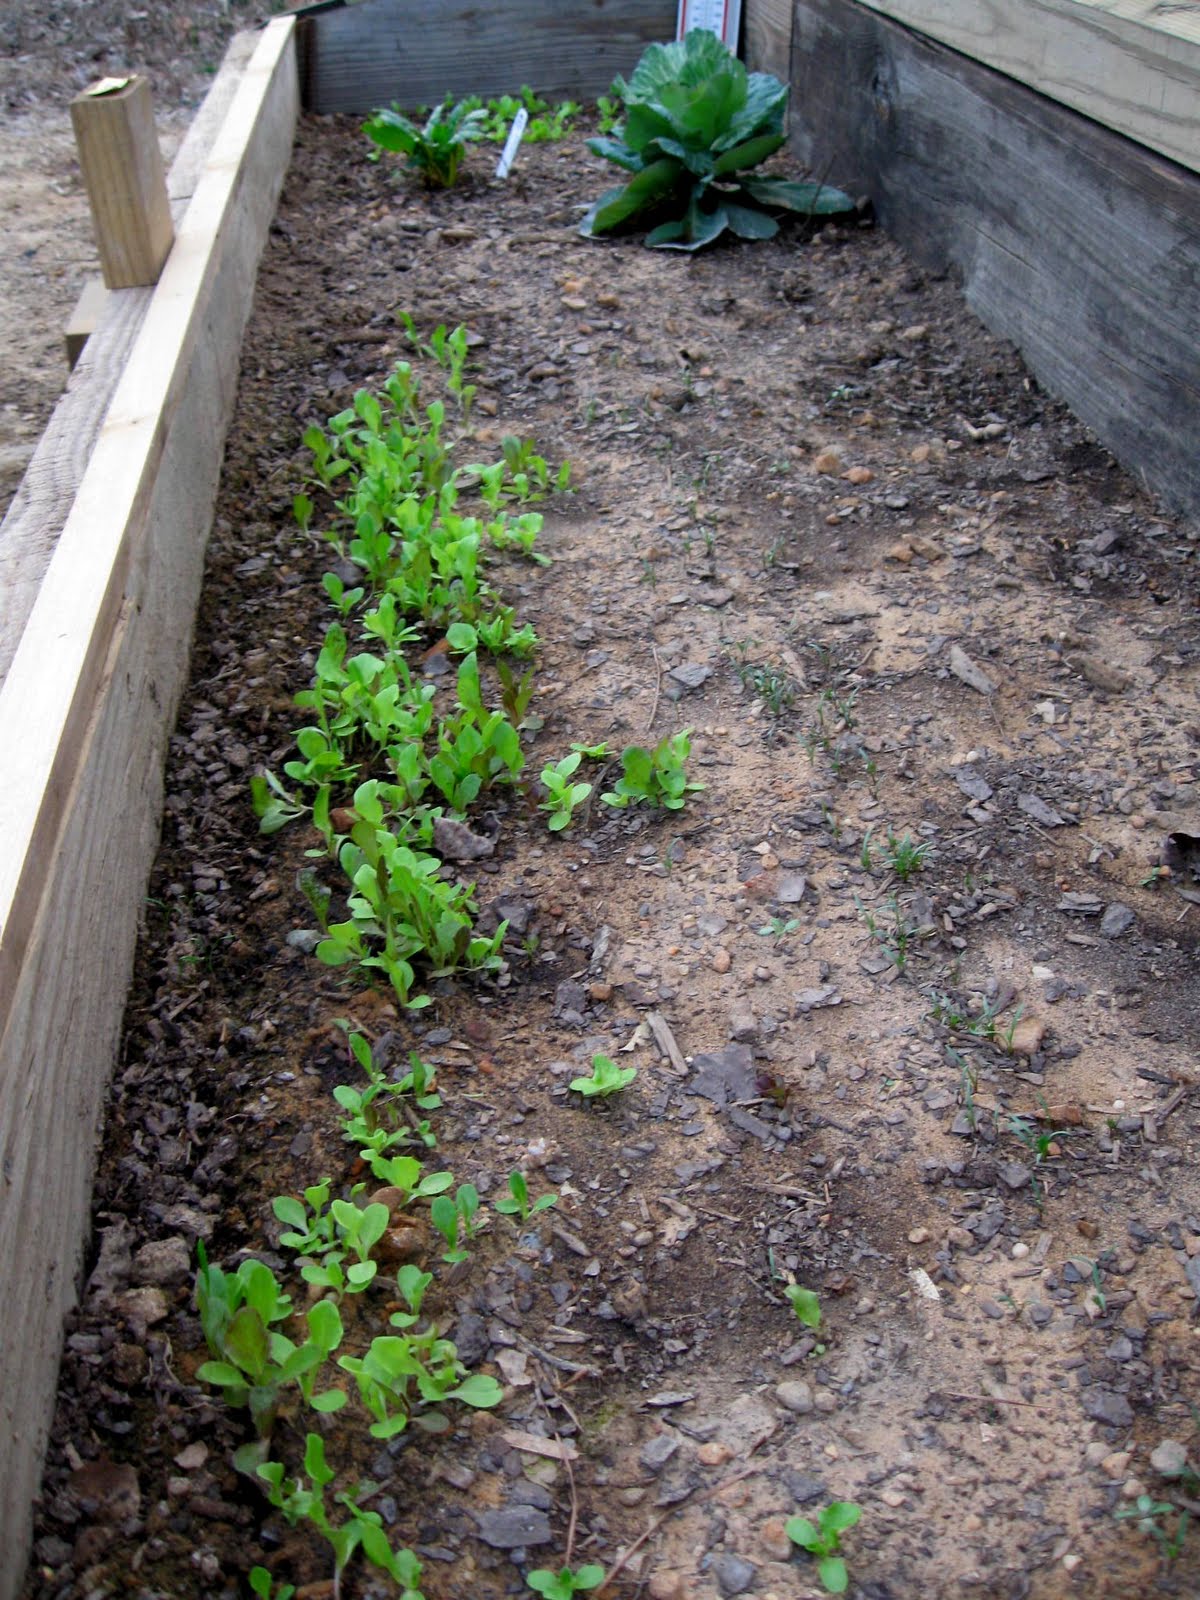
The veggies in the coldframe are really doing well now with the warm weather. Of course, that is loose leaf lettuce on the left hand side growing so big. Next over, much smaller, is carrots and then further right of them is more lettuce just barely coming up. I'm going to try to keep a succession of plantings going as long as I can. At the far end is one chard plant, head lettuce and the beginnings of spinach. The days here are usually in the 60's now with nights in the 30's and 40's. I close the frame completely at night and prop it open in the day. On really warm days I open it like this.

The other crops are doing well also. Closest is young cabbage, then broccoli, older cabbage, garlic in the far right (tallest) and you can barely see young onions up there too. The raised bed across the walk is strawberries.

The broccoli are putting out tons of these little heads and they are so sweet and tasty! Each head is loaded with them. I do have 4 small broccoli plants also that, hopefully, will start producing when these older ones start pooping out.

I know I have been kinda quiet here and on your other blogs. I am just in a transition now I guess. I'm not sure of what I want to say or if I even have much to say. Well, of course I do, I just have been mulling many things over. If I am not going to go back into the mainstream workforce (and it looks as though I'm not) I must make some strong efforts here to complete some things and get many things operational. The garden, the chickens, my pottery. I must make a serious effort this year to begin producing much more of my food.

So, bear with me on my posting. I will be showing ya'll more projects and all that. I am still reading your blogs, just not saying much.

Thursday, March 10, 2011

Finishing Touches

Alright. I don't have as many detail shots of the cork installation but I think there is enough to see what I did. It's not that complicated. I checked my room for square and I was within 1/4" overall so I didn't worry any more about that; I just started laying the stuff. First off, you must maintain a 1/2" gap all around between the flooring and the walls. I stuck 1/2" shim packs against the wall and cabinet base to hold the planks at the right distance. These are pulled out later. I works easier to snap the planks together long way and then snap that length into the preceding length, as I have pictured. Remember to stagger your joints. I simply used the drop from one end to start the next run. This is fine as long as your drops are at least 10 inches long.
The first plank lays flat on the floor and then you insert the next plank at and angle and press down, wiggling it a little. When it snaps in place it is very hard to see the joint.

So, you just keep working your way across the floor, making sure to maintain your 1/2" gap. The last plank is a little aggravating to get in but not impossible. It helps greatly to have a small pry bar so you can pry against the wall and snap the plank in place that way.
I removed the plastic shim packs holding the 1/2" space and replaced in with 1/2" foam strips. Just little pieces about 4-5 inches long. Just enough to hold the flooring in place but it must be something that will allow the floor to expand and contract and foam works fine. I then installed the base trim all around, which of course, covers the gap and foam. And voila'! a finished floor!
I am quite happy with this cork. You can read more about it here. It is a 'green' material; very renewable, healthy for your home and looks great. Supposedly, the resin in natural cork also makes it fire and insect resistant.
This is a 6' x 8' area and it took 2 boxes plus 1 plank from the 3rd box. Each box costs about $63 and covers just under 22 square feet, if I remember correctly. This brand and type comes with a 25 year surface warranty and a limited lifetime structural warranty.

I have since moved my little upright freezer back into the pantry and installed a few other little hooks and hangers. I just need to seal the counter top and install the backsplashes and I'll be completely finished there. Seems like an awful lot of work for one little dang room.

Tuesday, March 08, 2011

Down Under

So, I'm goig to show ya'll the steps I went through before installing the cork flooring and explain why I did things this way. Basically, the cork is only about 1/2" thick and I intend to run it through the kitchen and out to where it will meet the hardwood flooring in the dining area. Although the cork seems to be rather resilient, I believe that traditional hardwood will be more durable, for me and my work boots, in the living room and dining area. Anyway, hardwood is 3/4" thick and I didn't want to have this 1/4" discrepancy between floor heights. Also, adding a layer of cement board would just help provide a very smooth and clean surface on which to run the cork. My plywood floors, having been down so long with no other flooring over them, are a little rough in some areas.

Using a 1/8" notched trowel I spread a layer of water based glue that is used to adhere vinyl tile, wood and/ or base trim. This stuff has a relatively short working time so I only spread enough for one piece of cement board at a time. I picked this glue up off a job a while back, not knowing if I would ever use it but seems it came in handy after all! They were going to throw it out even though it had never been opened. So, making sure I was staggering the cement board joints over the plywood subfloor joints, I just started laying in one corner, working my way out. These sheets come in 3' x 5' sizes, btw.
Make sure to stagger the joints of the cement board also. I then screwed the cement board down using 1" coarse threaded drywall screws, 12" on center both ways. Make sure that the screws sink beneath the surface well. You don't want to feel those screw heads because they can cause problems in your finish flooring later.

As you can see, the cement board makes a lot of dust, so I try not to even cut it in the basement, although I have on occasion. I continued to run the cement board up to the threshold of the pantry door. You could use 1/4" luan plywood I guess but the cement board will never delaminate on you and is very resistant to moisture.

After getting everything glued and screwed real good, I installed the plastic underlayment that the cork manufacturer recommends for a moisture barrier. It is basically 6 mil black poly. I shouldn't ever have a moisture issue, considering this floor is elevated and not on grade, but you do what they call for, for warranty sake. The red, moisture resistant tape they recommended was basically crap however. It wouldn't even stick to anything. The plastic has one sticky edge though, so it sticks itself together anyway. I lapped the pieces about 3 or 4 inches.
It wasn't too terribly bad to put all this down and after stopping to eat lunch, I then proceeded to install the flooring. Which I will show in the next post.

Sunday, March 06, 2011

Barefoot Floors

Alright, so we finally had a good rainy day and I got to work inside on the pantry floor. I'm just going to show ya'll some quick pics today and then will do a more detailed post later of what all I actually did to install this stuff. This is cork flooring, by the way. Not sure if I had mentioned that before. It comes in planks that are 1' x 3' and about 1/2" thick. These planks lock together and the whole floor "floats". It is not nailed or glued down in any way. I was a little skeptical at first but once the planks lock in, the floor is virtually seamless. In fact, I really had to keep track of my joints because it is extremely hard to find them after the plank is in place.

I pooped out before I got the base trim run but hope to do that soon. It took about all day because I ran a 1/4" layer of tile board under this. I'll explain why and how later. I am very, very pleased with how this came out and can't wait to do the whole kitchen. It wasn't terribly hard to do either. The very last run against the wall was a little tricky to get it but not horribly so. The main thing is just to take your time and not get flustered.

This particular brand carries a 20 year warranty and comes prefinished, so when it's down, it's done. The title of this post refers to how it feels to walk on this stuff. It's wonderful. It feels great. I just sat on it for a while, looking. It is warm and feels good to stand on. Now, in 2 years I may hate the stuff or turns out it is too delicate, but so far it seems to be a good product. It's hard to get a good close-up detail shot but it is really beautiful to look at too.

Friday, March 04, 2011

I Won't Crap Out

Yes, that is a shit load of crap. Cow crap to be specific. So, we won't be crapping out or out of crap for some time. Not unless the shit hits the fan anyway and then we are probably going to be in deep shit or up shit creek, however you want to look at it. Actually, I prefer not to look at it or smell it either but it is good for the garden. Anyway, I finally got my shit together today and went over to the cow neighbor, who said they didn't give a shit if we got it, and loaded poor ol' Blue down (twice) with well, cow shit, for the garden. I am usually full of shit but today the truck was too. Afterward, I was really pooped.
Hehehee, okay, have ya'll had enough?

I'm pretty good at spreading shit, so I got this honor. As soon as the rain stops we are going to till this in and it will sit and compost some more for about 4 to 6 weeks. By planting time the shit should be straightened out. Hopefully, I will be able to grow a shit load of veggies now.

Chigger says, 'I'm staying out here; I'm not getting involved in that shit!' Actually, Chigger the Dog  knows that the garden is off limits to her. Her mole chasing habits would destroy my plantings.

I also spread this kelp meal over the garden to be tilled in with the other crap. I have used this stuff before and it really helps to add many nutrients to the soil. It is supposed to be sustainably harvested from areas of the sea that do not suffer from contamination. I try to use only natural fertilizers and make my own compost etc. but this soil here is very lean and I'm just trying to get it up to the point it will grow stuff halfway decently. After testing the soil last year I was actually not so surprised to see it was basically dirty colored sand.
I finally have my handy-dandy, homemade composter working and I will be showing that to you soon and hopefully, adding much needed 'black gold' of my own making.

Well, rain is coming in tonight and looks to be here for a couple of days, so my projects have moved inside. I hope to get the pantry floor installed this weekend and will be showing that to you soon also. I'll be very excited to be finished with that; thrilled shitless I guess you'd say.

Tuesday, March 01, 2011

Gates To The Garden

I just love the fact that title is actually a song by Nick Cave and the Bad Seeds! Ha!! So, at long last, here is the garden gates and the incredible pain-in-the-arse to do brick paver entry. Actually, the pavers would not have been such a pain had I paid better attention to what I was doing and not let it get out of square. I guess I was so excited about finally hanging the gates that I tried to rush through the other. That is never a good idea. I backed up though and did it right and now everything is square and straight and looks pretty good. The pavers are not entirely finished on the other side however. I need to finish that soon. I desperately needed to be able to close the garden up, what with food growing in there, so getting the gates hanging took priority after the majority of the brick was down.
I am fairly pleased the the gates but I am going to add a few more touches to them. I have some copper plates that I am going to do some stamping on and add and maybe a few other things. Not a lot, but a little more whimsy.
I also have to clean and seal the gates. I will show ya'll shortly how I made the hinges and hung them and how I did the brick area.

So many green things are springing forth from the ground! The weather has been so nice these past few weeks and I am just ecstatic to have been home, working on these things that make me happy rather than slaving away on some construction site. Not that I didn't enjoy my job but I enjoy building for me so much more!
I feel a lot of creative energy stirred up from this project too. I have many ideas for other things and a lot of enthusiasm to finish what I already have started. God forbid I jinx anything but I feel this is going to be a good year.

Sunday, February 27, 2011

Diggin' Your Scene

This sudden emergence of warm weather has also brought about a flurry of activity here.A friend of ours (Rurality and her Hubby) gave us this old tiller. The motor had seized up on it, and for the most part, it had seen better days. I was a little sceptical that it could be made to run again. My plan now is to acquire some old manure to spread and till into the main garden.

I have also been working on the gates but that has turned into a much more complicated project than I originally intended. After hanging the one leaf I saw that the ground was so out of level that I would have to dig out several inches on one side. This was going to leave the makings of a big mudhole. So, after some deliberation, I decided to remove the gate, grade the area and lay brick pavers to make a nice, level entryway over which the gates will hang. This will also deter any critter from trying to burrow under the gates. I've had, for some time, a few cubes of miscellaneous pavers that I had scavenged and had been meaning to do something with and one type I had was just enough to do this. As you can sorta see, this is adding a bit of time and effort to the gate project but it is going to look really nice.

Some of you noticed this little critter in the background of my last post. After I decided that Lika needed to go live with another family I figured it would just not work out for me to have a dog. I was working a lot, the dog would be alone all day and Lika proved most wouldn't go for that. And I wouldn't want the dog to be alone. I refuse to cage or tie a dog also, even with company. Well, after I got laid off I kinda figured I would not be going back to construction. Things have worked out that I am here the vast majority of time, so I have time to devote to a dog but I did not pursue getting one. Then my little niece Katybug called and begged me to take this little pup a friend of hers had found on the side of the road. I came very close to not doing it but she swore her parents would take it to the pound if I didn't and I believe they would have. So, I said okay and they brought little Chigger to me. This was back in October and she was just a wee little thing. I didn't say anything for a long time because I didn't know if it was going to work out but I think Chigger is going to be a great asset to the place. She is just the sweetest little thing. t. She mostly just asks for someone to play Frisbee or kickball with, which I try to often. She is not a very big dog but tries to be watchful and alert. I am hoping I can train her to help watch out for the chickens when we get them but not sure how well that is going to work. She has a great deal of fun here now though and loves to burrow after the moles in the yard, snorting just like a pig the whole time. She's diggin' it here too.

Saturday, February 26, 2011

Back To Scratch

I didn't realize how long it has been since I last posted! This gorgeous weather we've been having has had me distracted. I've been spending large amounts of time in the garden or just on general outside projects. We often times don't really have a spring to speak of; it just goes from winter to HOT, so these actual spring temps are great.
Yesterday was quite windy and cool though, after a stormy, rainy night, so I decided to go back to the ol' pantry projects. I had received the sanding discs I ordered but was waiting for a not sunny day to come inside and use them. When I first saw the discs I thought, this ain't going to work. If you held them just right in the sun you could see just the vaguest sparkle of diamonds; it didn't seem near enough to grind concrete. But, those are some powerful little crystals. I only went up to 400 grit (the pack went to 2,000) but it produced a very nice, smooth surface. The 50 grit knocked down the rough areas and then I just worked my way up. I suppose if you used the entire spectrum of grits you could produce a virtual mirror finish.

I know these are not really good shots of the surface, and the sealer is not on yet either, so it doesn't really show how polished it is but I was quite pleased and actually surprised that they did as well as they did. I was afraid nothing was going to fix that surface but it even took down the uneven areas in addition to polishing. It was a major pain in that you MUST use the pads wet, so you have to keep water standing on the surface. This keeps the dust down but throws a slurry of fine concrete over everything. You use the pads with a stiff backing pad and screws onto a 4" side grinder. I did cover the cabinets with plastic sheeting but it was a freaking mess. I would only recommend this remedy if there is no other choice. I spent all afternoon cleaning the pantry and kitchen area but it did fix the counter top. It is nowhere near perfect but it is acceptable now, even for me and ya'll know I can be a bit picky. Once I have the concrete back splashes installed I believe it will look pretty good.

After cleaning everything I installed yet another shelving unit above this window. I am also going to install a few hooks to the underside of this shelf to hang drying herbs and such.
Now, to install the flooring. I am very excited about that. The back splashes will be poured outside and then just set in place so there will not be any more messes in here and not affect the floor.

I have also been working on the garden gates. The other side is up and installed. I now just have to set the hinges and hang this side; which I am about to do today. I am real happy with the way these gates have turned out. Completed pictures soon! I wanted to show my method for plumbing this post though. I know it's not rocket science but some people have never done it before. I pulled a string line down the fence to line this post up by and painted my marks for both side on the ground. With the other side of the gate up I simply measured from the inside edge of the hanging leaf to the inside edge of the post to make sure I had enough space for the next leaf. Always measure at the bottom of the post and then plumb up. As you plumb you will have to keep checking the bottom and adjust a little, as plumbing will move the whole post a little bit. Two kickers, which you go ahead and nail on before you start plumbing, hold the top both ways. This is a very easy and simple method.

Now, if you can ever get your hands on some of these things, called turnbuckles, you will bless my name every time you use them. Bless in a good way, that is! These things make setting posts or plumbing walls a snap. You just get the post halfway plumb and then nail on the turnbuckle. Then, turning the threaded part there, push or pull the post into alignment. They are about 3 feet long but made to nail onto a 2x4 of whatever length you want. Oh, and they have that hole through they foot to stake them to the ground but you can also turn them the other way, which the turnbuckle itself nailed to the top of the post. We usually use them that way on walls.

Now, back to work!!!

Tuesday, February 22, 2011

Speaking Confidentially

I've been told a number of times, and even accused a couple, of my house only being built for one. I never thought that was a conscious action but over the past couple of years I have begun to wonder if perhaps it was subconscious. The house is small by most people's standards although I don' think it's unbearably small. However, I must admit, it does not contain, as one fellow put it, 'much room for a man to put his belongings.' Not much storage for a man's clothes or his personal items for the bath. Just as I always envisioned that I would one day find a permanent partner, my better half so to speak, I also imagined that there would be another half to this house. One that contains all the niceties for a couple to live together in comfort. A walk-in closet, his and her vanities and so on. But, you know that old saying, "man plans and God laughs".
And I am beginning to see more and more of myself in this one half of a house. It functions perfectly well on it's on. It's comfortable with it's one-halfness. It doesn't 'need' the other half. Granted, it would function more to the original thought if both halves were here. It would be nice to have the whole function and design of both halves. It wouldn't look so odd to most people. Both halves together wouldn't provoke uncomfortable questions from friends and strangers. Most of all, it would then be very comfortable for two people to coexist here.

It just gets so much more complicated as you get older. When you're young and you pair up, most people don't have much anyway, so there is no stepping on each other's toes over property and such. You're not so old and set in your ways. It doesn't matter as much if your sweetie wants to iron the clothes before they are put away. Sure!! go ahead! Now, after you are older, it's more like, just hang the damn things up and get them out of my way.! Iron them later! I'm not used to having 'stuff' over there! I want my 'stuff' here. My 'stuff' has always been here. Find another place for your 'stuff'. This is especially bad if you are older and have mostly been alone all your life.
I like my aloneness sometimes. But I like to have a partner to go places with. To snuggle up to at the end of the day...and so on, if you know what I mean! I like knowing I'm not here alone in the night.
Building the other half of the house would be adding a tremendous amount of effort and hard work to a project that has already about worn me out. Sometimes I don't know if I could do it. It's too hard. As old as I am just let everything stay the way it is; I don't feel like fooling with it. You know, would it really be worth all the work and sacrifice and making due at my age to have the other half? Most of the time I feel a resounding yes! Yes, if it is done right and not just something thrown together. Yes, if the two halves are actually going to work correctly together and function as one. But no, if the two halves are only going to exists as two separate entities simply joined by a common walk way. I've worked too hard for that also.

Monday, February 21, 2011

Give It Away

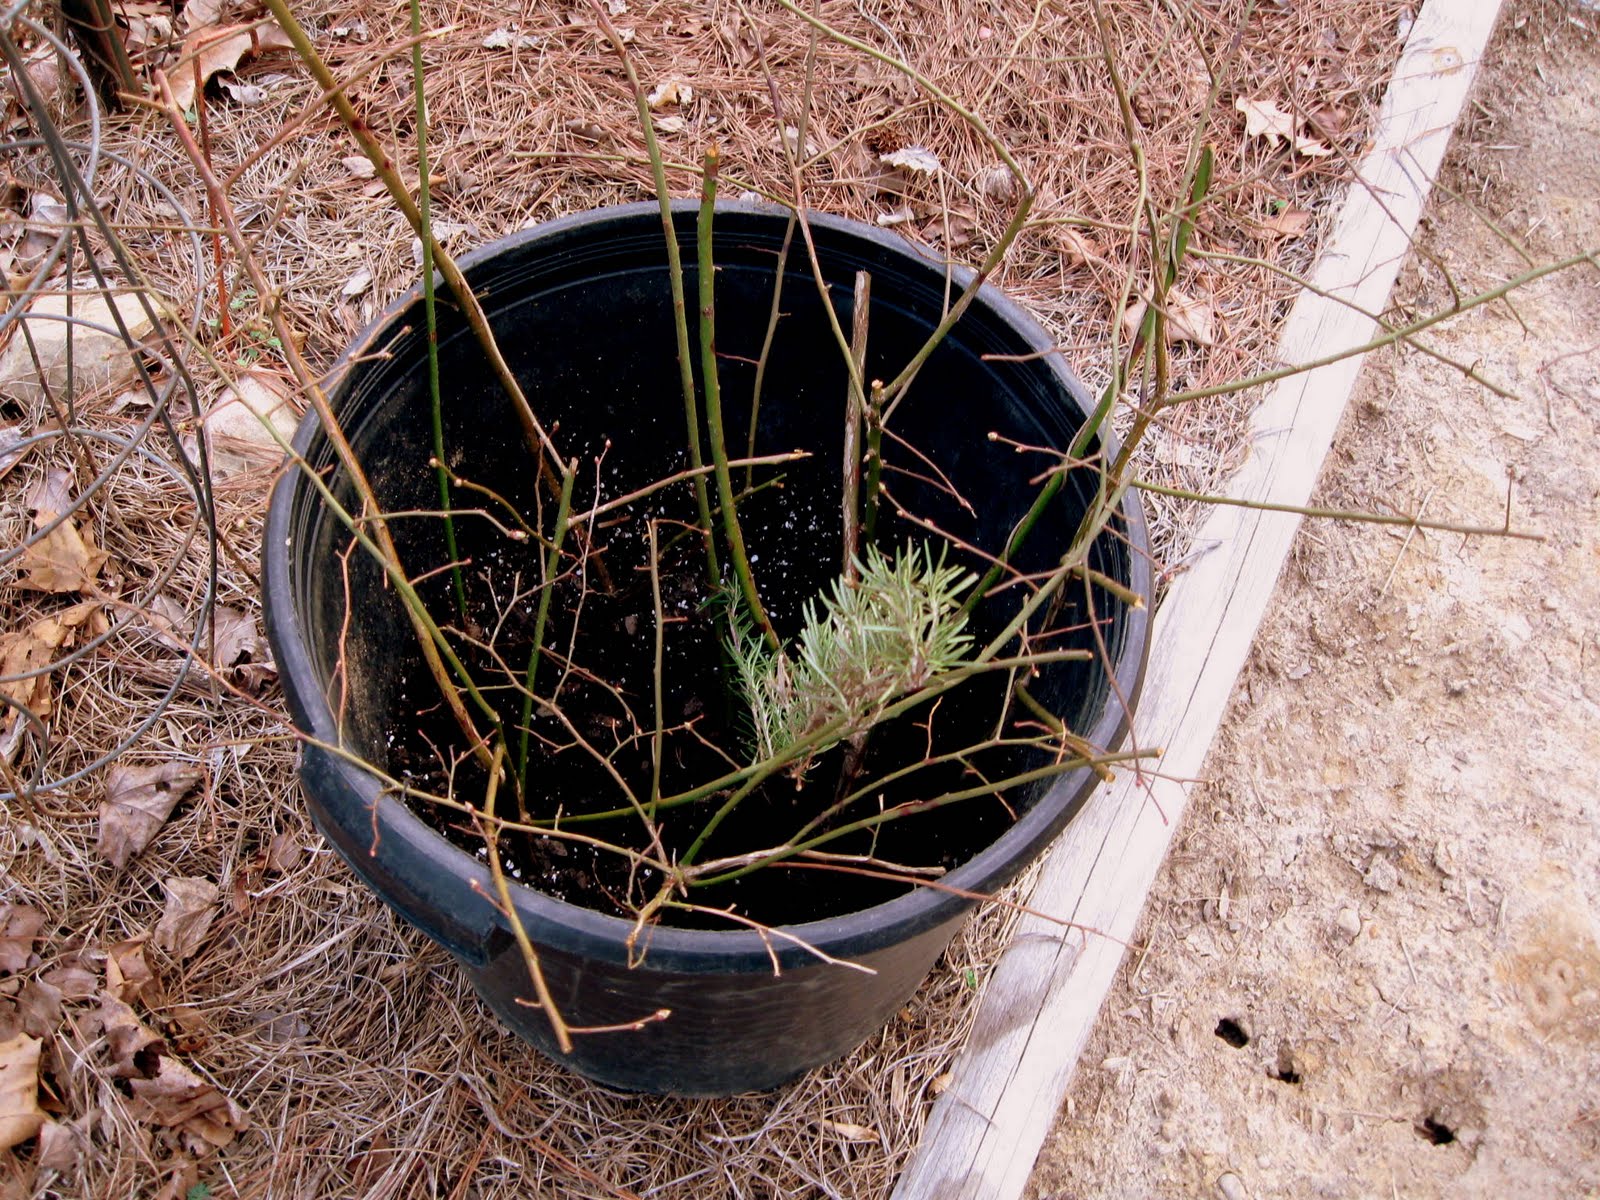
I made a really good score on some free plants the other day thanks to some righteous friends down the way. I know some people that live in a 'intentional community', what they used to call a commune. Cool folks and Allen has actually been doing some house framing for some of them. He told me they were looking to give away some trees, so I emailed and sure enough, they said come on down! After I got there Sara kept showing me other plants I could dig if I wanted. I ended up with a large witch hazel tree (which was what I went for), a LARGE blueberry and hopefully, many rootings from said blueberry, if they will take. That is what you see in the bucket there. I also got a good size Rosemary shrub, marsh marigolds, spearmint, irises, a redbud, and 3 or 4 forsythia bushes. And maybe something else I forgot. I was very appreciative and offered them to come dig stuff at my place. Even though we only live about 20 minutes apart there is some difference in our flora, as I have several species they don't. It is really awesome to be able to swap extra plants with folks.

So things here are cranking up with the warm weather. The strawberries are poking out of the pine straw I put around them. I bought a few more the other day to replace a few that died last year. I hope this year's harvest is better than last year's pitiful few. I need to add some manure to their soil.

On the other hand, the cabbage and broccoli are really cranking up! They are in their element I guess with these sunny, mild days and cool nights. Hopefully, I will be harvesting cabbage soon.

The broccoli is coming along too! I think the cold got to a few of the blossoms because I have a few heads with a rotty spot where the head would form. About half are forming a nice size head though. I think they have put on an inch all the way around just this week.

One good thing though, is even with the rotty spot in the center, these heads are putting out little heads to the side, so I should still be able to get something out of them. I am very excited that these are doing so well as this is my first successful growing of broccoli. I tried once before, years ago, but I think I waited until it was too hot.
I have another row of much younger cabbage behind the broccoli, so I should get staggered harvests of that. Even though it was some work, I think starting the cabbage and broccoli last fall and overwintering it was not a bad idea. I will have a very early harvest this spring. Perhaps this fall I will start one planting early enough to harvest in the fall and then stagger the rest. At any rate, it certainly works to over winter the stuff.

I have a lot of other stuff coming up in the garden so I will post a little more of that soon. I know not much of this is real exciting but maybe I'll have something else soon! I do have lots going on at any rate. Due to that I haven't been taking time to comment on a lot of ya'lls blogs but I am dropping by! I guess I just haven't felt like I have much to say lately; either here or there. But I am reading.

Hope ya'll like the new blog design. If any of it is hard to read then let me know. I try to keep legibility in mind and I know some colors affect everybody's eyes differently.

Sunday, February 20, 2011

Rock Bottom


The sign at the beginning of the trail suggested a picnic, fishing or a swim when you get to the bottom and I'll say, had the weather been warm, it would have been a most beautiful place for it. I never saw an area where the water was murky.

If you enlarge this photo and look closely smack in the middle of that rock bluff, amongst the pine trees, you will see a large house. The park itself is apparently not very wide because you will see private residences every so often along the rim. Thankfully, there are not a lot. I guess there ain't a lot of people that can afford such construction. But what a damn view from your deck.

This was one one of the steeper parts of the trail on the way back up. It was a good workout!
Sorry the photo is a little washed out.

This was a little side trail on the way back up also. A good excuse to go out and sit on this rock and rest for a minute! The pictures just don't give the feel of the immensity of the canyon unfortunately.
So, if you are ever passing through Alabama, or live here, or have ever thought about coming here, I would definitely recommend that you visit Little River Canyon, if you enjoy hiking or camping and nature. Oh, there was also an official bird-watching trail on this end, near the trail I hiked to the bottom. It didn't cost us anything to get in but if you go to the south end of the canyon, to the 'beach', there is a $3 use fee. Sounds extremely reasonable to me.

Friday, February 18, 2011

Beauty In The World

These are the falls that are considered the start of Little River Canyon in northeastern Alabama.
Most people are unaware of the bounty of natural resources in Alabama. In fact, Alabama is the most biologically diverse state east of the Mississippi. It goes from this to white, sandy beaches. We got whatever you would like, nature-wise anyway. This park also host many endangered plants and animals, including one plant they say doesn't occur anywhere else in the world.

I was absolutely mesmerized by the quality of the water and I have done nothing in editing to accentuate or embellish the color. The water here really is that jewel like blue-green.
We drove about half of the rim and stopped many times to hike and eat the picnic lunch we had brought. There were very few other people around so it was very peaceful. The top of the canyon is at slightly over 1,100 feet with the bottom of the canyon around 750 feet.

There are about 6 major hiking trails, which the park service claims are not maintained, but I thought they were in great shape. They all range from easy/ moderate to very strenuous. Camping is allowed but not down on the canyon floor. You can however, hike down to fish, swim and just walk around.
I hiked to the bottom at one point. It was only abut 3/4 of a mile down though, so it turned out to be easier than we both thought. Now, it was quite strenuous coming back up, with parts of the trail just as steep as what I remember from Bright Angel.
I'll have some more photos of what I saw once I got to the bottom. It was truly beautiful.

Wednesday, February 16, 2011

Groove Is In The Heart

I tell ya what..! between getting to fall back into my clay work and the sculpture and workin' with hot metal and this gorgeous span of weather we've been havin', my mojo is workin' overtime!!! My juju is jumpin'!! I got it goin' on, I'm tellin' you. Ha!! Well, I think the gate project has been rather successful anyway. I can't wait to show ya'll but you're going to have to wait until they are installed to see the whole project. Just snippets 'til then! I am basically finished with them except for cleaning and spraying them with a sealer. Oh, and I have to weld the hinges on but that shouldn't take long.. This is a 2-piece gate and each section probably weighs 80 pounds each, so the posts to hold it need to be substantial.
I did have to go buy some more expanded steel, so that broke my plan to make them entirely out of scrap. I just didn't have as much of the grating that I thought I did and couldn't come up with anything else that would work. The gates need to be solid for the most part to keep rabbits and such from slipping through and making a feast of my garden. By having to buy more steel though, I discovered a local steel supply that I never knew existed and wow, what a great help this is. I had been driving to Birmingham up until now but these people are just down the road and are very nice. I talked to them for a while and they said they gladly sell their drop or whatever I would need. Score!!

I am very excited to have these things done and my garden on it's way to being a real decent project. To me, if the area looks neat and well-kept it is better incentive to get out there and weed and plant things. Of course, if I continue to work at home I think I will have plenty of incentive for the garden. At least I won't be so wore out at the end of the day I don't feel like dragging myself out there.


Tuesday, February 15, 2011

Let Me Ask Ya'll Something

Hey, I got a question for you all now; well two questions actually! This is for anybody who may raise beef to sell to individuals or any individual who has recently bought a whole or side of beef from an independent farmer. What is beef going for, per pound, these days in this situation? A neighbor of my Mom's recently gave me a price per pound by hanging weight and I am trying to determine if this is a good deal or not.
Also, for those who might own some acreage; what is a decent charge for someone storing hay on your property? This hay takes up probably 1-1 1/2 acres.
Thanks so much if anybody has any idea on these questions. I know prices can vary quite a bit around the country but maybe this can give me some idea.