So I promised to show ya'll a few photos of some actual work I have done around here. I was never really enthused about the idea of painting this bar wall, so when it hit me to sheath it in pallet wood I jumped on that. Allen had been scrounging pallets for me for months and I had stripped a lot of them down to usable wood where they were just waiting for finishing. So, I finally bit the bullet and sanded, stained, painted, sanded again, and patched for two days to get enough planks to do these 2 walls. I didn't make a lot of effort to hide any patches, dents, or bangs in the wood. I mean, it's obviously pallet wood and obviously reclaimed, so there's the "charm". Ha! Anyway, I thought it came out rather well. The corners are done in 1 1/2" angle iron and these make helluva good corner guards.. The iron is just stuck on for now because I'll have to take it back off and cut to fit when I run the finish floor and baseboard. In person it looks better. The color is a bit washed out in this photo because, due to low light in the warm months in my house, I have a devil of a time getting decent photos. I often have to use a flash and it just doesn't look right.
This photo is a little better but it's a little washed out too. Anyways....I finished this counter top and back splash and wanted to run a little of the glass tile just to see how that was going to look. I'm very pleased with this but please note; the tile has not been grouted yet, so it will look a little different when finished. This gives me a lot of motivation to keep going. I'm very anxious to get the kitchen finished because I think it's really going to be awesome.
However, I had to take a break from all that and take advantage of the fact we are in an extended drought. I have needed to fix this basement wall for years after I discovered just how much rain floods down the mountainside during the winter rains. If the rest of the house were built this area would remain dry but.....we all know that has not happened yet so....I have to treat this as if it is forever an exterior wall. Which meant chopping the bottom 2 feet off of the wood framing, forming a 4 inch thick wall and pouring it in concrete. Here you can see the girls inspecting my forms. It came out real well. I even played around and did a faux board formed look on the outside. This 11 foot section is a little less than half of what I need to pour but it's the worst part of the problem. I admit I should have done this to begin with..but I did not realize the amount of water etc. around here. And I was under the supreme delusion that the rest of the house would come along soon enough. Ha!!
Anyways, this form has been dropped, the wall sheathed back, and also insulated and covered on the inside. Snug as a bug! I'm now running multiple shelves on the inside in an effort to better organize the basement and my studio there. I'll rub the exterior of the concrete here, below grade, to produce a smoother finish, then waterproof heavily and backfill. There is still no sign of any rain anywhere in our near future so I shouldn't have any issues finishing this in the dry.
I also thought I'd take advantage of the drought in other ways! We have ample dried foliage, leaves, flowers, grass and any things else you can think of here, so I gathered up a armful of stuff, a couple handfuls of feathers via some molting chickens and threw together this autumnal wreath. Not too shabby I guess. Certainly was cost effective. haha!
Showing posts with label moisture protection. Show all posts
Wednesday, October 26, 2016
Thursday, April 10, 2014
Going With the Flow Again
Right after my recent "water" post we had some very heavy storms come through our area that dumped a tremendous amount of rain on us. This isn't all that unusual actually, we normally get heavy rains once a year, but if I remember correctly, they usually come in January or February. But, it's probably not that far out of the normal realm for them to come in March or April either. I've shown ya'll the photos in previous years of the large amounts of resulting water that flow through my valley, so this isn't really anything new. What I did want to mention though, is what I've been working on over the years to accommodate these yearly occurrences. I think if you are going to buy land, even if it's not really rural or undeveloped, it's always a good idea to observe the place in times of heavy rains, if possible, before you make your purchase. Not that it may deter you from buying the place, though it might; but it will just give you a good idea of what to expect in the future. Now, I had been around this land before I actually started building the house and I did take into consideration the proximity to the creek, the water dynamics of a valley etc. but I really didn't get a good idea of things until I started clearing land. Trees, forest undergrowth and all that greatly reduce the speed and volume of flowing water and when you clear that...well, it can become ferocious in some cases.
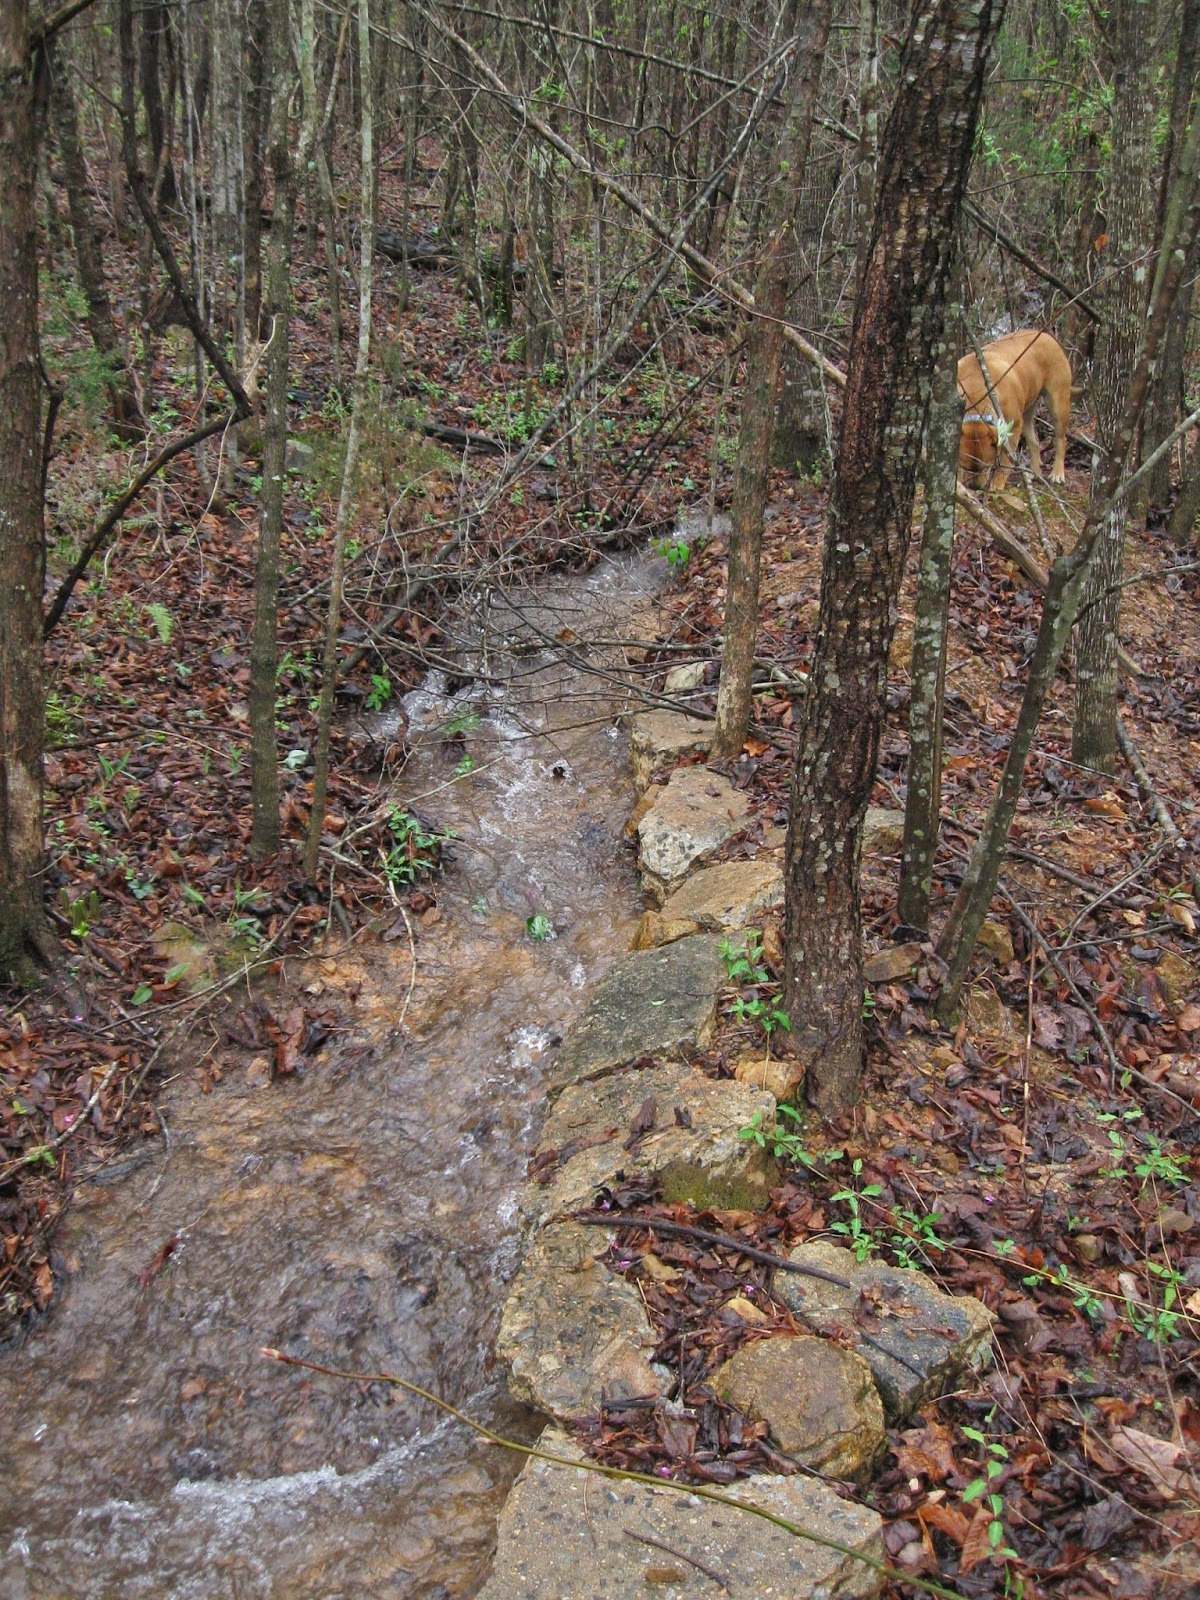
So, basically, I kinda let the water do what it wanted to at first, just to get an idea of where it naturally wanted to flow. Sort of like letting footpaths form before you pour your sidewalks. You want the under structure to actually be in the right spot when it becomes permanent. We tried to locate all the culverts in naturally low lying swales and I further enhanced these swales by digging the stream beds out even more.
In the photo above, this culvert has become just a little clogged but it didn't take much to undo it and that sped the drainage up immensely.
This is the other side of that same culvert. Some strategically placed boulders help prevent erosion and protect the tops of the culverts from machinery and I also planted very hardy iris and such that don't mind having their feet wet or even standing in water at times. These are very tough plants too that can stand up to the flow of water and also help with erosion control. I plan on transferring a good many more to both sides of this area, so it's still a work in progress. I would also like to eventually line these stream beds with some nice heavy gravel because for most of the year they are dry and that would like nice.
The same stream as it dumps off down the hill and flows to the creek.
The creek got quite high, out of it's banks and even crossed the driveway in a couple of spots but had receded by the time we were really out and about. There's always lots of clean up to do after flooding like this. Various things wash down the creek and get stuck the trees and all. Sometimes we find some cool stuff and other times...well, not so cool, just trash. It also washed every single bit of my mulch away that I had placed around my creekside plantings, so I get to redo all of that.
Ya'll know I like to build most anything and I especially enjoy building with stone, like all these walls. They serve a lot more than just for beauty's sake though. All these stone walls act as terraces and help to break up that flow of water. One reason I added this stone wall and got rid of the logs was that I could build the stone higher, and it just looked better. With the logs the water was still washing too much soil in this area but by bringing this wall up about 6 inches or so it has helped the washing tremendously.
You can vaguely see how the water flows towards this area. My garden is just across the drive from this bed also and, as it is on sloping land (like everything else around here), this planting bed helps break that flow before it hits my garden. I used to have a bit of trouble with ruts washing in the garden but no more! With this and the addition of small retaining walls at the lower end of the garden, we have an almost level gardening area now. And it looks nice!
The most unexpected and worse trouble I had was from the flow down one of the valleys right towards the house. If the rest of the house was built that would block this flow, but it's not and I had to do something else. Some of ya'll may remember that I used to get free equipment usage from my old construction company and that was absolutely a Godsend. At one point when I had a Bobcat I used it to build this dam that you see Chigger sitting on. You can tell it's new because the redness of the dirt still shows. I don't know that I would have ever been able to do this by hand with a wheelbarrow. As it was with the Bobcat, it took me most of a day but it helped tremendously. 90% of the water is now diverted out across the yard.
We lined the dam with stone and broken concrete to avoid erosion here.
I also get many people asking me about whether or not I collect rainwater; you know, every good tree-hugger collects water! Well, no I don't. Not yet anyway. See, the way I look at it, my whole plumbing system is essentially a rain water collection system. I just let mine collect in the ground rather than big barrels. Yes, I do have to pump it to the house but that doesn't actually take much and after we finish using it, it is returned to the ground. Honestly, when I was trying to get this house blacked in and livable, collecting rainwater just wasn't that high a priority because I knew I would need a more reliable way to water the house. However, now that things are further along, I have thought about and will probably at some point put in a collection system for the chicken coop and garden area. I am in no way opposed to such a thing and it would be nice to have water there without having to use a little power.
All of this is just a system that you tweak as you go along, seeing what works better in some cases or not at all in others. It's a very organic way of building to me, where you let the land point out what to do next and then use your imagination to make your own.
Monday, July 23, 2012
Loose Ends
We interrupt this regularly scheduled financial posting to show something actually being accomplished on the completion of the house!!! Yay!! I thought I had shown this picture in the last post but I had not. These are the tiles I have been making to cover and protect the ends of the exposed rafter tails on the south side.
And I installed a number of them today!! Now, some may say, that's about as worthless as teats on a boar-hog but you know what? I like 'em. And that's all that matters. It actually looks better in person because the tiles line up with the dark underside of the roof ridges above them and it creates a nice rhythm. They all fit pretty well too. Accounting for how much clay is going to ultimately shrink can sometimes be a pain but I've about got it down. The ends of the rafters had been sealed well and then I applied a mastic over the whole end and screwed the tile to it. The screws will hold until the mastic sets. This should keep the tails from absorbing much moisture through the cut ends and protect the ends from the harshness of the sun, since these are on the south side. I did miscount somehow and lack 4 to complete the clerestory rafters. That is easily remedied and will just have to fire one more time to get them done. So, as soon as these are done I will be completely through with the upper clerestory and can take down all the ladders and pick boards. It's waaay overdue.
Wednesday, January 05, 2011
All Together Now
After establishing the correct elevation for the top of the plyform on one end, I drilled through the plywood, with a hammer drill, into either a concrete filled cell or into the solid wall of the block, as you can see in these photos. With one end of the form set at the correct height, I simply used a 4' level to get the rest of the form correct or you could pull a string line. The top of your block is not going to be correct all the way, so you don't want to just measure up off that.
After you screed it off, smooth the surface with a hand float just enough to seal the holes and lay it down smooth. Then leave it alone!! Let the water come to the top but do not work it back in! you will see when the surface starts tightening up. The water will start disappearing. Go over it once more with the float to smooth it further and then let sit again. You can either broom it or go over it with a trowel to get a slicker finish but this takes much practice.
I don't really make New Year's resolutions but one thing I really want to work on here is more organization and storage. Getting the basement in proper order is a big accomplishment and I think will help me greatly. It's especially important now because Jack has brought a number of his tools and such and I want to make room for his stuff and have him feel comfortable. Many people have commented that my house was not built for two people but I think I can make it work. We do need a separate workshop but that's a whole 'nuther project!!
Labels:
block work,
concrete,
fasteners,
formwork,
how-to,
moisture protection
Tuesday, January 19, 2010
Smooth
Now, your finish is only going to look as good as the tools you use, so buy a decent brush! A Purdy or similar and make sure it is for the type of finish you are applying. Not all paint brushes are for paint! Some are only for varnish or oil-based stuff etc. It will say plainly on the cover what that brush is for and yes, you should only buy brushes that come in the cardboard covers unless it is just for some real messy something that you are not going to see later.
Sand your piece well and the last pass should be with a fine paper like a 200 grit. Then, go over the piece well with a tack cloth, or at least a lightly damp cloth, to remove the dust. Make sure it's as clean as you can get it.
Apply one coat (not too thickly) and make sure you don't have any runs. Now, after this dries and you run your hand over the piece, it's going to feel rough but that's okay. Sand it again with the 200 grit and clean with the tack cloth. Apply a second coat of finish. When that dries you can feel it and decide if you want it smoother. The more you sand and reapply the finish, the slicker the piece will get.
I also put the last finish coat on the drawer and skirt, so I should install them tomorrow. I'll post pics when I get that finished.
*Santana
Labels:
bathroom,
how-to,
moisture protection,
painting,
woodwork
Wednesday, January 13, 2010
Proving Ground
So, this is how to install a proper French drain. And I don't give a flying shit what some residential contractor said, this is the way you do it and have it work.
When you get your footing and wall waterproofed (with an actual membrane, not just some paint on crap) lay your 4" perforated drain pipe down along the wall. Now, I put down a layer of landscape fabric between the pipe and the ground because the dirt was a little close and I couldn't get a full 1 foot of gravel all the way around the pipe.
So, I'm in a little better mood now. Halfway through writing this post one of the guys called and I cried on his shoulder (so to speak) for a while. Everybody is all up in the air 'cause we have heard of a job starting in Birmingham.
*Widespread Panic
Tuesday, January 12, 2010
Thank U
Thanks for all of ya'lls input! I will be going with the 5" header trim and Mouse got to rub it in a little that he was right. That's okay though! I'm always open to suggestions. And I appreciate all the other suggestions and ideas that you all commented on.
So, I'll be changing that piece of trim out soon but first, a little diversion. Since I have this Bobcat at my disposal, I need to get on with the work that I got it up here for, in case they come to get the machine before too long. I had to go into town today and buy a little more waterproofing membrane to finish the foundation/ retaining wall, so that I can finish backfilling and grading. After that is done, I will have a much better surface to work off to finish the siding on the west and south sides of the house. I have already installed the drain and gravel and will be able to start filling with topsoil tomorrow. Yea! But don't worry; I have taken photos of the whole process so you will be able to see what I did. I just wanted to have the whole process done and photographed before I started to show you. Anyway, it was a rough ordeal as you can see from this one photo below...
Every time I get into one of these bigger projects, even if I make good progress, I always get a little overwhelmed. I'm not sure why. I guess it reminds me that I still have many more, just as big projects to finish. But things are going well. I just have to keep pressing on and not think about things too much.
*Alanis Morissette
Labels:
being goofy,
foundation,
moisture protection,
shouts
Tuesday, December 01, 2009
Why
Obviously, the louver boards are slanted downward to shed water, although I think rain will only reach this one on rare occasions. Also, any exterior finish I put up is primed all over before installation. Any trim, siding, anything like that gets one good all-over coat of paint and so you may have noticed that this louver was primed all around, inside and out, even though the inside won't show. Some may consider this overkill but I think it's a good safe guard. Moisture problems are one of the major repairs done on houses and so I go the extra mile on trying to avoid this in the future.
I went with spruce on the trim for a couple of reasons, mainly I was afraid I would not have enough of the cypress that I am trimming out the rest of the house in, so I chose to conserve that material. I should have thought about this and made sure I had enough cypress but I made a mistake. I didn't want to use pressure treated, like the louver itself, because it has a tendency to shrink and I don't want the trim to develop cracks in the joints if I can help it. Spruce (or fir) is a good straight, clear wood and I think it will hold up fine, especially being painted.
*Annie Lennox
Sunday, November 29, 2009
Hot Corner
Oh, here Allen is nailing on a little support piece on the back (inside) of the vent. This will hold the louvers straight and keep the longer ones from eventually sagging in the middle.
*B-52's
Wednesday, August 26, 2009
Down Under
I know a lot of people would think, well, if that stuff is so sticky, why paint on the goo too? Well, the membrane must be applied to a treated surface. No matter how well you clean concrete, it's always going to have some dust or film on it that would interfere with the membrane sticking.
Now, waterproofing is the nastiest stuff you will deal with. Wear the worst clothes you have with the expectation that you will throw them away when you are done. I don't care how careful you are or try to be, how much you watch what you are doing, the waterproofing will get all over you. You remember in the first season or so of the Star Trek; New Generation series when Picard and the crew got stranded on that planet with the tar pit-looking monster? Okay, that tar pit monster was waterproofing. Yeah, you think I'm joking. This crap waits for you to turn your back and then it jumps on you. Everything will be fine and then suddenly...it's on your arm! or in your hair! Beware of it.
Of course, gasoline will take it off but so will WD-40 or similar and then you can just wash that off with soap and water. The roller and paint brushes you might use though are trash, so buy disposable.
*Men At Work
Tuesday, August 25, 2009
Move It
Now, a lot of people will tell you that you don't need to use this and that white paint on stuff works fine etc, and there are a lot of people out there with leaky basements too. In all of my experience with construction, and we bury a lot of concrete, this method is the only one that truly works over the long term. And I assure you, I don't want to be digging this footing out again when I'm seventy. It may seem like overkill to some but you do it right the first time, you know. 'Course, if I had really had a brain I would have put a keyway in the footing and inserted the bentonite coils where the wall joins the footing. But I didn't think of that back then.
After I get all of the membrane applied, I will install a French drain down at the footing level and backfill a couple of feet with stone and then cover that with dirt.
I also painted some more on the north side of the house and am close to being ready to move the scaffolding down to the other half and be done with that side! Yea!!!! Hopefully, the rain will hold off for another couple of days.
*Cliff Richards
Labels:
electrical,
foundation,
house,
how-to,
moisture protection
Monday, October 22, 2007
Hey, Crow Doesn't Taste Too Bad!
You know when you rant and rant about something it's going to come back and bite you in the butt. If it's a free bite in the butt though it's easier to take though! Most of ya'll know that I dislike Pella windows because they have a tendency to rot, in my opinion. I even inadvertently attracted the attention of Pella Corp. with my rants here on their product. Well, anyway, I was offered 10 free Pella windows by a dear friend who didn't need them so...... beggars can't be choosers, I guess. They look great and I really, really appreciate the gift. I don't want it to sound like I just took them and didn't really want them, I just need to take some extra steps to assure that they stay dry in their setting. So, this weekend, we set the windows which helps in closing in the underside of the house. This is very important now as winter is approaching and I have bare water pipes under there and an uninsulated floor. We used 3/4" plywood to create a backing for the windows (spaces where cut out in the plywood so that you can see through the windows) and this works to suspend the window in the space above the concrete block so that I can lay the stone around the windows without hindrance. And I can lay the stone at my leisure and the space is still closed in. That stone work is going to take some time and I would have never been able to get it all done before winter with all the other work on me.
Here is a little better view of what we have done. You can see the stone work approaching from the far side. The stone lays out flush with the front of the block work so the windows will be recessed into the stone about 3 inches. I will wrap the outside of the windows where you see the bare wood, with a rubber membrane to keep the moisture out. It's the same stuff we used in the window sills before we set the windows upstairs. This is some cool new plywood too. Well, I don't know how new a product it is but this is the first time Allen and I had seen it. It's called Dryply. It's apparently just CDX with one side embedded with a water repellent. Looks like good stuff. Could have really used that when we put the sub floor down. It's tongue and groove stuff too.
So, this is the "basement" now. My pottery studio will go down here and some storage. This area you see here is where the washer and dryer will go for now. We need to continue that wood frame wall on the right a little more and put up a door and it will be dried in then.I was finally able to order the tile for the shower and it is on it's way! YEA!!! I have a feeling I will be down there installing that stuff at night to get a little further along. We are working so much that I now only have Sunday to work on the house. I'm making lots of money to buy stuff for the house but no time to put it up. I'm not complaining though. It is funny though that not too long ago when I was laid off, I had lots of time for the house but no money. Ain't that just the way things go?
Labels:
foundation,
how-to,
moisture protection,
salvage,
stonework,
studio/basement,
windows
Sunday, September 09, 2007
Second Time Around
OK! We are set up to pour again Monday morning about 10:30 a.m. so keep your fingers crossed for me. I wish we could have gotten mud earlier but that was the best we could do; I just hope we have enough daylight to get a good slick finish on the slab. I could not arrange a finisher either so looks like me and Allen are going to be pulling double duty. I told him if he would run the troweling machine, I would be the one to get down on my knees and do the hand work. I was able to get everything back together and ready on Saturday so I had Sunday free to work on the inside. I mucked out all the soft stuff and put the plastic sheeting back down. You need to do this anytime you have a slab that is going to be in an enclosed area or you will have moisture wick it's way up through the slab and make the concrete sweat. That causes all kinds of problems. Always use at least 6 mil poly too for this. My rebar is laid out on a 2'x2' grid; all #4 bars. You could use that welded wire that has the 6"x6" grid but I had salvaged this rebar; it's easy to come by. You must put something in your slab though. What most people don't realize is that concrete is going to crack. I don't care what people tell you; it's going to crack and if there is not some kind of reinforcing in the slab, pieces can begin to float up or down and then you've got a mess.
This is the western edge of the slab that will one day (when the other half of the house is built) have a door here. There will be a block wall laid on this edge and since I don't have a footing for that, pouring this edge thick will take care of that. That is a 6" edge form there made of 2x4's ( the slab itself is 4") and we dug out from that form about 8-10" to form a horizontal flat area that slopes up to the normal 4". There are steel drive pins about every 4' behind the edge form to hold in but so much dirt washed behind it also, that thing ain't going anywhere.
We determined the top grade of the slab by measuring down off the bottom of the floor joints. The house is level (yea!) so this should give us a consistent measurement. We drove these rebar pins (at grade) about every 10 feet to give us something to screed to on the dirt bank side. On the concrete block side we just popped a chalk line.
I had to scrap in the rebar since it obviously was not made to order, so that means lots of filling in places and laps. Lap your rebar at least 16". I saved all of the drop from when Charles laid the concrete block and made all those cuts and that is what I am going to use to chair the rebar up with. Works great. Rocks work great too if you don't have anything else. The rebar should sit about in the center of the slab. It's best to leave the rebar laying on the ground and just have the little blocks nearby so you can roll a wheelbarrow over the steel, if you are going to have to do that and I think we will have to wheel just a little of this. The slab is just about 13'x 36' and 4" thick so that's about 5.75 yards of concrete. Hmmm, Allen said he just ordered 5 yards. Going to have to see what size he figured. Do you know how to figure concrete? It's not hard but you have to know how to convert inches to decimals for the slab thickness. Anyway, 5 yards is a piece of cake. The biggest pour I was ever on was only 700 yards. That's 70 full concrete trucks minimum. We worked 16 hours straight that day. Allen has poured upwards of 1,200 yards at one time, I think, when he worked on a cement factory.There is something always kind of exciting about pouring concrete. On days of a big pour, most of the guys are always in a good, festive mood. I'm not sure why. It's almost like the same kind of excitement I feel when I am firing a big load of pottery. I think it's because you have spent all this time building these forms ( like giant molds) which can sometimes take weeks, and when you pour it's like you are casting your piece of art. We sometimes even have a special lunch or something if a big pour comes off well.
I'll try to have photos soon of the finished slab.
Subscribe to:
Posts (Atom)