Showing posts with label roof system. Show all posts

Monday, September 10, 2012

What Goes Up Must Come Down


Look at this picture of my roof!!  See??  It's just my roof.....and nothing on it!  No scaffolding, no pickboard, no ladders!!  YEA!!!  Well, there is some dirt I need to wash off but other than that...  I'm very stoked about that.  Well, not washing dirt off but you know, nothing on the roof because I'm finished there!


I also made a concerted effort to finally close up the clerestory wall bottom and I got'er done! Did that today.  It looks 100% better.  I still have a little caulking and touch up to do but it's done basically.  WHOOP!


I also got this length of wall completely closed up and ready for cabinets to be set!  Yea me!  I will wait to start setting tile until after the cabinets are in and I know what kinda spaces I'm going to have.
Tomorrow I think I will start on the opposite kitchen wall and touching up drywall and caulking to get ready to paint.  And hang more metal wall covering.  I got one piece painted today but not hung.  That stuff is kinda tedious the way I have to do it.  So, things are finally rolling along here.  Have ya'll finished any projects lately?  Or started anything?

Monday, May 16, 2011

Eight Easy Steps

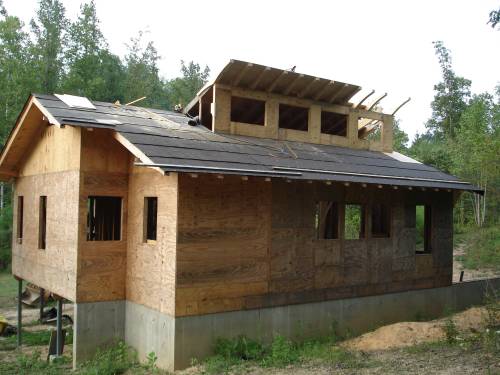
I know I have shown ya'll some of this framing before but I wanted to go back and do a little more detailed account of how we built the chicken coop, partially because I think my chronicling of it kinda meandered off course towards the end.
Of course, the first steps were to form and pour the floor, which I did show pretty well, and then lay the block. I laid one row of block because I wanted my wood framing elevated above grade to avoid rot and termites and to make washing out the coop easier. Now, if ya'll recall, I poured the slab on a 1/4" per foot slope, to facilitate water running off when cleaning. So, since I laid my block evenly on the slab, not accounting for this slope, they are out of level too. I could have just left it this way but that's 2" over 8 feet and that would have made my framing pretty dang wonky. So...since I was going to fill the block anyway, to accommodate anchor bolts, I simply formed a little top of the blocks that brought everything back up to level. You can see this in one of the following photos.
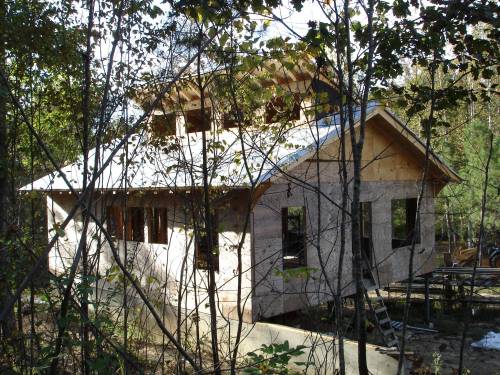
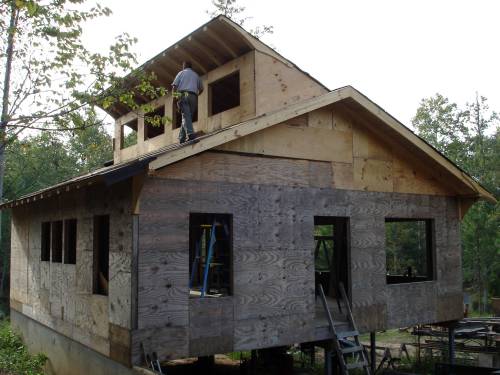
In the above photo you can see the I framed and stood the wall on the left first. This is the wall shared with the tool shed. I then mostly framed the front wall and stood it. I waited to frame in the window and door because I wasn't real sure what height I wanted these things at and it was easier for me to judge with the wall standing. Plus, it's easy to throw in that framing once you have basically, your wall outline. If you look closely you can see that we did use reclaimed lumber where possible.


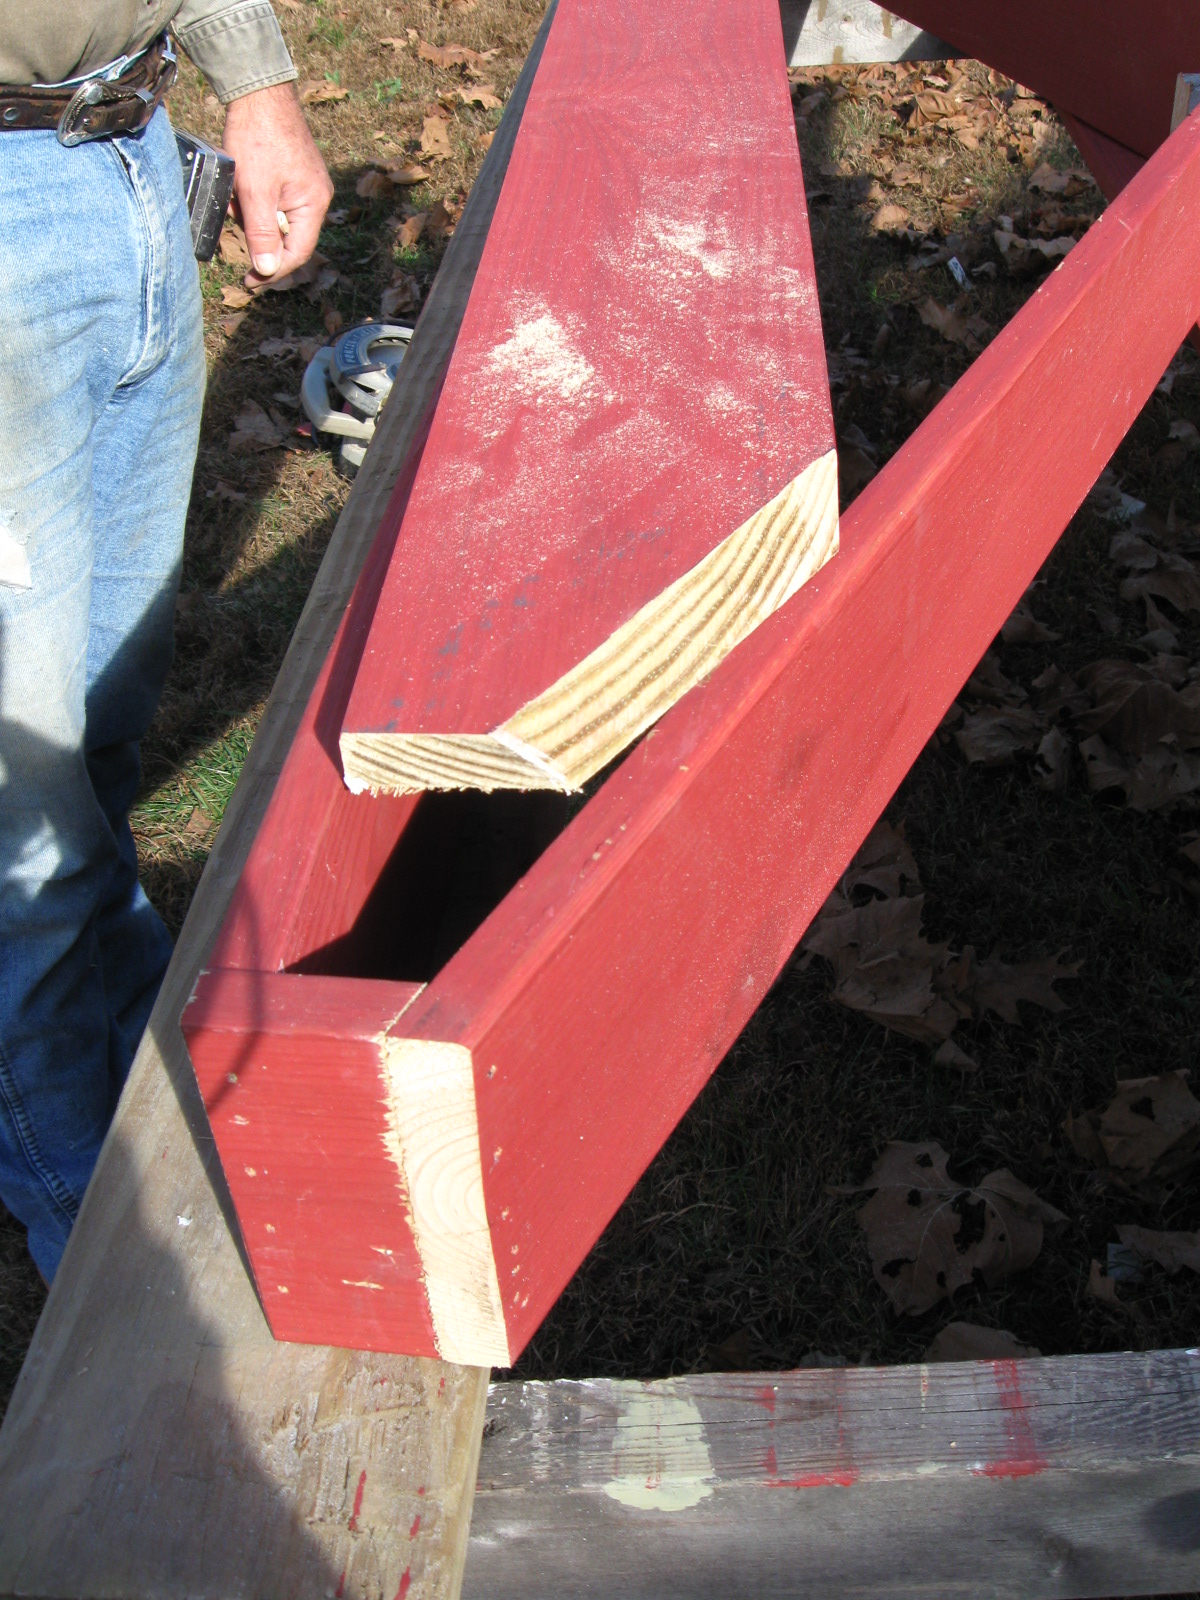
Here you can see the anchor bolts that were set into the cells of the block as I filled them with Sackcrete. I used 1/2" x 5" bolts and they have the little crook on the end to keep the bolts from pulling out. I laid out their location before pouring to make sure they were not going to coincide with a stud location and I think I put about 3 per side. You don't need many; just about one every 4 or 5 feet and I put one about 16" out of each corner. Most of the walls are framed laying on the ground as this lets you nail your studs through the bottom plate, rather than toenailing, which is not as strong. The bottom plate, or rat seal as we call it, is then drilled to accept the anchor bolts, the wall stood up and set down over the bolts. I pop a chalk line on my concrete also and worm the wall to the line as I tighten down the bolts.

Now, if you click on this picture to enlarge it you can see at the base of this closest wall, where I leveled out the top of the blocks with additional concrete. If I were a real concrete finisher I could have formed the slab level and then just finished the interior of the slab on a slope, leaving the edges level where the block would go. But..I'm not a real good finisher.
So, after framing this front wall, which faces south by the way, I then framed the back wall. Since this structure will have a shed roof it was easier to frame the two straight walls and then connect the two with the one sloped.

Now, this wall I framed in place. I had the two walls on each side to determine my slope and I knew I wanted somewhere around a 2/12 slope or so. It's actually not a dead on 2/12 because I just used the drop off the 12 foot 2x4's to frame the lowest wall after I had cut off what I needed to frame the front wall. This way I used every bit of the 12 footers, rather than have a bunch of little drop and waste money. I mean, you can always find uses for short 2x4's but I like to use every bit I can in the original framing. The building is also 8' x 12' because plywood comes in 4' x 8' sheets and I didn't want any drop from that either. Of course, I did have some because the building is less than 8 feet tall, but that waste went towards nesting boxes etc.
Anyway, to frame this wall I just set in my bottom plate, which are all pressure treated since they contact masonry, and then figured the slope for my top plate, cut it and nailed it in place. After laying out my studs on the bottom plate, I then took my 6' foot level and transferred those marks to the top plate. This allowed me to accurately measure the length of each stud.

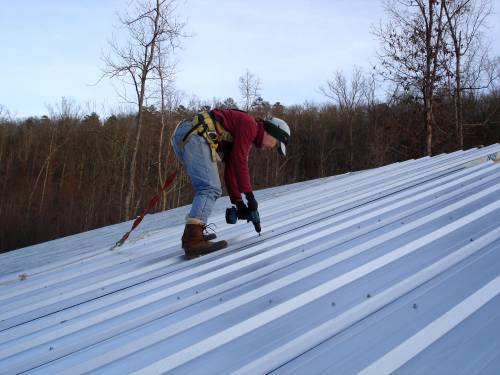
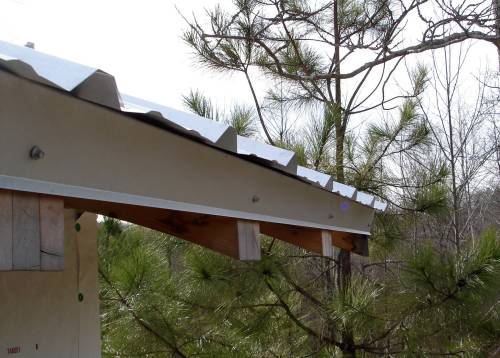
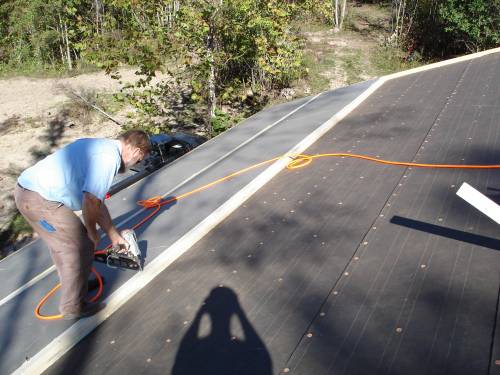
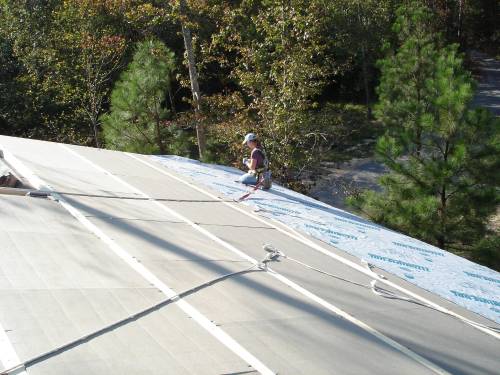
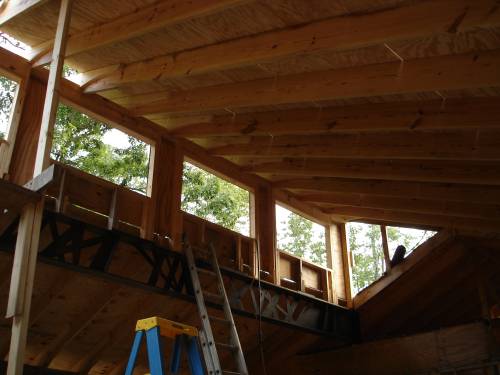
Which I then cut on the correct pitch and nailed in place. Easypeasy! And yes, I always mark the side of the line I want to set my stud on with an 'X' like that. You would be surprised how easy it is to get mixed up on that. Before I did my studs though, I laid out where I wanted the little window to go to make sure I wasn't putting a whole stud in the way. After framing all the walls I then ran my double top plate to tie the walls together. One note I forgot to mention earlier; I don't mind having such a low slope on this roof because it will get metal roofing to finish it. It's generally not a good idea to use shingles on any roof that is a 3/12 or less. In fact, you will void your warranty on most shingles if you do this. Metal roofing or roll roofing is the only stuff designed for flatter roofs. That I know of anyway.

Now, a lot of people would look at this coop and think, that's a hell of a lot of trouble (and expense) to go through for some chickens. Well, this is just my way of doing things. See, as I build and finish each structure I don't want to ever have to go back and lay my hand on that building again, aside from regular maintenance. I've got way too much to do around here to be continually repairing other structures and as I get older I sure don't want to be out there when I'm damn 75 trying to fix the roof. Do it right the first time because if you don't, all you're doing is just barely keeping your head above water with the continual repair. I watched my father half-ass everything his whole life and I can honestly say very little of anything he built is still standing. And I realize not everyone, especially nowadays, has the funds to buy all new material but you can still build a structurally sound building with reclaimed or used material. Even completely unconventional building materials.
So, I will finish up this project in the next post. There were a few more little things I wanted to discuss.

Sunday, November 29, 2009

Hot Corner

I finally got Allen to come down and help me build the attic vent louver for the west end gable. Well, I guess I should say, to just build it; I didn't really do anything other than buy the lumber and stain it. These things are extremely confusing because the miter cuts can be kinda complex and he has built many over the years, whereas I've built none! Here, he is nailing together the outer frame of it.
This is an example of one of the compound miter cuts for the louver boards that go inside the frame. The angle of my roof is such that it makes the rake of the cut too long to be able to be cut on a miter saw, so these must be hand cut with a circular saw.
Here, he has a couple of the louver boards in place. I think the boards ended up being about 2 1/2 " on center apart. He normally builds them about 3" apart but that didn't quite work out with this roof pitch. Now, most people just buy the pre-made gable vents but ya'll know me....as Rurality said recently, I can't do anything the easy way apparently. I've had several people say that to me actually. It's not that I want 'hard', I just don't want 'cheap', as in cheaply made.
Now, Allen suggest that these vents always be made of cedar or cypress or pressure treated lumber; something that resists rot because they can have a lot of moist air passing through them, especially here in the south. Attics can get very hot and humid at times. My attic is so small and this vent is large enough, I don't think mine will ever heat up much but I went with pressure treated lumber anyway. And yes, I meant to stain it that red color. Some people are put off by the red accents on the house but I like them! Ya'll will see more what I'm talking about when I show the west end after it has been fully painted.
Oh, here Allen is nailing on a little support piece on the back (inside) of the vent. This will hold the louvers straight and keep the longer ones from eventually sagging in the middle.
So, this is the finished vent. Well, not quite; it needs another coat of paint to cover that caulking and such. We got it installed too but ran out of sunlight before we could get it trimmed, but should be able to finish that tomorrow and I'll show the finished product in place.

*B-52's

Saturday, April 28, 2007

Back Up On The Roof

The roof is done!! We finally got through the bad weather and got all the ladders and pick boards freed up and everything set back up outside and finished the roof and all the trim and flashing. What a pain in the butt. Early when we started back on it, the pollen had just started to fall in a big way and that roof was slicker than owl grease. It was very difficult to get around on but it rained the other day (yea!) and washed all that off so working today was fine. You may not see much difference in the roof but all that right on the edge has previously not been there. It was just this ragged looking edge for a long time.
This is a close-up shot of the trim that goes on the gable ends. Allen had this made special because the standard pieces they gave us were a lot bigger and really looked goofy. They stuck further out and we wanted something that had a more streamlined look. It's still kinda big but it looks good in place. You can see, it caps over that last rib on the decking and is screwed tight against the verge rafter.

The trim is run on the sides and then the ridge cap is installed over them. It makes a nice smooth look there. You can cut the ridge cap off wherever you want and we thought it looked better sticking out past the trim about a half inch. This is the little tiny short piece over on the east side of the house. This little area will eventually disappear and be integrated into the rest of the roof when the other half of the house is built.


This is the flashing under the clerestory windows. All of this is fairly easy to install; not rocket science. Flashing under shingle roofs always seems more complicated to me. But this is a pretty simple roof; no valleys or other weird stuff. Well, the clerestory section is a little weird but not too much. You just have to make sure on your flashing that everything is layered. Note the flashing up under the Tyvek and the siding will, of course, extend down over all of this to that inside corner in the flashing.
We also hung some more Sheetrock today and did some cleanup. I'm glad the roof is over because it takes so long moving all that scaffolding etc. around. I think that part of getting set up took almost half of the time. Well, any high work on this house takes a long time to set up for. The siding will be the same way and painting.
One other thing about this roof, it is MUCH cooler to work on than a standard shingle roof so I think it is really doing it's job of reflecting heat. Now, granted, it's not August but you could place your bare hands on the metal with no problem and I know of times that I have actually blistered my butt sitting (with blue jeans on) on a shingle roof in the springtime.

Saturday, March 31, 2007

Blood, Sweat and Tears

OK, so that is a title of a band and not a song but still in the same general theme. I don't know, maybe it is a song too. Anyway, my computer is wanting to be ugly to me right now and not let me download new photos so I am having to depend on photos I just happen to already have in the computer. These are a little old but hopefully I will have things straightened out soon. We are almost done with the roof. Just putting on the final trim and flashing. My finger, a nail and my hammer all met in the wrong combination here and that's where the blood is from. Metal roofs are a little aggravating to work on as they can be very slippery and trying to hold a bunch of stuff and keep from sliding around can be difficult at times. I did start to name this post "Things We Said Today" but what I said after I did this probably would not be good material to put up. I have been told by other construction workers that I have a dirty mouth. I have tried to curb that habit as much as I can. It aggravated me more that I was dripping blood all over my new roof than anything else.
The ridge cap was easy to put on but I need to find something to stuff under those open areas between the ribs to keep bugs and wasps etc. from getting up there and nesting. They make a Styrofoam weatherstripping that is made in that configuration but it is solid and does not allow for ventilation. Because of the way my roof is insulated, with the Iso board immediately under the roofing, the ribs serve as vents and I don't want to clog them up. I need a porous material that will allow air to pass through but not holey enough to let bugs etc. Make sense? We thought of something like Brillo pads (the plastic ones) but I'm not sure. Any ideas?
I'm getting down to picking colors and stuff like that. We are just about ready to close up all the walls and the block and stone wall under the house should start soon. My septic system was approved and I am getting bids on that now. I think I stated before that Alabama has recently passed a law that homeowners can no longer install their own. That sucks but in a way it's nice that I will not have to do that. Maybe I will have some photos soon of the tiles going in the bath and stuff. I'm still arguing with the BFA over that but I think budget will win that one.


Tuesday, March 20, 2007

Let's Go Get Stoned

Some of you may remember that title from an old Ray Charles song. I think that I have become obsessed with rocks lately. I look for them everywhere; I'm constantly searching for just the right rocks for my wall. I have plenty on my land but I want more...lots more. I have a huge pile that I have collected so far but I am fearful that it will not be enough. So, I am always dragging more home, digging around to unearth what I think might be a prize rock! Allen keeps hoping that I dig up a gold nugget about the size of a watermelon ( and I do too) but nothing like that so far. I have even been given rocks as gifts from those who know about my obsession. Some of them are pretty cool looking and I plan to lay them in a prominent location in the walls I'm going to build.
The roof is getting very close to completely finished now that the weather is cooperating some. We installed the ridge cap and some of the flashing under the clerestory windows etc. Then we ran out of screws so Allen ordered some more and decided to swap the edge trim we had for some with a lower profile he thought would look nicer. So, when that comes in, which should be this Thursday, we can complete the roof. We have finished stubbing out all the interior plumbing and so have been able to close up the bathroom walls. Allen got a water heater from the power company and we need to install that this weekend. Hopefully it will not operate a lot after I get my solar water system installed but it is needed now and will be a good storage tank later. Lots more to tell you about the next chance I get. I have been transferred to another job and we are doing concrete form work so I am pretty tired when I get home. This job is a little closer to the house though so I only have to get up at 4:15 a.m. now. Bleeh!

Thursday, February 15, 2007

For You

The BFA (big, fancy architect) has been complaining that I put too many pictures up of details and not enough shots of the whole house, so here it is! He has relented on the roof a little, but not much. This is as far as we got on the roof this past weekend; just lack that little bit on the far right end. Those few rafters you see extending on out from the roof are the beginnings of a covered walkway. It looks kind of funny now and will until the rest of the house is built. When I build the other half of the house, this walkway will extend another 12 feet and deadend into the side of the house. It will be supported by cedar posts also, not those little 2-bys you see there now. You might also notice in this photo that I am short one window there at the bathroom but it is just temporarily boarded up. That will be a stained or architectural glass window and will be installed much later. Time and the weather are postponing sitework on this area too. I mean to install a drain with gravel at the base of the concrete foundation wall but it is too wet now to bring in a big truck. After the drain is installed I will backfill against the wall, up to about 6" below the top of the wall and level it out as far as I can towards the woods. I want to have a big flagstone walk and patio here.
The roof from the other side of the house. I told Allen the other day that I believe I will be working on this house for the rest of my life. Sometimes, it seems like we have really made alot of progress but at other times it seems to just be dragging out eternally. I really need to start the wall under the house but I'm still trying to salvage enough block and avoid buying them. I may have scored a good load of CMU's this week but don't know for sure so keep your fingers crossed for me.

Ha! I had to get in one good detail shot but I thought the BFA would appreciate this. I love it that all the ribs on the roofing line up perfectly with the rafter tails! I would like to think this is due to somebody's good thinking but I think it is just plain dumb luck. This edge is finished (and I really like how it looks) but the east and west ends, as you might notice in the photos, still need an additional piece of trim and we still need to run a little bit of ridge cap.
On a side note, I have been looking at my site meter recently and noticed that I was up on daily visits just a little lately. As some of you know, with Site Meter you can see where the people are that visit your blog and if they came there from Google or another blog etc. I noticed that I have been getting quite a few hits from people searching Google for "Pella windows rotting" basically. I thought this was a hoot! And then today.... I got a hit directly from Pella Corp. themselves! Did you know there is a Pella, Iowa? I didn't. To be fair, I have also gotten several hits from people searching for "MW window complaints". Honestly though, out of all the windows and doors that I have either worked on myself or have been asked to work on because they were rotting, 80% have been Pellas. What really gets me is their customer service though or lack of it I should say. So! Buyer beware.
Well, I've got to go bring in the brass monkeys tonight 'cause its going to be another very cold one here. I'll be so happy when I'm in my nice, cozy house with a nice, cozy fire going in the wood-burning stove and something savory cooking in the full-size oven and maybe taking a long soak in a tub. None of this I have now and have not for over 2 years.


Sunday, February 11, 2007

How Long Has This Been Going On?

We have had a pretty fair run of cold weather down here for the past several weeks as you might see in this photo. This weekend was quite nice with temperatures in the 50's during the day but that has been the exception lately. This was taken at the Big House where we continue to slog on, trying to finish the restoration but it keeps dragging out. I don't think we will be out of there before summer now. Which is fine really, to me. Good job and actually good conditions for work despite the cold. I worked on a food distribution center in North Carolina once for about a year and that was really a miserable job. It was a 50 acre site and the building itself was an enormous tilt-up, which I normally enjoy. We got the panels set before the worst of the winter set in, which made that part fun, but when winter did come it was awful. It was mostly rainy and in the south when it rains alot in the winter, it just gets soupy with all the heavy equipment running back and forth through the mud etc. One of the foremen was walking across the site one day and he stepped off the normal path. This is a bad idea on a construction site; you stay on the paths because they are safest. Anyway, he stepped off a little ways and into what he thought was just a mud puddle but he fell in and kept going up to his waist! And the kicker is that he said he did not feel his feet ever touch the bottom! He caught hold of a piece of steel nearby and pulled himself out. I felt pretty bad for him; he was covered in cold, nasty mud. It was pretty funny too though and we ragged the crap out of him for some time.
Well, we are continuing to work on the roof at the house. We need to place about 6 more pieces of the sheet metal and we will have all of that on. Then we have to run some trim around the ends and we will be done. Maybe 2 more weekends on that. I will try to get some more photos soon. I am trying to get the water system started soon also. That is the next big item. I have to get a perk test done before I can get my septic tank put in and that is all expensive and a pain. Some people have asked me am I not going to go with one of those composting toilets and such but I am not so sure about those things. Anybody have any experiences with one of those? They say they work well. Hmmm?

Monday, February 05, 2007

A Hard Day's Night

Progress on the roof is coming along slowly but surely, I guess. We got all but one piece on the front half of the house this weekend. This is the worst side due to the fact that over half of the pieces are 27 feet long. We were afraid the weather was going to be too bad to do roofing but it turned out okay after all.
It has been fairly cold here (for us) lately as we have been averaging in the 40's during the day and the 20's at night. Usually we are in the 50's during this part of the year. Pablo had asked awhile back about how our winters are and sometimes they can be pretty cold. The past 3 years, I would say, have been very mild winters but this year has been making up for that. I remember my first winter as a little apprentice carpenter. I was working on a 6 story building, pouring concrete columns and floors. You just go straight up with that part and then much further below they start putting up walls, so if you are on the sixth floor, there is nothing between you and the wind but a barbed wire fence as the old guys used to say. Anyway, it gets cold up there and I remember one day I looked around and all the guys with mustaches had icicles hanging down out of them. I thought to myself', "what the hell am I doing out here?" But, the desire to eat and have a dry place to sleep will keep you going sometimes.
But back to the original story... we had a bit of a time getting these long pieces up on the roof. We finally devised a little ramp on the back of the house, where the ground is higher, and would walk the end of one up and prop it on the roof. I would push the piece up as far as it would go while Allen ran around to the front of the house and up the ladders etc. and then over the roof and grab the piece and pull it up. Then, I would run around and up the ladders etc. and get on the other side and we would carry it over to where it was to be installed.
Since we have lights and heat (YEA!!) we can work after dark so when the sun went down we insulated the attic. It's only about 300 sq. ft. but that took a little over 5 rolls of insulation. It went down pretty quick and easy. The boards you see laying around over the joists are all the patterns for rafter tails and such. We made sure to save anything like this so that when the other half of the house is built, everything will match. I was using them to kneel on while stuffing the insulation. I always have a fear of falling through the sheetrock in attics. I will probably put a little plywood down up here for a little storage space but not much. If you have space like this you will fill it up and usually with junk so I limit myself in some areas. FYI, this insulation is the standard R-25, 8" deep. Some green builders advocate the use of the foil lining on the rafters but I'm not really convinced that stuff works. Does anybody out there have any experience or proof that it helps?

Wednesday, January 31, 2007

Higher Ground

Here are some roof detail shots. We have not made alot of progress on the roofing due to poor weather. It's either been raining here or the wind has been blowing pretty hard and it's very difficult and dangerous to try to handle sheets of metal this big in much wind. You can get an idea of the type of roofing that we are using though. I'm still hearing about choosing this type from the BFA. (He hates it) He did admit though that all architects had rather sit and complain about what had already been done rather than be an active participant in choosing beforehand. I think he just likes to aggravate me too. Anyway, I like the stuff and I think its going to look good. This is a detail where the pieces overlap although the overlapping piece is not there yet! You can either run a bead of silicon down the joint or use this sticky, gummy stuff that the manufacturer sells. It's like 2-sided tape, kinda.
This shot shows the edge flashing that hides the 2 stacked 2x4's that contain the Iso Board. I think its a nice detail. We screwed the trim every 2' o.c. above the rafter tails. These screws have little neoprene gaskets made on them so they seal up the penetrations they make in the sheets. We use a cordless drill with a nut driver and they run in pretty easy.
A friend requested a photo showing the whole house and I tried to get one that showed what little roof we have on. I know this photo sucks but it was about the best I could do at this time of day. The roof is highly reflective, as you can imagine, and in the afternoon this was the best angle. I'll try to get one in the morning time. Any newcomers also keep in mind that this is only half of the house. The rest will hopefully be built at some later, unknown date. You can see my growing collection of concrete block and stone though, that I will use to enclose the underside of the house and build planters with. I'm hoping that this light colored roof will do alot to cut down on heat gain in the summer. We'll see.

Tuesday, January 23, 2007

Mailman, Bring Me No More Blues

I'm somebody!!! We have mailboxes! No mail yet but, hey! We'll get to that. I thought Allen came up with a nice design for them that incorporated anti-bash structure. We have the occasional teenage box mashers like everywhere does I guess and we are hoping maybe they will skip over these. I know these are not the most exciting photos but it has been raining alot here lately or dark by the time I get home so I have not been able to get many pictures lately. Several people have requested certain shots of the house and I am working on it!!
The roof came in!!! I am pretty excited about some stuff as you might guess. I could not get all the roofing in the shot but this is most of it. It is standard 1 1/4" rib metal roofing; ribs are 1 foot on center. I think it is 26-gauge Galvalume. It's the silver stuff like you see on barns, sort of. The BFA ranted and raved because I didn't get corrugated Galvalume but he did not tell me in time! I didn't think it mattered. Oh well, this stuff was not special order (read cheaper) so that was the deciding factor. The longest sections are 27' long. The truck had just a little trouble making the turn in our drive but he did OK. He just got up on one of the rocks a good bit but didn't hurt anything. We have started installing it but have not gotten very far due to rain etc. It has been miserable working weather here lately with the rain and cold. The house is about sealed up though and we have a propane heater so it is somewhat comfortable in the house. I'll try to get back with some more photos and/or stories soon.

Sunday, October 15, 2006

Up On The Roof (again)

Here is a little bit of a differnet view of the house that I don't think I've shown before. I like this because you can see all the way thru the house. We finished insulating the entire roof now and are ready to order the metal decking. I will be glad when the roof is done; the rest of the work moves faster. Pablo had some interesting questions about my last post and since I did not get to answer him when he first left the comments, I thought I would just answer now because some other people might have been wondering some of the same stuff.
As far as how much we are insulating; Alabama winters can and do get fairly cold. I think our average daytime temperature in Dec., Jan. Feb. is low 50's but quite often in the 40's and nights regularly go 30's but can get down in the teens. I remember one Christmas Eve night when I was a teenager it was 7 degrees. But here is the thing; your primary source of heat loss from inside your house is through the roof. There is some through windows and walls etc. but hot air rises and so it transfers itself out that way. It's not to keep the cold out so much as to keep your heating source from having to work so much by retaining as much heat as possible. However, in the summer, good roofing insulation does work by keeping heat out because of heat transfer. The roofing will heat up and in turn heat the decking, then the attic, then your ceiling etc. until it migrates into your living space. Good insulation and air spaces help prevent this. As do light colored roofs. Basically, insulate as much as you can possibly afford to.
Now, on the bullseyes on the roofing membrane; you would not normally use that membrane the way we did (which you may know). It would normally be put down directly on the plywood decking, under the shingles or whatever and when you nail down felt or this stuff, you are using short felt caps and it doesn't matter if you hit rafters or not because its in the attic. Now, this does bring up something I failed to mention. We don't have any attic in the living room/ kitchen area of the house, so what are we doing about that? When we nailed down the sleepers (the 2x4's that are sandwiching the insulation panels) we did take care to hit the rafters so that no nails would show on the ceiling. The insulation panels are not nailed but they do have metal clips on top of the sleepers holding them down. The fancy roofing membrane is nailed to the sleepers and glued also so we don't have to worry about nails showing from that. I hope I am able to explain this correctly, if not please ask more.

Tuesday, October 10, 2006

Upside Down/ Inside Out

We started on the roof insulation this weekend. We are using a 3" thick foam board called Iso board. It's similar to the Dow blue board that you may have seen in Lowe's or Home Depot but it has a 18.5 R- value where the Dow board is R-15 and it was only about $1.25 a sheet more. That's a 4' x 8' sheet. It has about 45% recycled content too, so I was happy about that. It is normally used for commercial structures but is great for this application. The gable end of the house (where there is attic) will also have traditional bat insulation so that end will be really well insulated.
We ran two 2x4's all around the perimeter of the roof and then started laying down one run of Iso board all the way across the roof and then sandwiched that with 2x4's. Then just keep repeating until you reach the top. The only thing about the Iso board is it has alot of fiberglass in the outer paper coating so I was SO itchy at the end of the day.
After we ran all the insulation we went over that with this high tech new roofing felt stuff I got for free off of a job. It's not really felt; it's more like a vinyl type stuff. It's great to work with though. It lays down very nice. We put this down because we are going to have a metal roof and you usually get some condensation under a metal deck and this material will protect the framing and insulation from getting damp. Plus, it didn't cost me anything so, what the heck!
In putting all this down it meant we had to take up our toe-boards from the roof and therefore nothing to catch on if you start sliding. The roof is not really steep but Allen was afraid this material might be slick and he knows how clumsy I am, so I got to wear that wonderfully attractive harness.
This is just a close up of the "felt" we used. Cool stuff and it's treated somehow to be non- skidding to walk on. It also comes in 4' wide rolls whereas traditional roofing felt comes in 3' wide rolls. I thought it was funny how they put little bullseyes everywhere you are supposed to nail it too. And no, we didn't nail it everywhere they said as you can probably see.

Tuesday, September 19, 2006

Loose Ends

Well, alot of stuff has been going on these past couple of weeks. I've been working so much I haven't had time to post much but here is a summary of some of what has happened. Allen finished framing and sheathing this end of the house so now it is completely framed except for a couple of small interior walls. The outside is ready for roofing and siding. We used up alot of scraps we had on this so that was good. I hate to waste material.
It's so neat to see on the inside! It actually looks like a house now! Now to start planning electrical and plumbing. Well, the next immediate thing is to get the permanent roof on but we are planning utilities too.
While Allen was working on that I got the backhoe! Those things are sooooo much fun. I started cutting the area that will be parking next to the house. I do pretty good but I am a little slow with the machine but I think I still made fair progress. This is not a really good shot; I don't think it really shows how much I cut and moved. I will have to build a retaining wall here at the front of this cut as it will be about 4 ft. into the hill there with a set of steps going up towards the house.
I also gathered up all the many piles of rocks that I have all over the property that has been accumulating for months and took them up to the house. You have to throw them in the bucket by hand but its great to just be able to dump them wherever you want them. I have a pretty good pile at the house but I fear its only going to be a drop in the bucket for what I need to build this wall.
I started clearing this area behind the house too in preparation for putting in a french drain at the base of the retaining/foundation wall here and backfilling this area. There will be a large flagstone patio and walk here that leads to the entrance to the house, which will be in the dogtrot part of the house. Which, of course, is just porch now and won't actually be a dogtrot until I build the other half of the house. Which hopefully will be in the not-to-distant future. If I survive this. I will be clearing quite a bit more here but leaving the bigger trees for shade. There are also a number of dogwood and redbud trees that I want to keep. I'm trying to keep lots of the native plants that are attractive and that also includes wild hydrangeas and ferns.

Monday, September 04, 2006

One Man's Ceiling Is Another Man's Floor

Well, this is this weekend work. We about got it topped out. Here is Ted and Allen discussing how the plywood was going to lay out on the rafters.

These are the rafter tails on the clerestory eaves. We were still making them Sunday and putting them up as we went. So far all of the overhangs seem to be sufficient to keep out the summer sun.
This was quite a bit of decking to get put down but it went well. Getting it up on the roof was the hard part and made Ted and Allen grumble about being old.
Now, this is the south side which will hopefully recieve the winter sun. We were missing one last 2x10 for something so we couldn't quite finish that last little bit of roof on the end there.
Just a view from the inside. It's shaded inside now!! Allen is felting the roof today; I've been a little under the weather. But it's starting to look like a house now!