Friday, January 30, 2015

Float On


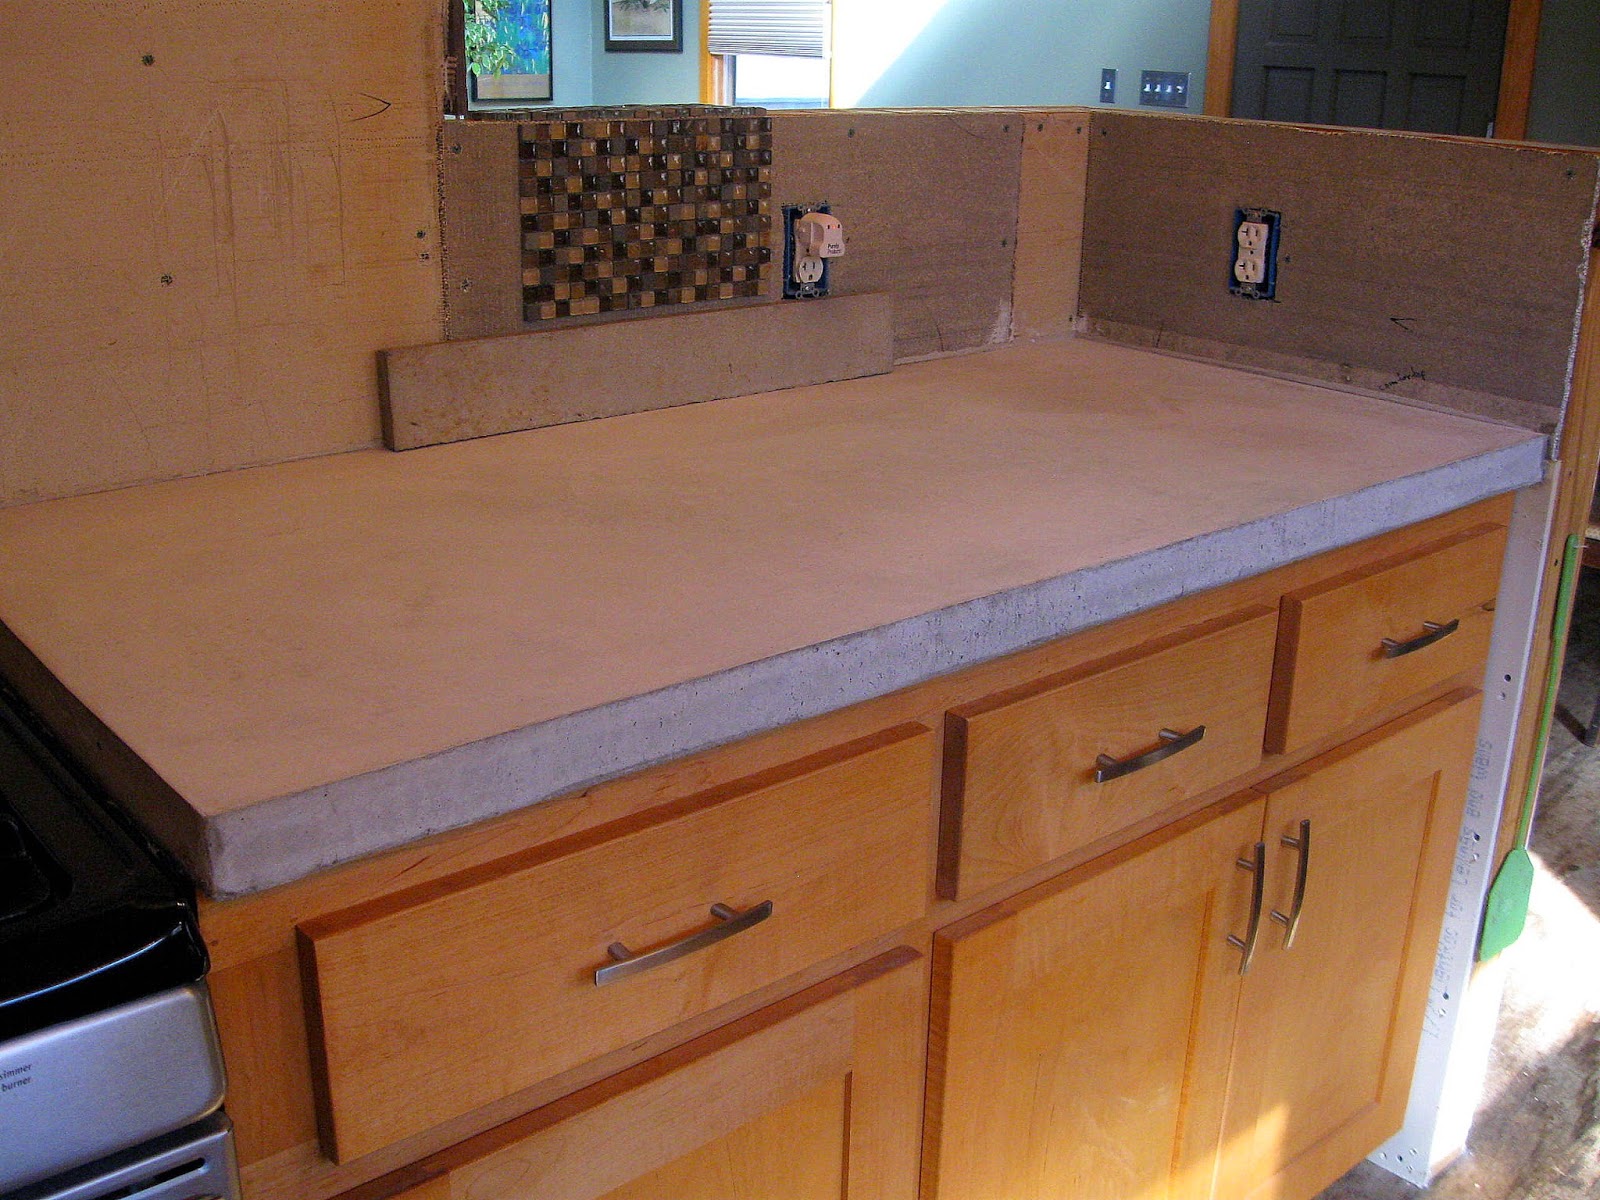
So, I pulled the forms from the counter top and was pretty pleased with the way it came out.  As you can see, the concrete has cured to a fairly light color but once I polish it a bit and seal it, it will be a much darker gray.
I set a piece of concrete backsplash up there too and some of the glass tile I will use for the back also, just to kinda see how it will look.  Once the concrete is sealed it will be very close to a grayish slate color and match the glass tile well.


I was fairly pleased also, with the finish I got on this pour, although I think I actually got a smoother finish on the hearth slab.  It's fine though.  I will run over this a bit with 100-200 grit diamond pads and it'll be slicker'n owl shit.  I have no idea where that saying comes from or what it means but I used to hear it all the time on construction sites.  Ha!
It's also quite hard (to me anyway) to get a good slick finish right up to the edge because you can't follow through with your stroke but that is easily smoothed with the diamond pads and I'll round that top corner off just a tad.  The front face of the edge had a few little bug holes in it but I don't really mind that.  It makes it look more like concrete, to me, and I want that to be obvious.  I just really like the look of unstained, natural concrete.


 It's really hard to explain to somebody else how to finish concrete and I looked around for some YouTube videos that might do a good job but didn't really come up with much.  Most of them show how to float concrete, which is good, but none I could find show how to trowel it to a hard finish and that's what takes such finesse.
In the photo above I have the tools most commonly used for concrete finishing and they are not interchangeable.  The one on the left is the float and the one on the right is the trowel.  Since my pour was so small I did not need a screed or straightedge but you need those on a large pour.


The float has a much thicker blade and is longer; some of them are up to 2 feet long or so and this is what you use immediately after placing the concrete.  On really small pours like mine you can use the float sorta as the screed to knock the mud down to the correct elevation.  Then you pass over the concrete in sweeping motions to smooth it down nice.  Now, at first, it's not going to look that smooth and that's okay.  Once you float it off good, with one pass, you just then let the mud sit.  Water will begin to rise to the top and you will see a pool form.  Let this water evaporate!  Do not keep working it back into the mud.  Once the water evaporates you can see the surface begin to "tighten up" as we say.  Make one more pass over the concrete with the float.  Water will rise again.  Let it evaporate.  At this point the mud may have tightened so that you can move to the trowel.  When you go over the mud with the trowel you will begin to get a much smoother finish.  As you can see, the blade on the trowel is much thinner.  And, it's pretty much the same rhythm; trowel it off, let the water rise and evaporate and etc.  Now, at this point, hardly any water will be noticeable on top but you can tell it's happening.  This is the part that is really hard to describe as it's something that a person has to see and do to really "get", but it's much like burnishing clay or similar.  Also, the tighter the concrete gets the harder you have to press down to get a smoother finish.

If you really want to try pouring something like this and have never worked with concrete before I would strongly suggest pouring some little practice slabs first.  Maybe pour some steps or a small patio just to get the hang of floating the mud and those things don't require a really hard finish.  In fact, you don't want to get them too slick or they will be very slippery in wet weather.  Then maybe pour some little stepping stones or maybe a bench seat to practice troweling a smoother finish.  Good concrete work is much harder to do than most people realize but it's not rocket science.  It just takes a little finesse, as I said.  If all else fails, hire a finisher.  And you can polish counter tops once the concrete is cured, to hide a multitude of sins.  I've done all my own concrete work here at my house but I'll say this:  the work I did as a carpenter and welder was pretty hard sometimes, but I always got through it.  I don't think they could have paid me enough money to place and finish concrete however. 

Okay!  I'll be putting this finish on this top before long but we had to order some new diamond pads so it may be a bit before I have another post on this.  And, I have to find a suitable sealer to use on these since they are in the kitchen and would come in contact with food.  But I'll have a complete post on all that when I'm done.  Any questions?

Monday, January 26, 2015

Something's Cooking In The Kitchen


I suppose a more accurate title would be Something's Curing In The Kitchen, but this'll do!  Unbelievably enough I finally got up the gumption to start pouring the first of the kitchen counter tops.  We had a whole week of spring-like weather and I just couldn't let that pass without doing some kind of house work.  A lot of times the hardest part of a project is simply starting, so I just took one step at a time and pretty soon it was going!  The nice weather made getting and hauling the sand and gravel enjoyable and easy and that was one of the biggest steps.
Now, in this first photo you can see that I have everything pretty much ready and in the next photos I'll give you some detail shots and more explanations.  As you can probably guess, the plastic sheeting is to protect my cabinets and also the stove that I left in place for the pour.


I ran my forms on grade, which is to say, I set the top of the form at the height I wanted my finished counter top.  To me, it's just so much easier to finish to the top edge of the form rather than try to make a grade line and keep it visible while you are pouring.  Of course, that's not that hard and what I had to do anyway on the sides that butted the backsplash area.  When I get my forms set to the right elevation I always mark it with a crow's foot and that allows you to see if something happens to knock your form up or down.


I then leveled my grade line across the back and around the sides and was pleased to see that when I measured up 2" inches in random spots it actually hit the grade line! ha!  I also partially ran a few long screws into a few studs to help "lock in" the counter top slab.  It would probably never move on it's on but expansion and contraction and all that jazz, you know.


There are several ways to do the edge form and I choose again, just to clamp mine to my cabinets with a 1" spacer between the cabinet and the vertical form, which is the standard counter top overhang.  Clamping does sometimes cause the form to roll out a little at the top but I'll show you how I remedied that in a minute.


The ends of the form were screwed off to available surfaces.  I always use screws also because they are much easier to remove than nails and will not pull out like a nail will.  Of course, there was very little pressure against this form but 2 inches of mud will exert a little.


This is looking at the inside of the edge form and you can see I caulked everything really good.  The concrete mixture will weep way more than you might think so I always caulk any crack really well.  A nice, smooth bead of CLEAR caulk in the bottom inside edge will give the bottom front edge of the concrete a really smooth finish too.  I know everything looks white but this is that caulk that goes on white but dries to clear.  The edge form and spacer are white though.  To the left you can see the 3/4" plywood that tops my cabinets and is the bottom form for the counter tops.


The very last step is to put in your reinforcing and in this case I used dog wire.  It's a 4"x2" grid wire.  You could use chicken wire, hardware cloth or even #3 rebar.  You also want your wire to end up about halfway up in the concrete rather than mashed down against the plywood.  An easy way to do this is to initially pour a blob of mud about every 12 or 16" and then pull the wire back up so that it's about an inch off the bottom.  I'm pouring 2" counter tops, btw.  The mud will hold the wire in place then as you pour the rest.


We mixed the concrete outside and then just brought it in with buckets.  I float the mud down as I go, pushing the concrete on grade towards the back first and working your way towards the front form.  With floating you are kinda pushing and patting and smoothing.  Not trying to get a smooth finish yet, just trying to get everything on grade.  I also vibrate the edges with a palm sander and tap the underside of the form with a hammer to compact the mud.  When bubbles stop coming to the surface you know you are done.  Don't vibrate any more or you can actually separate your mix too much.
In this photo you can also see two other tricks.  The side form against the stove is not nailed off as this was not possible without moving the stove and all that crap.  I pushed the stove over to the left as much as I could and slid in the edge form.  I then placed the wooden wedges every few inches and tapped them down until I got a good snug fit.  Once it's screwed to the front edge form and caulked good it's not going anywhere.  Always use wood wedges too because they won't scratch or dent anything. 
You also see 2 wires running over the slab.  I anchored 2 tapcons into the studs of that wall and then wired 2 little turnbuckles in the wiring, which ran over to the front edge form.  As you tighten (or loosen) the turnbuckles you can move the form in or out, however you want.  Works great.  I simply used a straight edge on the front edge to determine when it was good.  These are a tiny version of the large turnbuckles we use on big wall forms and such.  After you pour and get it floated down, you want to check your lining again and make sure nothing moved.

Okay!!  So, any questions??  I hope I explained all that correctly.  If I didn't, please let me know and I can address it in the next posts.  I'll do another on troweling the concrete for a good finish, removing the forms and all that.

Sunday, January 18, 2015

Pocketful Of Sunshine


I have tried posting several times lately, and even have a couple of unfinished posts in drafts, but just have not been able to get it together!  First, we went through this horrible gloomy week of rain or drizzle and absolutely no sunshine.  It was affecting everyone and I just couldn't think of much to write about.  I even ordered me one of those SAD lights to sit on my desk and changed the light bulbs in some of my studio lights to the daylight spectrum bulbs.  All of that actually does seem to help and just about the time I was getting up enough steam to post...the real sun came out and we all were rejoicing!  I stayed outside as much as I could to enjoy the sun and it has even been in the mid-50s (F) so the days have been really nice.  The thought of sitting at a computer did not appeal to me.  You can see that Chigger and the girls were rejoicing in the sunshine too!  Everybody is happy!


I've also been working on a new load of pottery, which we delivered yesterday, and that always takes up a bunch of time.  We are even getting eggs again! 


I've got a zillion projects I want to work on outside and am trying to prioritize them so as to get something started.  The two main ones are to start pouring my kitchen countertops and to rebuild the cold frame in the garden.  I miss growing my own salad greens and things.  Of course, the countertops are inside but you have to mix the concrete outside and it's so much better on a nice day.  Plus, I want to pour the bar tops outside and you definitely need a nice day for that.  We did pick up one big bag of portland cement yesterday but I'll have to wait until Monday to be able to get the sand and 8910 gravel.


And in between all of this I need to keep making pottery!!  I must increase my income.  You know I had thought of supplementing with restoration work here and there but all my leads on that have just come to an abrupt stop.  Nothing.  It was kinda odd actually.  But, that happens and then in a year or two I'll get some more jobs in that area.  But since I've been able to throw standing up and that is working so well it has renewed my enthusiasm for the work.  Coming up with some new colors and glazes is exciting too and helps encourage me.


I was pleased with this latest firing and need to make large batches of these new glazes.  I'm also down to my last scrapings of clay and am waiting for a new shipment to come into Atlanta.


So, I hope you all are enjoying some nice weather or at least the sunshine.  I am SO very ready for spring.


Well, time to go!!  Lots of stuff to do!!

Friday, January 09, 2015

Easier Said Than Done


So, one of my goals for 2015 is to finish this kitchen!!  Really, I hope to finish the kitchen and maybe even the other side of this wall before the winter is up, or at least spring.  I don't really lack all that much, although there is a lot of unfinished square footage, it covers fast with what I plan to do.  First, is to pour these counter tops and the concrete bar tops that go on the low walls.  I'll probably form and pour the bar tops outside on a decent day and then place them once they are cured but the counter tops will be poured in place, obviously.


Then to do the tile backsplashes and wall tile.  This is the glass/ slate tile that will go between the concrete countertops and the bar tops.  And yes, that's about how much tile will be the too.  I have 2 inches of countertop (as marked by the crow's foot on the lower left on the wall) and then a 3" or 3 1/2" concrete backsplash which should fit right up under that electrical box.  Then the glass tile from there up.


On this other side of the wall I need to finish the sheetrock, paint those low walls and then make, or have made, the built-in bookshelves that go there on either side of the fireplace.  You can see where I have a temporary bookshelf on the other side.  And of course, I need to finish running the slate tile here and grout it, along with the mosaic work that goes in the off-centered strips.  That part may drag out a little longer as that mosaic takes a long time!  Ugh!  the little bit you can see I have done, down by the hearth, took 4 hours!  But, it's just something I've got to psych myself up to do.  I do enjoy the work but I tend to get a little antsy to be finished.  Doing a little bit every day or so is usually my best strategy.


Now, this will have to wait until warm weather but I also must finish this wall this year.  I have to etch and paint those metal sheets so that is why I need warm weather; can't do that in the house.  And then after the metal is up I'll install some sort of shelving to display sculptures and ceramics.  Or whatever.  Skulls of old boyfriends, I don't know.  And yes, that sheet hanging over the door will be replaced with an actual door!!  I have a really, super cool idea for the interior doors but again, I need warm weather to do those. 

So, if I can get all this finished before springtime I can then move on to all the crap that needs to be finished on the outside!!  Yay!!  I guess I should look at it like this...it all keeps me from sitting down at least!  I also have not forgotten that I need finished flooring but that is a very last of the list item and I'm trying not to overwhelm myself.  haha!

So, do ya'll have any interior house projects going on for winter? 

Wednesday, January 07, 2015

Don't Let Me Be Misunderstood


Tonight's post is basically more rambling, and it's hard to pick a photo to go along with that topic, but I thought this one was as good as any.  It was taken not too long ago along one section of my driveway.

So as I mentioned, I am coming up on 8 years of blogging.  That's a helluva long time to write about day to day life.  It's kinda funny because I always liked the idea of keeping a diary....but I could never actually do it.  I guess this is the only method I've ever stuck to and a blog is a really good way to record life's events and your thoughts at the time.  It's sad to me that blogging is not the community that it once was.  I guess I was fortunate that it was more popular, (or at least I had more entertaining things to write about), when I was single.  It was sort of like having a friend to dish to at all hours and you might even get replies at all hours.  Sad though that people seem to have let Facebook and other outlets steal their already short attention spans.  Of course, I've also seen a lot of the older bloggers pass away during the last 8 years.  I think many of them added to the community feel of blogging and with many of them gone (at least in the circle of bloggers I know) things seem kinda sparse and forgotten.  I have never really fit in, in any group or stage of my life, but at one point I was sort of a part of a friendly circle of like-minded people and it's always sad to see that go.  But that's life, you know.  People change, or think that you change, or just get swept away in some other tide.  It's also very interesting to see who sticks with you.  As in "real" life, it's often not who you thought it would be! But sometimes it is and that's nice.  But for those of you who enjoy reading here, don't worry, I'm not leaving.  I've just been in a reflective mood the past month or so I guess and thought I'd ramble a bit. 

But speaking of such things, there were a couple of questions for you guys out there.  You may not be able to answer any of them but I thought I'd try.  First, are any of you familiar with the blog Tossing Pebbles By The Stream? and it's author, Philip?  He used to stop by here regularly but disappeared about the time I got married, as did a number of people (haha!), and a couple of us have heard that Philip has cancer.  We were just trying to see if any communicates with Philip or knows anything about his situation?  I personally would love to be able to send him a card or such.  I always appreciated his comments here.
Another person who has dropped off that I am concerned about is Caroline over at Gingersnaps or And A Hive Of Silvery Bees.  She used to comment fairly regularly but has just seemingly dropped off the face of the blogging world anyway.  I have left comments on her blog but they go unanswered.  Does anyone talk to her?

So, I'll be back with some new stuff soon.  As I said, no year in review but I do have a number of goals for this new year and maybe if I write them down it will help motivate me! 

Sunday, January 04, 2015

January Hymn


Well, I hope everyone's holiday celebrations were what you wished for; whether that was days on end of food, family and festivities or just quiet days of leisure alone.  As I said in my previous post, we had a couple of nice dinners at home with family and that was about it.  Watched a couple of movies and went out once or twice.  It was nice actually.
But, I am ready to move on into the new year.  I'm not going to do a year-in-review thing like I usually do because....uhh....let's see...I didn't do shit this last year!  Yeah, that's it.  So, we will concentrate on what I hope to do in this coming year!  I don't really do New Year resolutions either.  To me, you're either going to change habits or you're not and a new year never seemed to motivate me that much.  I've already been sticking to my gym work-outs for about 2 months now, so I'll just continue that.  I'm to the point now that I look forward to going because the exercise really does make me feel better, physically and mentally.  Lifts my mood considerably.  And, I've lost about 8 pounds or so, so to see some progress is great and encouraging!  Can't say that it helps my pain any, other than I'm not sitting down, but it still helps me in other ways.  On days that I can't make it to the gym I have measured out a mile walking/ strenuous hiking trail around the house here and I do that instead.

My work break ends tomorrow also.  One of my stores has already called with a new order so I need to get busy on that and restocking my inventory anyway.  It's so nice to know I can make all these things standing up now and not hunched over in pain.  Maybe this year I can even come up with, or continue, some new designs and colors.
So, speaking of scenery and getting rich (haha!), this year I finally got off my ass and designed a 12-month calender that features the critters and flora of my little Dragon Valley.  They are available to purchase HERE and you can preview so you know just what is inside.  This is a standard size wall calender but I may see about having a larger, jumbo size printed and available.  The standard size includes all Americans holidays and the spaces are large enough for penciling in notes and such.  And please know, I sincerely appreciate any purchases.  Many bloggers put advertising or other such means on their blog to raise a little money but I've never really wanted to do that.  I don't like the way it looks and makes the blog seem sorta impersonal.  However, a little money raised from photos I've already taken for this blog doesn't hurt, you know?  And all the photos featured in the calender were taken right here at home.  If these come out well I might do an all chicken one, or all flowers or such next year.

So, here's to a prosperous and happy new year!!