So I promised to show ya'll a few photos of some actual work I have done around here. I was never really enthused about the idea of painting this bar wall, so when it hit me to sheath it in pallet wood I jumped on that. Allen had been scrounging pallets for me for months and I had stripped a lot of them down to usable wood where they were just waiting for finishing. So, I finally bit the bullet and sanded, stained, painted, sanded again, and patched for two days to get enough planks to do these 2 walls. I didn't make a lot of effort to hide any patches, dents, or bangs in the wood. I mean, it's obviously pallet wood and obviously reclaimed, so there's the "charm". Ha! Anyway, I thought it came out rather well. The corners are done in 1 1/2" angle iron and these make helluva good corner guards.. The iron is just stuck on for now because I'll have to take it back off and cut to fit when I run the finish floor and baseboard. In person it looks better. The color is a bit washed out in this photo because, due to low light in the warm months in my house, I have a devil of a time getting decent photos. I often have to use a flash and it just doesn't look right.
This photo is a little better but it's a little washed out too. Anyways....I finished this counter top and back splash and wanted to run a little of the glass tile just to see how that was going to look. I'm very pleased with this but please note; the tile has not been grouted yet, so it will look a little different when finished. This gives me a lot of motivation to keep going. I'm very anxious to get the kitchen finished because I think it's really going to be awesome.
However, I had to take a break from all that and take advantage of the fact we are in an extended drought. I have needed to fix this basement wall for years after I discovered just how much rain floods down the mountainside during the winter rains. If the rest of the house were built this area would remain dry but.....we all know that has not happened yet so....I have to treat this as if it is forever an exterior wall. Which meant chopping the bottom 2 feet off of the wood framing, forming a 4 inch thick wall and pouring it in concrete. Here you can see the girls inspecting my forms. It came out real well. I even played around and did a faux board formed look on the outside. This 11 foot section is a little less than half of what I need to pour but it's the worst part of the problem. I admit I should have done this to begin with..but I did not realize the amount of water etc. around here. And I was under the supreme delusion that the rest of the house would come along soon enough. Ha!!
Anyways, this form has been dropped, the wall sheathed back, and also insulated and covered on the inside. Snug as a bug! I'm now running multiple shelves on the inside in an effort to better organize the basement and my studio there. I'll rub the exterior of the concrete here, below grade, to produce a smoother finish, then waterproof heavily and backfill. There is still no sign of any rain anywhere in our near future so I shouldn't have any issues finishing this in the dry.
I also thought I'd take advantage of the drought in other ways! We have ample dried foliage, leaves, flowers, grass and any things else you can think of here, so I gathered up a armful of stuff, a couple handfuls of feathers via some molting chickens and threw together this autumnal wreath. Not too shabby I guess. Certainly was cost effective. haha!
Showing posts with label walls. Show all posts
Showing posts with label walls. Show all posts
Wednesday, October 26, 2016
Monday, July 01, 2013
Stuck
Well, I finally have a house post for ya'll!! I finally got up the gumption to start the fireplace tile and have been steadily working on it for the past week or so, in between pottery, gardening and such. I am actually a little further along than what you see in this photo. About 2 more runs of tile and I have started the mosaic that will be in that blank space over to the left. Yes, all that smashed pottery will be put to good use. There were a number of reasons that I chose to break this up with a mosaic. First, I think they are pretty and I wanted to do something different and creative. Secondly, in placing these tiles out so that they wrapped the corners the way I wanted them to, it was going to make the spacing between them just a fuzz larger than I really wanted. 3/8" was really the max that I could justify with looking right. By laying the ends the way I wanted and working inward, I could leave a strip in which dimensions didn't matter. Oh, and I didn't want to cut tiles if I could get away with it. There is nothing wrong with cutting them but with the area etc. I would have come out with pretty small cuts and just wanted to avoid that. I wanted to stick with whole pieces for the looks.
As it is, the spacing didn't quite come out as I imagined, although it's close. See, natural tiles are...well..natural. Even cut they may not be exactly the same size or totally square. I have found differences of up to 1/8" and I really didn't expect that. Maybe a better quality tile would have been more accurate, I don't know. I will use a dark grey grout on this so that will also minimize how much you notice the irregular spaces. For the most part I have been able to use these cool little spacers to keep it all in line but I have had to fudge some here or there. I made sure to establish at least 2 control lines (1 vertical, 1 horizontal) before I ever started to help keep the tiles laid level and plumb. Actually, I have 4 lines at this point but it never hurts to keep a check on that. These spacers, by the way, just pull out when the adhesive is set up and you reuse them indefinitely. They are also 2-sided; one side is a space just for a slot and the other is a spacer for intersections of 4 corners. The adhesive also sets fairly quick so I only spread enough to set 4 or 5 tiles (6x6) at a time. You have about 10 minutes working time, maybe. That may seem like a lot but when you are adjusting and tweaking it goes pretty fast. Or it does for me anyway!
You can also see from this photo what I meant about the corners. I did not want the edge of the tile that turns back to show. The edge of the face tile shows from the side but that is more attractive, to me, than the other. Basically, when you are standing in front of the fireplace wall, you will not see any of the edges of the tiles. There are many ways to do corners though. You can run some type of edge cap of another material such as wood or steel corner molding, another type of tile etc. etc.
In this photo you can see a bit more of the unevenness of the spacing but it will be covered up by the fireplace unit. See, I don't have any problem showing my stuff that doesn't come out exactly right. Everybody makes mistakes or has things that don't do exactly what they thought they would. I honestly thought the tiles would be more accurate in size so that was a learning lesson for me. At any rate, I have been able to control the spacing better in areas that will show more, now that I understand the material more. Plus, it's a natural stone. It is just going to have variations. Don't want variations?? Use a manufactured tile. I had to cut a few tiles to fit around the gas lines and anchors that hold the unit in place. This was very simple just using a 4" side grinder with a diamond wheel. You can use it dry too for such small cuts. I just had to nip out a notch here and there. For whole cuts I will use a wet saw for tile.
So, there is the beginnings of that. I'll have some more on it soon. Hopefully. If you would like to see a more in depth or closer look at how I did something please let me know. I'm not sure how well I explain things so please ask questions if needed or tell me to clarify.
Labels:
creative building,
house,
how-to,
living room,
screw-ups,
stonework,
tile work,
walls
Friday, January 21, 2011
Keeps Gettin' Better
 So, here is the pantry after I cleared all the junk out and had prepped the walls for painting. And yes, I know that many of you are sitting there thinking, 'she put plywood on the walls?' Well, in the pantry, yes. This was actually Allen's idea way back. I wasn't too sure of it at first but I guess it was a good idea. I mean, in a pantry you are going to be installing many shelves and attaching various things to the walls. Well, this way you don't have to worry about hitting a stud. The plywood is 1/2" I think, so it is very sturdy and it is easy to tell where the studs are also. Plus, most of the walls will be covered with supplies, boxes etc. on the shelves, so it's not like you are going to see much of the walls anyway. And, it's a pantry! who gives a crap; it looks smooth and it's easy to clean. One more note; that is plywood not OSB. Which is shit. Mashed, hammered shit that will begin to expand on you the first time it gets wet. I hate that stuff.
 And here it is with the final coat of paint (I used a kitchen and bath semi-gloss) and the window trimmed out. The only thing I don't like is that, if you look real close, you can see a slight crack where the sheets of plywood butt each other. But! I have a trick for that I will show ya'll later. I did skim some areas of the walls with sheetrock mud. It adheres to plywood just fine and sands real smooth.
Now, I just have shelves to put up over the window and around the other wall and move the freezer etc. back in. Oh! I forgot, I am going to go ahead and install the flooring in here also.
I have picked out some really neat stuff I will show you later.
 In other news, Jack installed a sink for me in the basement/ studio. Man, this helps me SO much with my pottery and just everything. A friend gave me the old cast iron sink, the faucet and the countertop, so that was great! We also had the lumber for the legs and framing so the only things we bought were a few fittings for the plumbing that I did not already have.
 When Allen and I first did the plumbing in the basement he stubbed out for hot and cold water and the drain line by the washer and dryer 'cause he knew my studio was going to be here at some point. I was really glad he thought of that because it made hooking things up a snap. Just cut off the caps, sweat two fittings on the lines and install the valves. Jack says I did most of the work because I sweated the 2 fittings on, but he really did everything. And I think he did a real good job.
But seriously, if you are ever running any water lines and think there may be the slightest chance you may want to put some other fixture anywhere in the vicinity, go ahead and stub out at least some partial lines. It hardly costs anything for a few inches of pipe, a couple of T's and 2 caps and you will be SO happy if you ever do install the other stuff.
I thought about showing a step by step of how I connected to those water lines but wasn't sure if ya'll would be interested in that.
 Now, from some time ago I know a few of ya'll had wondered about my support for the pantry shelves I have installed. Here is a photo of the steel braces that are in the center. I know some people seemed skeptical of my methods but you have to consider the materials. These shelves are a FULL 1" thick and they are old-growth pine. That makes a tremendous amount of difference as compared to the 3/4" sugar pine (new growth) they sell at Lowe's. That stuff will warp and sag all over the place! Plus, the shelves are doweled into the wall. These brackets are 1" wide x 12"x 8" and they are 44 3/4" from the wall supports. I could load these babies up like hell and they ain't goin' nowhere.
 So, hopefully I will have more finished pantry photos soon. My Be Prepared Challenge is probably going to go slower than the other peoples, since I'm dealing with new construction not just organizing, but that's okay. I will finish the challenge and be stocked up. Plus, it also involves accruing a decent first-aid kit and similar things, not just food. This is something every home needs. If any of ya'll are participating int he challenge, even a little, please let me know how it's going for you.
Labels:
creative building,
organization,
painting,
pantry,
plumbing,
studio/basement,
trim,
walls
Monday, August 21, 2006
The Light From Above
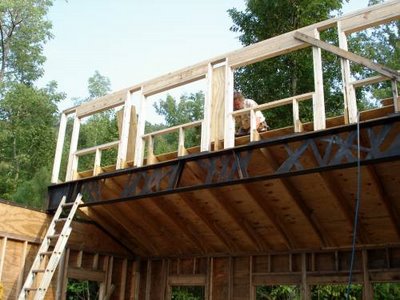 On Saturday we got the clerestory windows framed up completely and sheathed too. The Great and Wonderful Mr. Ted came and helped us again and he also got a good many rafter tails cut out. For my part, I ran up and down the ladder delivering material and then cooked lunch. I grilled some hamburgers and corn on the cob that we had picked up at the farmer's market that morning. So, it was a pretty good day even though the heat has come back with a vengeance. It had cooled down to the very low 90's but this weekend it worked it's way back up in the high 90's.
 Now, here you can see all the windows that are going to be on the south side of the house ( on this half) and that are used for solar gain in the winter. I have calculated the square footage amount of glazing (just glass) here and it comes out just slightly below 7% of the total floor square footage. I believe it was somewhere right at 65 sq. ft. of glass and this side of the house is 936 sq. ft. The solar book that I am going by recommends between 7 (for this area) and 12 (for very northern areas) percent. That one window on the far right, next to the 3 kitchen windows, will be shaded completely by a covered walkway so I did not include it.
Pablo had posed some interesting questions and I thought I might elaborate on them some. He asked what I was having to pay to have the power lines brought in. Well, all utilities are required to get their product to you (meaning the edge of your property) at no expense to you. Once they reach your land, then you start paying. The new power lines and poles will mostly be on Fred's property (since the closest pole to come off of was on his land) so all I had to get was his permission to cross his land. I believe the power company will set one pole on your land for free and then however many else are required to reach your site, you must pay for. They can span 350 feet between poles so they only need 4 poles, I think, to reach my house; 2 on Fred's land and 2 on mine. If I had wanted to have the power lines run underground from the place they hit my land, that would be very expensive I believe. Such large service lines would require them to be buried very deep and I would have had to pay another contractor to come in and possibly have that inspected etc. etc. Not worth it to me. Now, if you are building a house you will have to put in a temporary power pole at the house site and you buy the meter box and breaker box. If you are in a city limit that has building codes you will have to have an electrician pull a permit and hook this up for you. This cost varies of course. I am waiting to see if the power is going to cost me anything as I am not completely sure about all of the power company's policies.
Wednesday, July 05, 2006
Oh, What a Tangled Web.....
 OK! So it's all cut out! The webbing for the truss that is. I finally got it all cut out and polished and ready to start welding together yesterday ..... and then it started raining. So, next weekend maybe. These pieces are 18" tall and 1/4" thick. I just grouped them all together so I could get a good shot, so this photo may not make any more sense than the drawings. But soon you will see that I'm not crazy and that these pieces do actually make something. The big one in the middle has been darkened and oiled and the others had not, that's why you see shiny, silver places on them but they will all be dark when finished.
 Here, Allen is building the box beam that will support the truss on top of the walls. A box beam is basically a stud wall with 2 layers of plywood on both sides, glued and nailed like crazy.
 The plywood layers are staggered of course, to increase the strength. We are using a commercial construction adhesive for gluing.
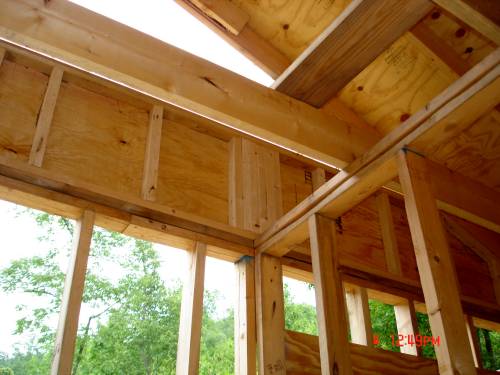 This is the beam from the other side where the 2 layers have not yet been put on so you can see the framing. This one did get completely done and we have to build one more for the other side of the room.
Labels:
creative building,
framing,
roof system,
steel work,
walls
Monday, April 24, 2006
Yesterday
 Well, finally! All 4 walls are up. This is the east facing wall that will eventually be one side of the dogtrot. This is where the entrance door to the house is. We finally decided on our window heights too and framed in most of the sills and ran the sheathing under them. Thanks to our friend Ted, who has helped us alot these past few weeks and then Allen's daughter, Linda and her husband Sammy, we got this last wall up with no problem. We had a little cookout too so we relaxed for awhile.
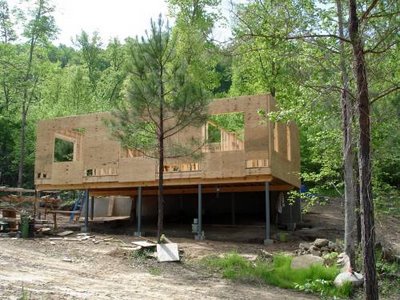 This is the north side with the windows framed in. This is the side you first see when you are coming up the driveway.
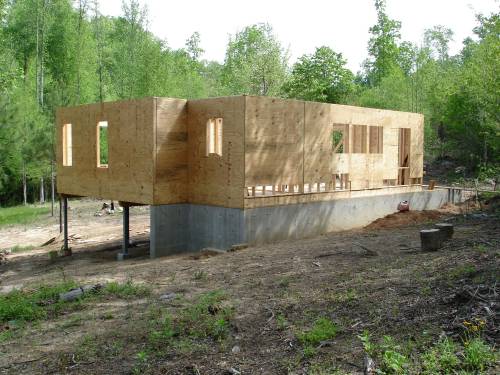 This is the west and south side and the side (south) that will also have the clerestory windows. The full size of the windows has been cut out now; if you recall earlier, these looked really small at first 'cause we just ran our sheathing over most of them.
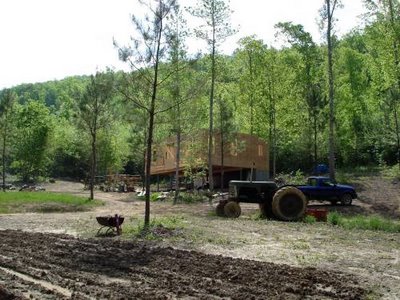 This is the west and north side from way down at my garden spot. I've got to try to get something planted in it soon. I was amazed at how green everything is as compared to the posts from just last weekend. The weather was great for working although it's already starting to get pretty warm now. I think spring lasted about 4 days this year.
Monday, April 17, 2006
We Can Work It Out
 Things started off well on Saturday with the framing of the exterior walls. Our friend Ted came to help us again and he and Allen got right to work but I had to keep the shop until 3:00. I enjoy having my studio and all but sometimes it's a little confining. Some days I just don't want to be there. I do occasionally get Fred to open for me but I hate to ask him much. Anyway, when I arrived at the house site, they had framed and sheathed the north wall but had not stood it up yet and were framing the south kitchen wall. I arrived just in time to see that all the windows were in the wrong spot. Allen had been going by the drawings that showed the window sizes but did not realize that the refrigerator had been left out. So, after debating for about 2 seconds on whether we really needed a refrigerator or not, we moved all the windows down 4' and then butted them all up against one another to keep the kitchen from getting strung out too long. (The drawing showed about a 6" space in between the windows.) Since I had caught it before the wall was sheathed, it wasn't too big a deal and really only took about 30 minutes to fix.
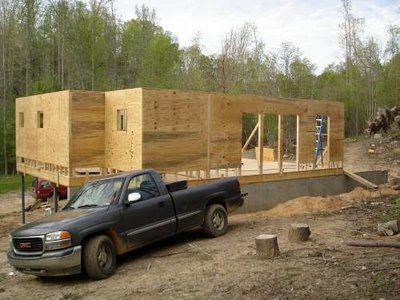 Allen wasn't sure he wanted the windows right together but after we stood the wall up, he agreed that it would look better that way. This also gave us room to get another window in a little further down without it looking too crowded. We are going to have to have the roof system completely finalized before we start framing it though because it will be a real mess to get into that and have to change something. As I stated before though, I would not recommend anyone building anything major without completed drawings unless you have ALOT of experience in construction. Even though I don't think we would have really changed anything, I wish we had had more of the drawings finalized before we started. It saves alot of head scratching later.
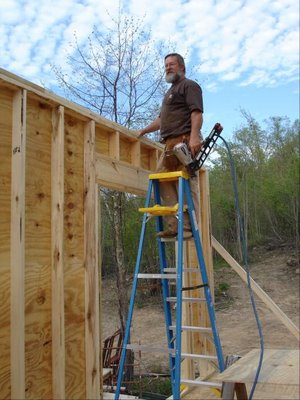 Here, Allen is nailing on the top plate on the north wall (living room) that ties the tops of the walls together. In the pic below he is running that last strip of plywood that ties the walls to the floor system.
 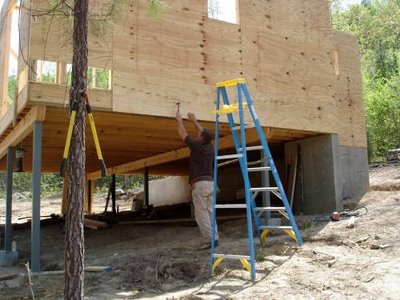 One of the main principle of building is that everything laps and/or staggers. I do good on the staggering part! So far, I have fallen on my butt about 3 or 4 times and twisted my ankle a couple of times. I think sometimes it's odd that I do this kind of work when I am so ungodly clumsy.
 Towards the end of the day the clouds made the neatest pattern. Sometimes the patterns seem to develope and dissipate so quickly. On Sunday we did not get alot done with it being Easter and all. Allen did plow me up a bit of a garden patch in the morning and then we went to visit with family the rest of the day.
Monday, April 10, 2006
Hello Walls
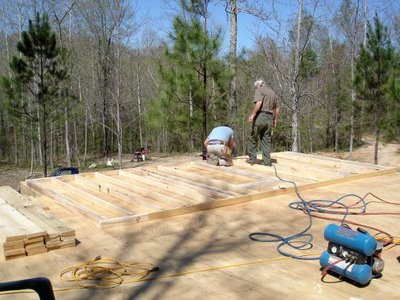 I can't believe it! We have some walls! There were days when I wasn't sure this would ever happen. A great friend came and helped us frame too so we had good company and good weather; on Sunday at least. Saturday crapped out for the most part due to the weather although Allen and I did manage to shoot some elevations on the floor (to see how level it was) and to build up some T posts and stuff. The floor was pretty close. We did have to shim 3 or 4 of the steel posts under the house. Then we quit early to go to a gallery opening in Birmingham, so we had a nice evening.
 We got a good start Sunday morning though and like I said, the weather was just beautiful. As I'm sure you can figure out, we put the wall together and sheathed it while it was laying on the floor and the stood the whole thing up. This is the west wall that will contain the guest bedroom and bath. It was pretty heavy but we got it up fine. I know what you're probably thinking about those windows but they are not completely framed in yet. We could not make our mind up about how tall we want them so we have left the bottom framing out until we decide. That's easy to put in later.
 That big opening there will be a pair of windows. It kind of looks like a door right now.
 This is later in the day and we have gotten the pantry (on the left) framed and are working on the wall that seperates these rooms from the living room and kitchen. It's one long, straight wall so it was pretty easy. We have to do a little framing for the bathroom and then the rest of it is mostly exterior walls. This side has a very open floor plan to help with air flow.
 The sun's almost going down on us but we did manage to stand that last wall up. I thought I had a picture of that but I guess not. I'm hoping we might get to do a little work on it during the week but we are still pretty busy wth our real jobs. I am about to leave now and go to Birmingham and help Allen pour a slab on his job etc. etc. How did life get so busy?
Subscribe to:
Posts (Atom)


