Monday, July 10, 2006

Come Together

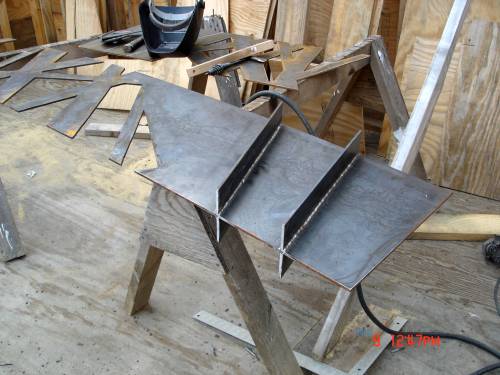
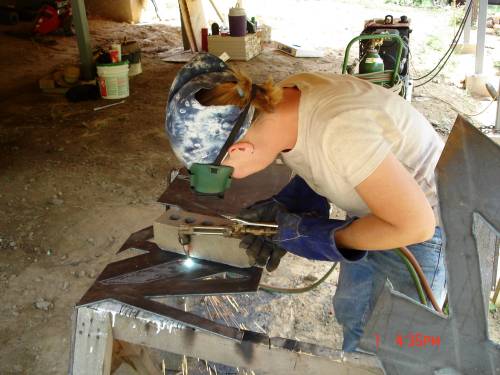
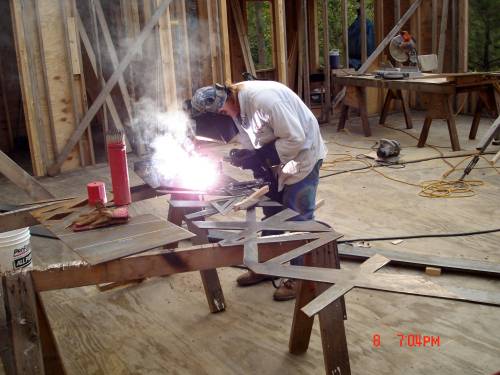
The actual welding of the truss has begun!! Here I am putting on some stiffeners that will hold the flanges from pivoting. Not that they would anyway once they're welded but these things are handy to hold the webbing upright as we are positioning them.
Finished product. The 2 end pieces of webbing each got 2 pair of stiffeners and the 2 middle pieces of webbing just got 1 pair each. This took longer than I expected but then, everything does I think.
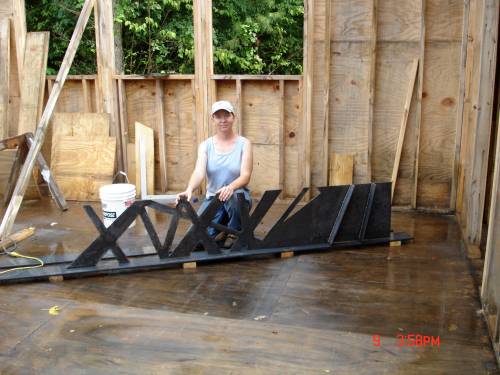
I'm just trying to show scale in this photo. We really don't have good room to get a shot of the whole truss at once. After it is in place we can though.
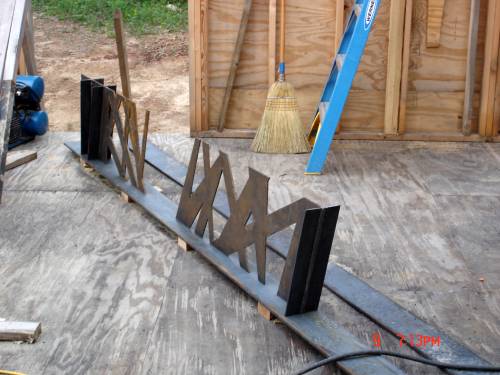
This is the other end. I was just placing the pieces on the flange about where they go as I finished them. We are going to have to do some measuring and see exactly how much space we can have in between each section of webbing. I'm afraid we are going to have to add either another small section of web or a solid piece to each end. I believe we have too much space within the truss and not enough webbing to cover it. We can't space the web out too much or it becomes a structural issue. That is the top flange laying on the floor behind this stuff. After all the web is in place and tacked we will place the top flange on and square it up etc. and then weld it.

Wednesday, July 05, 2006

Oh, What a Tangled Web.....

OK! So it's all cut out! The webbing for the truss that is. I finally got it all cut out and polished and ready to start welding together yesterday ..... and then it started raining. So, next weekend maybe. These pieces are 18" tall and 1/4" thick. I just grouped them all together so I could get a good shot, so this photo may not make any more sense than the drawings. But soon you will see that I'm not crazy and that these pieces do actually make something. The big one in the middle has been darkened and oiled and the others had not, that's why you see shiny, silver places on them but they will all be dark when finished.
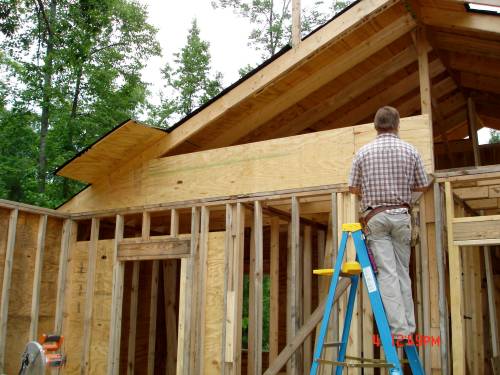
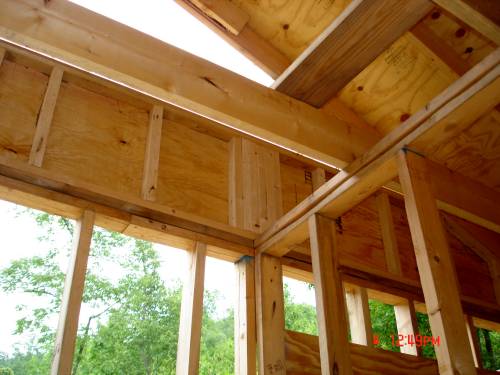
Here, Allen is building the box beam that will support the truss on top of the walls. A box beam is basically a stud wall with 2 layers of plywood on both sides, glued and nailed like crazy.
The plywood layers are staggered of course, to increase the strength. We are using a commercial construction adhesive for gluing.
This is the beam from the other side where the 2 layers have not yet been put on so you can see the framing. This one did get completely done and we have to build one more for the other side of the room.

Saturday, July 01, 2006

Red, Hot and Blue

I thought this title would be good with the 4th a couple of days away and also, I've been in a Cole Porter kinda mood lately! Well, I have gotten all of the webbing sections cut out for the big truss and will start welding them together tomorrow if all goes well. I had a little trouble at first with these things because we just had one old, ragged tip for the cutting torch and it was too big for the size steel so I was getting alot of slag adhesion. We got a new tip though and now it cuts like a dream! Happiness is a warm cutting torch!
Here you can see most of one of the sections leaning up against the horses. Three of the sections are about that same size and then one that's real big. Anyway, not very exciting I know but it actually was to me. It's like a big sculpture. Made me remember why I got that art degree. Despite the incredible heat today I had a blast. It has been in the upper 90's here for several weeks now and there's nothing like being bent over molten steel to just add a little more heat to it all.
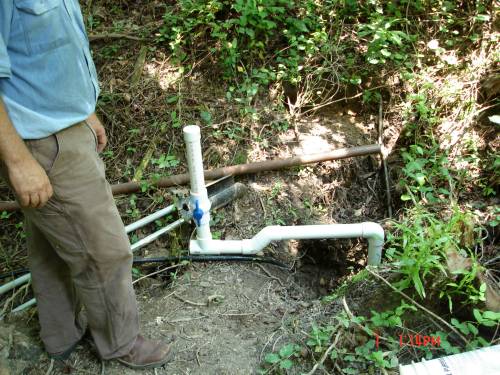
Allen started on the siphon today that will draw water up out of the spring and take it down to a reservoir where it will then go to a hydralic ram and be pumped to the house. Or that's the theory anyway. The spring here in this photo is about 9 feet deep. It has gone down some lately because of lack of rainfall but it seems to be putting out quite a bit of water still. Allen added a long run of pipe from this siphon down to the stream and it was putting out about 5 gallons a minute the last time we checked. We are going to monitor the flow and see if the spring can keep up. Of course, we don't need that much water flow but we want to see what we've got to work with and can adjust it down later. More about this later when we know more about what we are doing. This is something that we are just having to experiment with. We don't even know that the hydralic ram will work but at worst we will just have to pump the water from the reservoir to the house with an electric pump. I don't think we can use a solar pump because it's much too shady in that area.

Sunday, June 25, 2006

Little By Little

I have started laying out and cutting the webbing for the steel truss that holds up the living room. There are 4 sections of this sort of abstract work and I have gotten 2 cut out. This is the largest section and I think its about 7'-6" long and 18" wide. The kind of white shaded areas are the sections that will be cut out. I will show that when I'm completely done but before I start welding it up. I would have gotten further today but I ran out of oxygen, so no more cutting. I did get the 3rd one laid out and ready to cut. These pieces are not too heavy since they are just 1/4" stock but the top and bottom flanges are 1/2" and will add quite a bit of weight. This whole truss thing may be hard to picture in your mind with it in pieces like this but I hope I'm showing it the best I can. Allen got caught up on some misc. framing that we had just never gotten around to doing. Framed the closet in the bedroom and the bedroom door and finally got the gable end of the house framed and sheathed all the way up. So that end is dried in pretty good.
The house has been moving so slowly lately due to those certain events that happen in life that you just have to take time out for but I'm ready for the pace to pick up again substantialy. That's one thing that's really sunk in to me when you are building your house yourself as opposed to having a contractor do it; if you can't work on it, it don't get done. And sometimes you just have to do other things.
We have gotten some rain lately too. Lots at times. While good for the garden and such (and we really needed it) it has hampered our building. It rained both Sat. and Sun. as a matter of fact. But hopefully we will be dried in soon and that won't be as big a factor anymore.

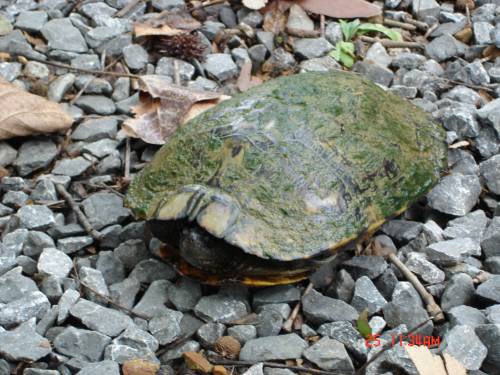
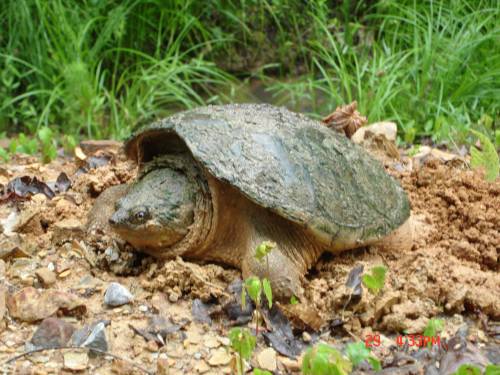
I found this guy on the driveway today. He was a bout 8" from snout to tail. Don't have any idea what kind of turtle or anything like that. Maybe some of ya'll know? He was right where we pull in the drive at and I was glad I saw him so I didn't squash him. So I stop and get out to move him but he wasn't having any of that. I didn't want to reach down and grab him for fear he might grab me so I kind of tried pushing him with my foot. I pushed him over to the edge of the drive towards the creek but as soon as I stopped he would jump up and run back to the middle of the drive. He could move pretty quick really! So, I said well, maybe he knows what he's doing and left him alone. Silly turtle, ya'll have only existed for millions of years, you don't know what's good for you! When I passed by later, there was no sign of him.

Friday, June 23, 2006

Progress Report

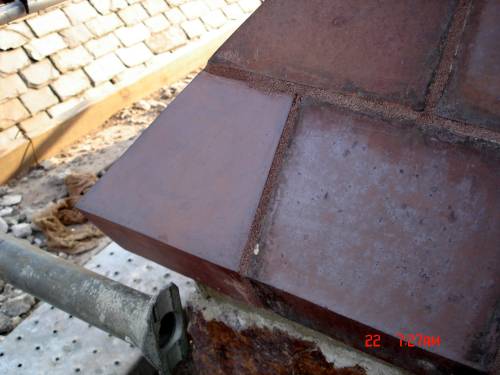
They finally set the 3 chimney pieces I made for the Big House. This corner piece is one of them. I was very pleased with the fit and color. I don't think anyone would know they were not original; I really got lucky on these. These were set while I was away from the job sick but the guys did put a small little time capsule of sorts inside one the the pieces. Many thanks to Pablo who suggested the idea! Charles, the mason foreman, made a little canister out of PVC with a screw on end and put a letter inside telling about all of us and the date etc. and a few coins that were minted this year.
This is the view from the other side and the piece next to the corner is one of mine too. I really wonder if anyone will ever find the stuff we put inside and if they do, what year will it be?
This is Charles, the foreman; he and his crew did a fabulous job of setting the pieces and reworking all the chimneys. I hope to get a good group photo of everybody before the job is over.
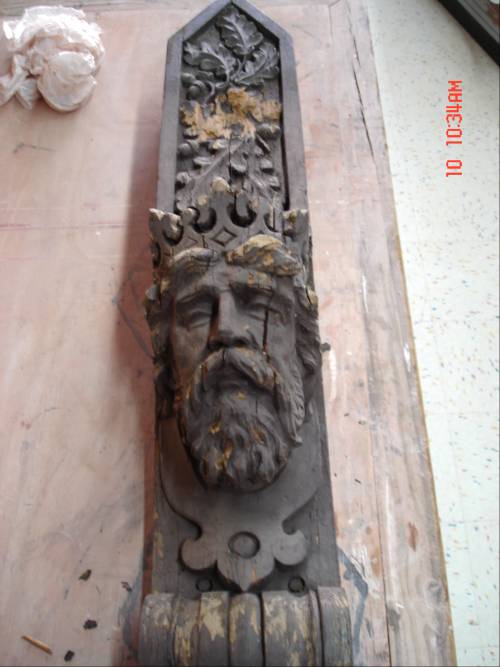
This is part of the wood work off of the front of the house that I have been working on. This piece is small enough (about 4' tall) that I could take it to my studio to work on it. This is one of a pair of these heads that go over the front entrance to the house.

Saturday, June 17, 2006

Movin' In

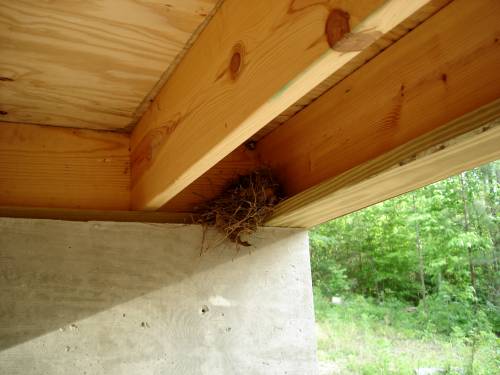
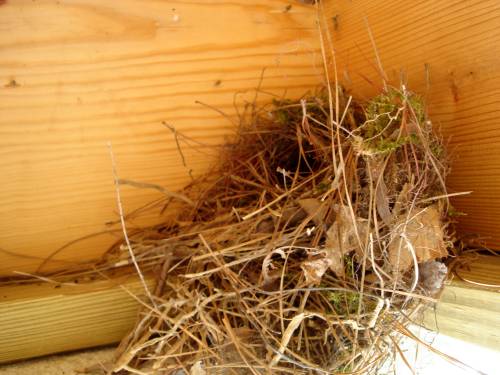
Unfortunately, we are not the ones moving in yet but everyone else is trying to. This little nest showed up quickly the other day. It's a little wren I think. It chose a very nice little spot except for there was also a wasp's nest right above it (which may have come later) but I disposed of them. There are several other wasp nests I need to get too. I saw these fake wasp nests that you can buy and you hang them around where they tend to want to build. The catalog said that wasp are very territorial and if they see another nest in the area that they will go somewhere else to build. I wonder. Seems worth a try I guess but then I thought, well, you could just collect some old, abandoned wasp nest and glue them around and that should work if that theory is true. Maybe? Anybody ever tried such a thing? We are also having a time with carpenter bees. They were on that wood within hours of us starting to frame, poking around, trying to find a suitable spot to start boring holes. I don't like to kill them because they are such good pollinators but I would like to discourage them from eating my house.
I was afraid that we scared the little mama bird off because I didn't see it when we would come down to work but she is back now. I try to stay away but sometimes we have to go under the house for tools and such.
Hopefully I will have something about the house tomorrow. Work has gotten so busy that it looks like I may only be posting on the weekends as ya'll have probably figured out by now. I have decided to close my gallery due to work and very poor sales etc. We have just gotten ourselves spread too thin lately so I am cutting back on some stuff and trying to concentrate on getting more done on the house. I like to be busy but when it quits being fun then its time to change something. No sense in running yourself to death; you need to enjoy work and have some quite time too.

Monday, June 12, 2006

Different Kind of Flowers

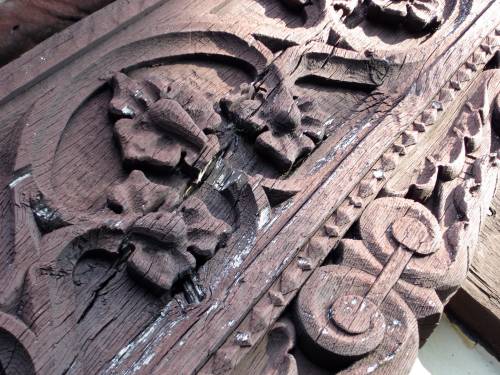
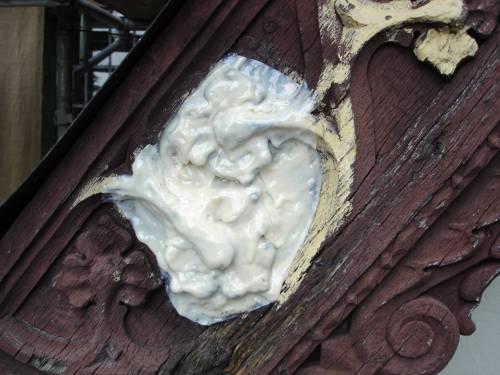
Since things are still slow on our house, I thought I'd show a little something I've been working on at the Big House. This is some of the fascia board on the front eaves of the house. These are about a full 2" x 14" oak. As you can see, parts of it are split pretty bad and in alot of areas those little rounded pieces in the middle of the flowers has fallen off. I am having to fill all of the splits and holes with a wood epoxy stuff and recarve the missing details. I love it but its pretty slow going.
This is a close up of one of the better preserved areas. I cleaned this spot up and filled the cracks and then made a mold of the flowers to use to reproduce the missing parts for other areas. That took a couple of days but was pretty cool. I used this rubber mold stuff that will stay in place on a vertical surface when you paint it on. After you put enough layers to have the mold about 1/4" thick, you back it up with plaster and then peel everything off and bang! there you go! Now I can make bunches of these flowers or section off certain parts of the mold if I just need part of a flower or whatever.
As for our house, the structural engineer changed a couple of little things about the truss but it is still basically the same and Allen priced and ordered the steel today for it. It was not as bad as I feared, cost wise. So, we should be working on that this weekend and I will have lots of photos of that. As soon as we have that thing fabricated, things should pick up once again. It has finally quit raining here, which is great for work, but now everything is about to burn up.

Tuesday, June 06, 2006

A Beginning

Well, I've been a little under the weather the past few days so we didn't get anything done on the house this past weekend and so, no new house photos. I will try to post something about the land or house even though I'm not sure if we will make much progress this next weekend either. Too much real work takes a toll sometimes and then when you get sick it's hard to catch up.
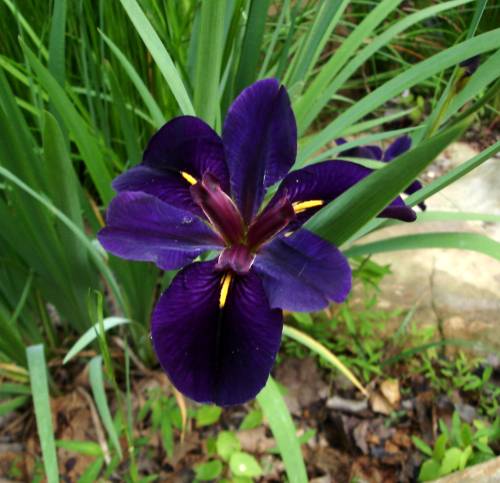
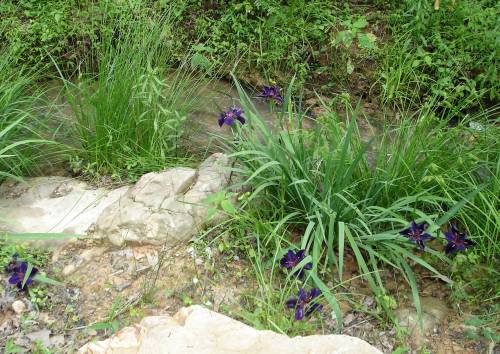
Anyway, these are some irises that I planted this spring by our little stream and was very happy to see that they really seem to like it there. I love the dark colors. We have some yellow ones planted in the area too and a little further up, some daylilies. Which you are required by law to plant in the South or so it seems anyway.
I put out about 4 clusters of these in this area. This is where we had to do alot of digging and rearranging to get the driveway in and so I've been working hard to get it back to a more natural state. This is also where the turtle from the previous post was laying her eggs or whatever. By the time I got back down there to investigate the turtle, it had come a pretty hard rain and packed the dirt where she was but there was a little mound there. I was afraid to dig around any lest I hurt them if they were there so I opted to just mark the spot with some stones and keep an eye on it. When we were first putting in the driveway, we unfortunately dug into a turtles nest and spilled all the eggs out. I tried to rebury them but after reading a post on PureFlorida's blog I realized it was too late and sure enough, they never hatched. So maybe I can make ammends by watching over these. Or maybe not 'cause the turtle might have just been sitting there, taking a break. I don't know.

Monday, May 29, 2006

Up On The Roof

Woo-hoo! We got the west end completely decked and felted this weekend. It was a good weekend; no rain until the very end but HOT! The clerestory windows start now and I asked Allen if we shouldn't just frame the whole thing and then deck it all at once. He said since we were putting in that truss that was going to weight a good bit that it would be better this way since it would help stiffen up the roof etc. It would provide a little more stable framing to be wrestling with that truss on. I think alot of it was that he just wanted to have something in the dry too.
You know, I was worried some about the pitch of the roof not looking right etc. but I'm happy with it now. The roof on adds more visual weight to the top and I think it all looks fine now. Told you!
We spotted this guy (gal?) on the side of the driveway after it stated raining. It was just sitting there in a muddy spot. Do you think it was laying eggs? It had kind of dug a deep spot behind it. It's shell was about 12" across; pretty good size turtle.

Saturday, May 27, 2006

'S Wonderful


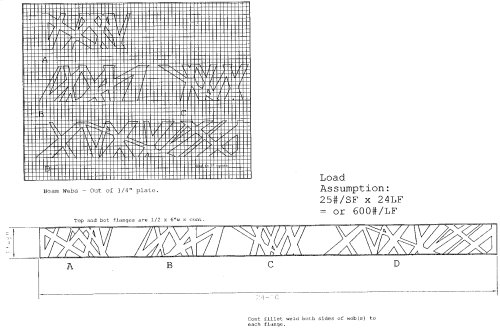
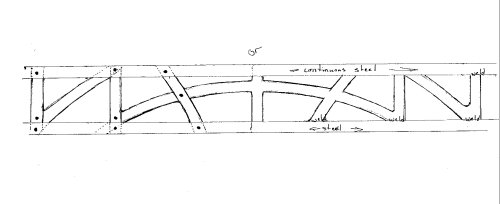
I knew if I sent my crappy little truss drawing to the architect, it would incite him to draw something really cool. And it worked! I think this is going to be really great! A little time consuming to enlarge and lay out but well worth it. We still have to run it by a structural engineer and get his blessing on it though. I hope this drawing makes sense to everyone. I know what I'm looking at but sometimes when you come at a drawing cold, it can be a little disorienting. This is basically a steel I-beam. The abstract designs that are the webbing will be cut out of 1/4" steel and welded to the 1/2" flat stock that will make the top and bottom flanges. The whole thing will be just over 24' long and 1'-8" tall. I'm not sure if ya'll will be able to read the details when this thing is posted. That top drawing where the designs are imposed over a grid are just to help me enlarge the design onto a paper template.
If I understood the architect right, the design was kinda inspired by a stained glass window that he saw at the Cathedral of St. John the Divine in D.C. And we even thought that later I might could install some pieces of stained glass in some of the open areas of the truss.
What do ya'll think? I love it myself and Allen even likes it. We are all having alot of fun with this.
I should have some more to post this weekend as we are going to go ahead and deck the part of the roof that we have framed and continue the rafter tails also.

Tuesday, May 23, 2006

Tail It Like It Is

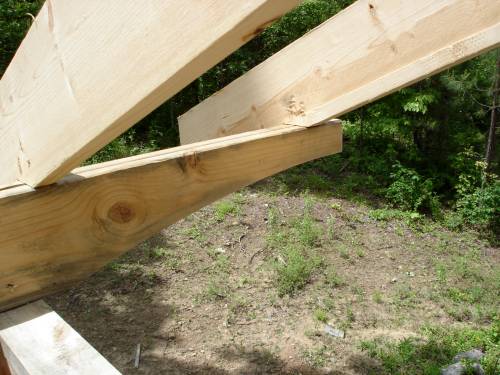
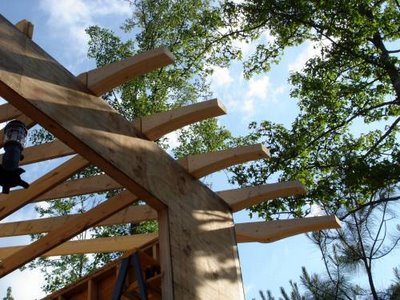
So, we finally started adding the rafter tails to the rafters since the rest of the framing is pretty much at a standstill until we get the truss decided on. Now, there are going to be several unusual features about the house and I guess this may be one of them. Instead of trying to hide the fact that the rafter tails have been added later, we (the architect really) decided to make that fact a feature and play it up. Now, on these rafter tails it won't really show but on the ones in the kitchen/ living room area, you will see the rafters and you will actually see tails inside the house too.
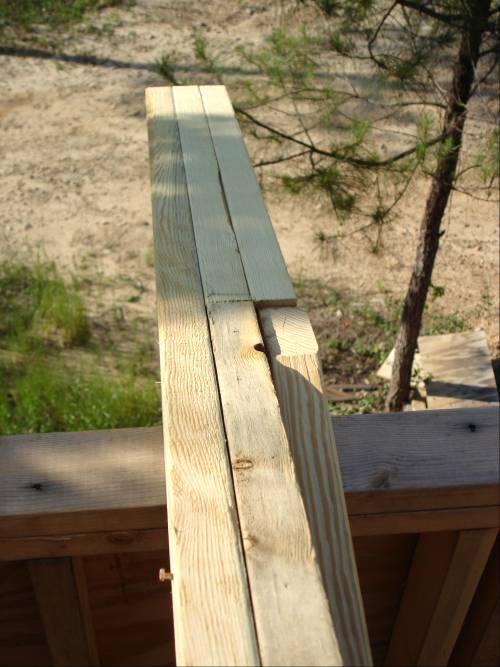
Since you will see them, it wouldn't look right to just scab a tail on one side, so you have to sandwich the rafter with 2 tails and that leaves a gap, so we filled it and that gives you a 4 1/2" thick rafter tail. I sure that's all clear as mud and about as interesting too.

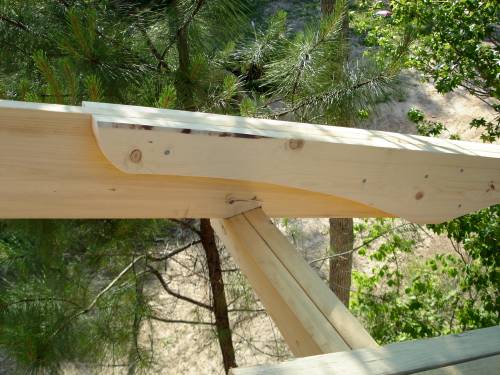
This is the detail that you will see also inside the house in the living room. The overhangs are about 2'- 4" deep. This was calculated on the website I mentioned earlier where you plug in your latitude and longitude, height of your windows, the space between the top of the window and bottom of the eave and the time of year and it shows you if your windows will be shaded enough. Our minimum overhang was going to have to be 18" deep but this looked better and will still let in plenty of sun in the winter.
This is just a shot of the tail from above. Allen got a good many cut out but only about 7 or 8 installed. It takes a little while to cut all that out and then we are sanding them and getting them prettied up before we install them. Less to do later.
I may not have mentioned that my truss drawing was rejected by the architect as "stupid and clumsy". I'm not suprised. He is supossed to be coming up with something by this weekend so hopefully I will have that to show soon.
Also, Karen (Rurality) has been by the shop a couple of times in the past week. She is pretty busy with soap orders but not overwhelmed, so maybe she will be blogging again soon. I will try to post some flower pictures as a poor substitute for hers. I'm hoping someone can tell me what kind of flowers they are anyway.
Monday, May 22, 2006

*%@##^&*%$%!!!!

I'm experiencing some real problems with Blogger lately. It ate the last post I tried to make and won''t let me post any photos now. I wil try to post again tomorrow. Too tired and too late to continue now.

Friday, May 19, 2006

Just My Imagination

Well, this week has not been all that good. In between wretching my guts up with what I think was food poisioning, I have been trying to come up with a design for that truss. I finally sketched up something and sent it to the architect who may or may not send it to the engineer, depending on whether or not he thinks it will work. So far he does not think it will. The drawing may be a little hard to make any sense of. The long, straight pieces at the top and bottom would be two 2x6 oak (or similar wood) boards and the design work in between would be cut out of 1/4" or 3/8" steel and the edges sandwiched in between the oak boards and then bolted where you see the little black dots. The truss will have to be 24' long and about 2' tall. This drawing is not to scale as I was just trying to show the architect a basic idea of what I had in mind. So, anyway, we'll wait and see how bad they tear it apart. Unfortunately, this weekend may just be another weekend of tying up loose ends at the house and not making alot of noticable progress. That's the way it is sometimes with building; you have stages where you see alot going on and then you have stages where it seems like nothing is happening. Of course, framing is when you're suppossed to see alot going on, so this is very frustrating to me at times. Ya'll just bear with me and maybe we'll have more to show before too long. Allen says he will be starting soon on the hydraulic ram he is going to build to pump our water and I am anxious to see that!

Monday, May 15, 2006

On The Verge

Well, I finally got a little time to post what little we have got done on the house. We have been working so much on our real jobs and it's been raining so much, that the house just seems to be going really slow. We have barely started the clerestory section. Actually, we just got this one board up to check dimensions and the actual length of these rafters. The clerestory windows and supporting truss will sit over the kitchen and this kind of took some getting used to. I had it in my head that they would be more in between the kitchen and living room (I think they were in the original drawings) and you know how it is when you've had some delusion in your mind for so long and then you discover the reality of the situation. Of course, Allen knew all along where the stuff would be but I'm not a framing carpenter so some of this is sort of vague to me.
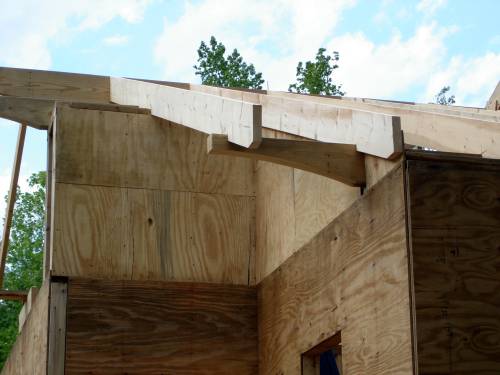
We got most of the roof on the west end of the house done. We lack the last two rafters on this side. What I mainly wanted to show was the brackets we made to support the ends of the verge boards. For non- construction people, the verge boards are the outermost rafters. The same detail we put on the bracket will be on the rafter tails, which are not up yet so you have to imagine all these rafters about 2 feet longer.

Just a close-up of the bracket; this is the side where we are still short the two rafters.
This is a view of the bracket from above. I like simple detailing but in some unexpected places. I have got to make a decision this week about the truss that will span the living room/ kitchen area and hold up that roof. Since I nixed the water tower leg idea, the whole decision is on me now and I can't delay any more. Hopefully the weather will clear some and most holidays and birthdays are over for awhile so we can really get down to business these next few weekends.

Wednesday, May 10, 2006

Walkin' Shoes

We had our "plant walk" on Sunday also and it seemed to be a success. Everyone that attended enjoyed it and even though the weather wasn't great, it didn't rain and no one stepped on a snake. Darryl is extremely knowledgeable about all kinds of plants and has some good stories too. He told about one other plant walk he just did where a man from one of the northern states attended. Darryl will have you taste several different plants and such during his talks and he gave this guy a leaf to try. The man said it tasted pretty good but it after chewing on it for a couple of minutes he felt that he was having a strange reaction to it in his feet and legs. A sort of burning and increasingly painful feeling. Darryl quickly informed him that it was not the plant he ate but that fire ant bed he was standing in that was probably doing the damage.
When we first started to build the house, we just had to start indiscriminately clearing the land because the brush was so thick we couldn't see how the land laid or anything. In doing so, I'm sure we cleared out some trees and things I would have liked to have kept but you can only do so much by hand. I hope to return alot of the area around the house to a naturalized setting, using native shrubs and plants, without any real lawn area. Because of the issues with fuel, pollution etc., I would like to not ever mow again. I know they have electric mowers but I just hate to mow also. There are just so many more enjoyable activities to be involved in. Of course, all of that is a long way off but I do try to spend an hour or two each weekend planting something or doing some kind of yard work.

Monday, May 08, 2006

Don't Look Back

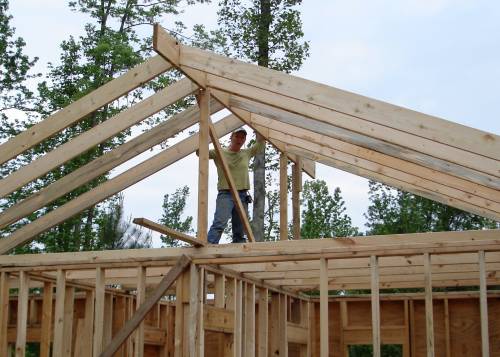
I used this title today for 2 reasons: the first is because in this photo, I am standing on the outer wall (which is basically a little 2x4) if I looked back and down it was about 20' straight down. Now, this is nothing in the height department as compared to what I'm used to on commercial sites but there I'm always tied off with a safety harness. We have nothing to tie off to here and when we were first raising the ridge beam to set the first of these rafters, it was just a little tense to me. Nothing but the wall you are standing on is steady so you have to have good balance. By the time this photo was taken it was fine because everything was braced and we had most of the rafters up.
The second reason for the title is that I have found that everytime we get in about the middle of a new phase of the house (the floor, the walls etc.) I am seized with overwhelming doubt about what it is going to look like. Is this enough floor space? Are the walls too tall? Is the roof too low? AAAHH! Allen just shakes his head and tells me it's too late now. The lumber's bought and set and nothing is changing. I know he is right and you can't keep second guessing yourself and usually by the time we move on to the next phase I am satisfied with what we just did. On the drawings it looks great but there is also an enormous amount of confidence you must have in the person who is designing the house because it always seems a little different in reality. Also, you can't go by what you see right at first because there is so much that is added later.

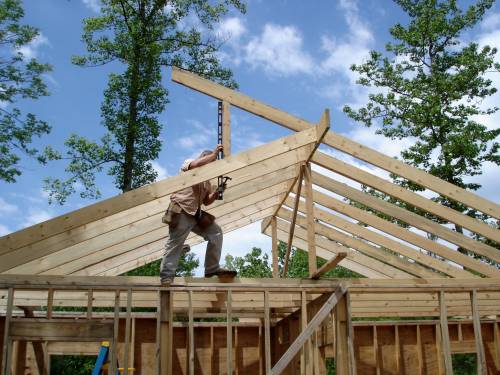
In these photos you have to keep in mind that the rafter tails are not there or even all the rafters for this section. We will have a 2' overhang (eaves) around the house which is how much I calculated according to our latitude and longitude, size of windows, etc. to keep out the summer sun. This makes for a very long rafter, especially where the clerestory windows will be if you include the tails (about 27'). I guess we could get such lengths and I'm not sure we are saving any money by doing it this way but it seemed more practical and easier to handle to add the tails later. Plus, it gives us a couple of opportunities for some fun details as I like for the rafter tails to show.
This gable end stops where you see it on the left end and the clerestory starts and runs the rest of the way. I'm not sure if we have decided if the clerestory will continue across the dogtrot or if there will be an intersecting gable or what. I guess each element has always seemed too big, too tall or whatever but as we added more of the house on top of it it always seems to balance out. The house seems a little "light" on the top now, to me, but as we add more roof it will look heavier and more balanced.
We never get as much done as we want it seems like, even though we usually work way past dark. We did take a little break on Sunday for lunch out since it was my birthday and my Mama came down to visit.

Saturday, May 06, 2006

Second Time Around

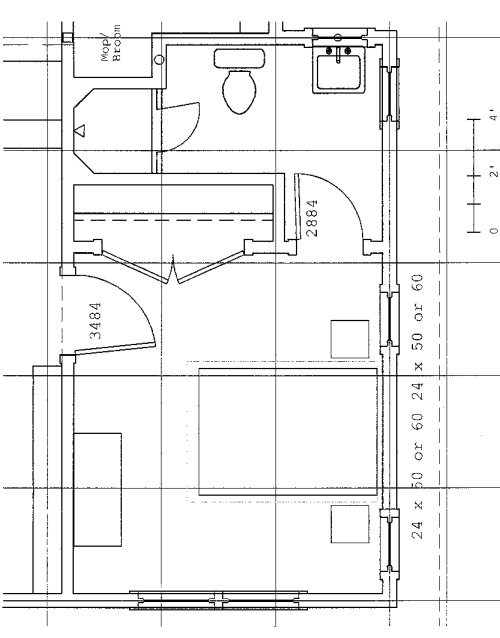
OK, we finally got the guest bathroom figured out and can frame it this weekend. I had more trouble with this than anything. I had it in my head that the entrance to the bath had to be from the living room but that was just not going to give us much room. It's funny how you get something stuck in your mind that it just has to be a certain way and then you can't think of anything else. I knew there had to be a solution that I was just not seeing so that's why it pays to have someone else look at it. Of course, he came up with a very logical answer once I let go of my irrational demands. Life in general is this way alot of times too I think. The writings of Joseph Campbell come to mind on that. Anyone else like to read his stuff?
We have changed some of the roof line also on this section so the clerestory windows will not run all the way across the house. The roof over this bedroom and bath will be a regular gable with a flat ceiling inside and the clerestory will only be in the living room/ kitchen area. This is pretty much what I wanted from the get-go. I think it adds a little more rhythm to the roof; not just a straight line all the way. I dreamed last night that we got the whole house finished but the only windows on the south side were clerestories; we had forgotten to put any windows in the walls! I hope I don't really start stressing over this thing as it progresses. Allen got the lumber this morning for all of this so we will be framing shortly but don't know how much we'll get done because there is suppossed to be some rain coming in.
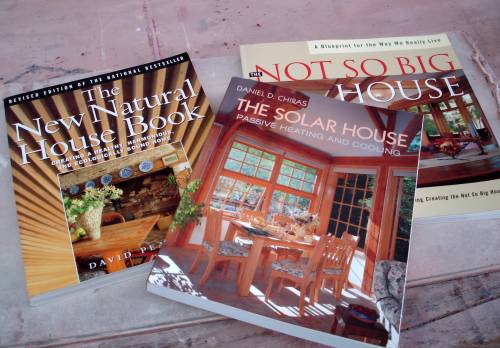
These are the main books that I have been using for information and reference. I like them all very much and would recommend them to anyone interested in such subjects. Hopefully things will pick up a bit on the house now. I believe we have gotten most of the big decisions made and can really go to it now. The truss deal has pretty much decided itself. I called around to get prices on renting a small crane with an operator and such for hauling and setting that water tower leg and it was more than I thought. It would have been about $800- $1,000 just for the crane and operator. There's no way we can swing that. Allen might could have found someone to haul it for less but he doesn't have time or doesn't care to, so in my mind, we exhausted our options on that one. The truss we are going to build ourselves will be really cool I think and we can build it in place also, so there will not be a need for a boom truck.

Friday, May 05, 2006

Life Is Sweet

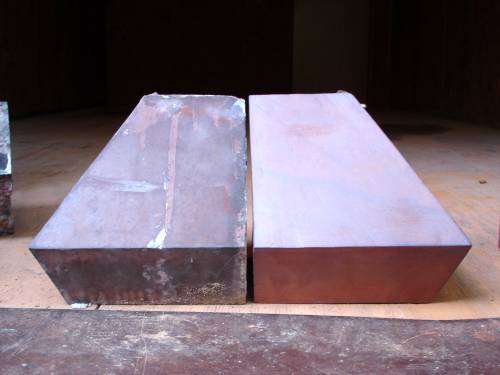
Sometimes it just all comes together fine! I can't believe I hit these this close. There was joy and dancing in the streets! Well, in my studio at least. Obviously, the one on the left is the old one and the one on the right is mine. The color could have been a little darker but there is some variation throughout the chimney pot and I think they still have to clean the originals some.
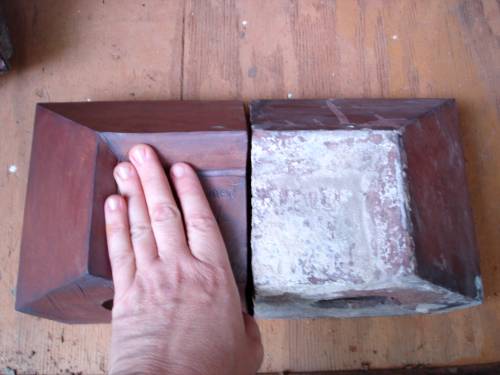
The dimensions all the way around were pretty good; I was off about an 1/8" on one side of this one and the 2 straight, middle sections were about 1/4" more narrow than the originals but at least they were not too big. I did, however, have one small problem. Under my hand in this pic is a pretty good size crack, plus some personal info I wanted inscribed in the piece just for ego purposes. I just got too anxious in the last firing and went a little too fast with the temperature and so that is what happens. They came through the bisque firing fine because I really took my time etc.
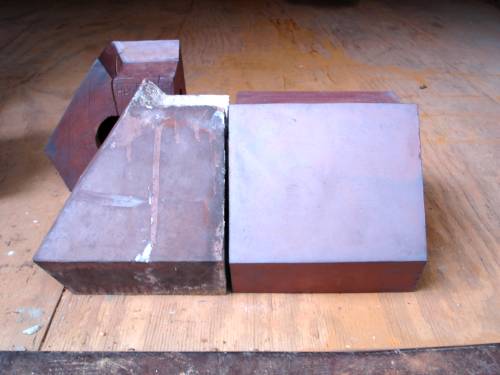
This is one of the middle pieces I did up next to the old corner. They all matched pretty good; I would say within 3/16" on the profiles and outer dimensions. You can see that bad crack in the piece in the background. Fortunately, none of the cracks made it to the face of the pieces so no crack will show when they are installed. I don't believe the cracks will ever pose a problem because the clay was fired to vitrification so they are not porous anymore. To compare, a flower pot is only fired to about bisque temperature (still porous) and therefore, can still absorb water and freeze and crack etc. I believe that was what happened with the old pieces.
These are the pieces right after the bisque firing. I applied a dark red slip as opposed to a glaze so they would not come out shiny, just the dark color. Then I wiped off about half the color to even it out and get a stained appearance and fired them to the final temperature of about 2,300 degrees. The clay just left bare does turn a nice dark brown but these needed a pretty good shot of red to match, so therefore the slip.
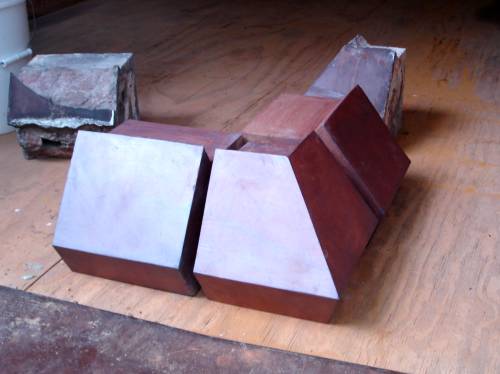
This is just how the 3 pieces fit together. They fit tighter though; the mortar joint is only about 1/4". I believe the guys at work were kinda suprised that I actually pulled this off. I am too to be honest. I always run my mouth about how I can fix this or that and then just sweat bullets until it's over. The architect approved them yesterday and hopefully they will be installed before someone drops something on them.

Wednesday, May 03, 2006

Run That Body Down


I have been burning the candle at both ends this week but I hope to have some posts about the house soon. When I get off work at the Big House at 3:30, I have been going over to Allen's job to finish laying those stone columns and working until dark. Then I have about an hour drive home, which sucks but it's only 3 days a week. We have made some decisions about our house and have some more drawings so I will be posting that soon.

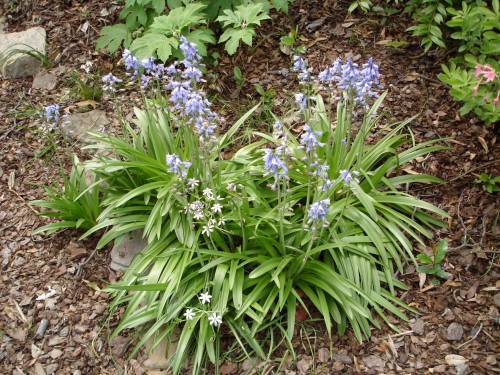
Anybody know what type of flowers these are? I know I should have taken the pic a little closer up so you could see the flowers better. These have died back now but were all over the place up at the Big House.